Quantcast
Channel: Korean Bapsang
Viewing all 1019 articles
Browse latest View live

Kongnamul Japchae (Soybean Sprout Japchae)

$
0
0

Kongnamul Japchae (Japchae with soybean sprouts

I really think you will love this simple variation of japchae made with soybean sprouts (kongnamul, 콩나물)!

Japchae (잡채) is a Korean dish made with sweet potato starch noodles called dangmyeon (당면). The traditional dish includes thin strips of beef and various vegetables, but there are many variations! Depending on the main ingredient accompanying the noodles, the variations are called buchu (garlic chives) japchae, beoseot (mushroom) japchae, gochu (chili peppers) japchae, ueong (burdock root) japchae, kongnamul (soybean sprouts) japchae, etc.

All you need for kongnamul japchae is soybean sprouts and sweet potato starch noodles, along with a few basic seasoning ingredients. Everything else is optional! I added scallions and a little bit of red bell pepper slices for color. The ratio between the soybean sprouts and the noodles can be flexible.

Kongnamul Japchae (Japchae with soybean sprouts

To make the dish, I cook the soybean sprouts first, remove the bean sprouts and then use the sprout flavored cooking liquid with a little bit of the sauce to cook the noodles. By the time the noodles are cooked, all the liquid will have been absorbed by the noodles. The result is springy noodles that are shiny and flavorful!

For the traditional japchae, Korean cooks typically rinse the noodles in cold water after cooking to stop them from turning soft, but the cooking method in this recipe keeps the noodles springy and shiny without that step.

The rest is easy! Quickly stir fry the noodles with any vegetables you’re adding, the soybean sprouts, and the remaining sauce.

Kongnamul Japchae (Japchae with soybean sprouts

One tip about cooking soybean sprouts — you can cook them either covered or uncovered, but if cooking covered, do not open the lid until the sprouts are cooked, or the raw bean smell will linger even after cooked.

This dish can also be made spicy. Add a teaspoon or two of gochugaru (Korean red chili pepper flakes) to the sauce if you want to add a spicy kick.

Kongnamul Japchae (Soybean Sprouts Japchae)
Serves 2
A quick and easy japchae made with soybean sprouts!
Print
Ingredients
  1. 8 ounces soybean sprouts (kongnamul, 콩나물)
  2. 4 ounces Korean sweet potato starch noodles (dangmyeon, 당면)
  3. 1 teaspoon cooking oil
  4. 2 to 3 scallions, cut into 2 inch pieces
  5. 1/4 red bell pepper (or 1/2 small carrot), julienned
Sauce
  1. 2 tablespoons soy sauce
  2. 1 tablespoon sugar
  3. 1 teaspoon minced garlic
  4. 1 tablespoon Sesame oil
  5. 1/2 teaspoon Sesame seeds
  6. pinch pepper
Instructions
  1. Boil 2 cups of water in a pan over medium high heat. Add the soybean sprouts and cook for 2 minutes. Flip the sprouts over once, if cooking uncovered, for even cooking. Do not open until done if cooking covered.
    Kongnamul Japchae (Japchae with soybean sprouts
  2. Mix all the sauce ingredients in a small bowl until the sugar is dissolved.
  3. Remove the soybean sprouts to a bowl, reserving the cooking liquid in the pan. Add 1 teaspoon of cooking oil, 1-1/2 tablespoons of the prepared sauce, and the noodles to the pan.
    Kongnamul Japchae (Japchae with soybean sprouts
  4. Cook the noodles for 6 to 7 minutes until the liquid is almost gone. When the noodles turn soft, cut with kitchen shears into shorter lengths.
    Kongnamul Japchae (Japchae with soybean sprouts
  5. Add the scallions and red pepper slices, and stir fry briefly until the vegetables are slightly wilted.
    Kongnamul Japchae (Japchae with soybean sprouts
  6. Add the soybean sprouts and the remaining sauce. Quickly toss everything until well combined before turning off the heat.
    Kongnamul Japchae (Japchae with soybean sprouts
Korean Bapsang http://www.koreanbapsang.com/

The post Kongnamul Japchae (Soybean Sprout Japchae) appeared first on Korean Bapsang.


Vegan Kimchi

$
0
0

Vegan kimchi

It’s fall – kimchi making season! Napa cabbages are simply beautiful and sweet this time of year. Let’s make some kimchi!  

I’ve already shown you how to make traditional kimchi, mak kimchi, and white kimchi. These kimchi recipes include fish sauce (myulchiaekjeot) and salted shrimp (saewujeot), so I’ve been getting a lot of questions about substitutes for these ingredients. Here’s my answer – vegan kimchi!

While salted and fermented seafood condiments (jeotgal) are essential ingredients for most kimchi types, vegan kimchi is not a strange concept in Korea. Buddhist temple food is 100 percent plant based, and kimchi is no exception!

Vegan kimchi

In place of salted and fermented seafood, which is the source of the deep savory taste of kimchi, temple cooks use soup soy sauce (gukganjang, 국간장) or sometimes fermented soybean paste (doenjang, 된장), along with dashima (다시마, dried kelp) or vegetable broth. For natural sweetness, they commonly add fruits and vegetables such as Korean pear, apple, persimmon, pumpkin, etc.  

This vegan kimchi recipe is inspired by temple kimchi, but it’s definitely NOT temple kimchi. There are five forbidden vegetables in temple cooking, and garlic and scallions are two of them. Well, I used them in this recipe.

Vegan kimchi

I like the temple idea of pumpkin in fall kimchi. I steamed and pureed it, but you can use canned pumpkin puree if you want. Any deep orange flesh pumpkin works.

One of the common vegetables in traditional fall/winter kimchi is gat, 갓, (mustard green). Its aroma is prominent in kimchi in a nice way. Korean mustard green is not always available around here, so I tried regular mustard green that you can find at some of your local groceries or any Asian markets. It’s pretty close! Consider it optional, but I strongly recommend you use it!

I really liked how this vegan kimchi turned out. It tastes nice and clean! Even if you’re not vegan, I think you will love this kimchi!

Vegan Kimchi
Serves 16
Traditional napa cabbage kimchi that's vegan!
Print
Ingredients
  1. 1 large napa cabbage (about 5 pounds)
  2. 1 cup Korean coarse sea salt for making kimchi
  3. 5 cups of water
  4. 3/4 pound Korean radish (mu/moo)
  5. 3 scallions
  6. 3 large mustard green (gat) leaves - optional
Seasonings
  1. 1 tablespoon glutinous rice (sweet rice) powder
  2. (Mix it with 1/2 cup water, simmer over low heat until it
  3. thickens to a thin paste and cool. Yields about 3 - 4 tablespoons.)
  4. 1/2 cup Korean red chili pepper flakes, gochugaru (add a couple more tablespoons if you like)
  5. 1/4 Korean pear, grated
  6. 1/2 cup pumpkin puree
  7. 2 tablespoons minced garlic (add one more tablespoon if you like)
  8. 1 teaspoon grated ginger
  9. 2 tablespoons soup soy sauce (gukganjang, 국간장)
  10. 2 tablespoons salt
  11. 1 cup dashima (dried kelp) broth (Boil 1 large piece of dashima in 2 cups of water for 10 minutes. You can add one or two dried shiitake if available.)
Kitchen tools
  1. a large bowl or pot (7 - 8 quarts)
  2. a large colander
  3. kitchen gloves
  4. a 3/4 - 1 gallon airtight container or jar
Instructions
  1. Cut the stem end of cabbage lengthwise in half only about 3 - 4 inches in. Then, slowly pull apart to separate into two pieces by hand. Do the same for each half to make quarters. Running the knife through all the way would unnecessarily cut off the cabbage leaves.
    kimchi
  2. In a large bowl, dissolve 1/2 cup of salt in 5 cups of water. Thoroughly bathe each cabbage quarter in the saltwater one at a time.
    kimchi
  3. Using the other half cup of salt and starting from the outermost leaf, generously sprinkle salt over the thick white part of each leaf. Try to salt all the cabbage quarters with the 1/2 cup salt, but you can use a little more if needed. Repeat with the rest of the cabbage quarters. Set aside for about 6 - 8 hours, rotating the bottom ones to the top half way through.
    kimchi
  4. Meanwhile, make the glutinous rice paste and the broth and cool. Prepare the other seasoning ingredients. Mix all the seasoning ingredients. Set aside while preparing the other ingredients until the red pepper flakes become pasty.
    kimchi
  5. The cabbages should be ready to be washed when the white parts are bendable with a bit of resistance. Rinse thoroughly 3 times, especially between the white parts.
    kimchi
  6. Drain well, cut side down.
    vegan kimchi
  7. Cut the radish into matchsticks (you can use a mandoline if available). Roughly chop the scallions and the optional mustard green. Transfer to a large bowl.
    kimchi
  8. Combine with the seasoning mix. Mix well by hand. Taste a little bit. It should be a little too salty to eat as is. Let it sit for 30 minutes to an hour to allow the flavors to meld nicely.
    kimchi
  9. Cut off the tough stem part from each cabbage quarter, leaving enough to hold the leaves together. Place one cabbage quarter in the bowl with the radish mix. Spread the radish mix over each leaf, one to two tablespoons for large leaves. Eyeball the stuffing into 4 parts and use one part for each cabbage quarter.
    Vegan kimchi
  10. Fold the leaf part of the cabbage over toward the stem and nicely wrap with the outermost leaf before placing it, cut side up, in a jar or airtight container. Repeat with the remaining cabbages. Once all the cabbages are in the jar or airtight container, press down hard to remove air pockets. Rinse the bowl that contained the radish mix with 1/4 cup of broth and pour over the kimchi.
    vegan kimchi
  11. Leave it out at room temperature for a full day or two, depending on how fast you want your kimchi to ripe. Then, store in the fridge. Although you can start eating it any time, kimchi needs about two weeks in the fridge to fully develop the flavors. It maintains great flavor and texture for several weeks.
Korean Bapsang http://www.koreanbapsang.com/

The post Vegan Kimchi appeared first on Korean Bapsang.

Bulgogi Jeongol (Hot Pot)

$
0
0

Bulgogi hot pot

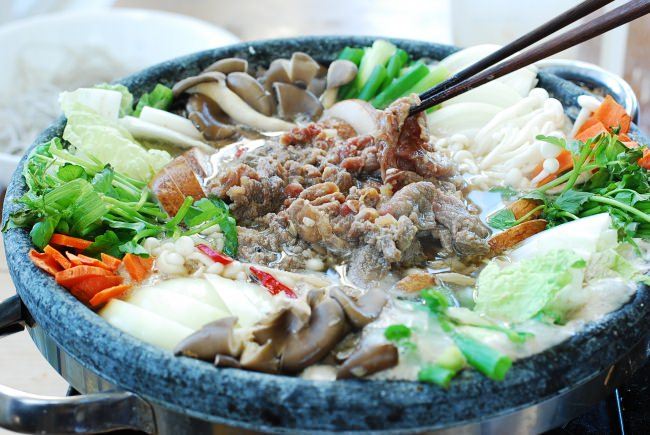
Bulgogi (불고기) is always wonderful grilled over an open flame or pan fried, but try making it into a hot pot (jeongol, 전골) with lots of vegetables. It becomes a whole new dish that’s hearty, steaming, and flavorful. Perfect for the cool fall and winter months!

Jeongol is a type of Korean stew with many variations such as haemul (seafood) jeongol, beoseot (mushroom) jeongol, mandu (dumplings) jeongol, etc. It’s an elaborate stew which is traditionally served in a wide, shallow pot called jeongol naembi (전골냄비).

Making bulgogi jeongol is fairly simple! First make bulgogi by marinating thinly sliced beef. It’s even better if you have leftover bulgogi. Then, arrange a variety of fresh vegetables and bulgogi in a shallow pot, add some broth (or water), and cook. Depending on the size of your pot, you can cook in two batches, or you can add more ingredients as you cook, or take some out to eat if you’re cooking at the table.

Bulgogi hot pot

You can certainly feed more people this way. One pound of meat will go a long way!

I like mushrooms so I usually add plenty of them – two to three varieties. I also use a couple of napa cabbage leaves. Green cabbage or bok choy will be great as well. Other add-in options are bean sprouts, radish (mu), and tofu.

Sweet potato starch noodles (dangmyeon, 당면) is also commonly added to this dish. The noodles are so good after soaking up the flavorful broth.

Bulgogi is sweet, so I don’t add sugar to the broth. The sweetness that the bulgogi releases makes the broth slightly sweet, not too sweet, but if you like it sweeter, add a little bit of sugar to the broth.

Bulgogi hot pot

The beautiful stone shallow pot (jeongol naembi) shown in the photos of this post is sponsored by Stone Lee (Youngshin Stone Co.) in Korea. The company has been producing stone kitchenware for over 20 years. They use Jang Su Gob Dol (Korean Amphibole) to make more than 100 stonewares such as bowls, pots, roasting pans, etc. This material has high heat conductivity and minimizes the loss of the nutrients of the ingredients being cooked in.

Bulgogi Jeongol (Hot Pot)
Serves 4
A Korean hot pot made with sweet and savory bulgogi and lots of vegetables!
Print
Ingredients
  1. 1 pound thinly sliced beef (rib eye or top sirloin) - see note
For the Marinade
  1. 3 tablespoons soy sauce
  2. 1 tablespoon sugar
  3. 1 tablespoon honey (or use more sugar)
  4. 1 tablespoon rice wine (or mirin)
  5. 1 tablespoon garlic
  6. 1 tablespoon sesame oil
  7. 3 tablespoons grated Asian pear
  8. 1/8 teaspoon pepper
For the Broth (see note)
  1. 3 x 3 inches dried kelp (dashima)
  2. 3 ounces Korean radish, cut into big chunks
  3. 1/4 onion
  4. 1 tablespoon soup soy sauce
  5. Salt and pepper to taste
For the vegetables
  1. 1 small carrot
  2. 2 large napa cabbage leaves (or green cabbage or bok choy)
  3. 1/2 medium onion
  4. 4 ounces assorted mushrooms (button, shiitake, oyster, crimini, enoki, etc.)
  5. 2 to 3 scallions
  6. 2 to 3 ounces minari (water dropwort) or watercress
  7. 1 red chili pepper - optional
For the optional noodles
  1. 3 ounces of sweet potato noodles (dangmyeon), soaked in warm water for 20 minutes
Instructions
  1. Mix all the marinade ingredients in a large bowl. If using packaged pre-sliced meat, run a knife through it to cut into smaller pieces. Add the meat to the marinade. Toss gently, with hands, to mix everything well. Marinate while preparing the other ingredients.
    Bulgogi
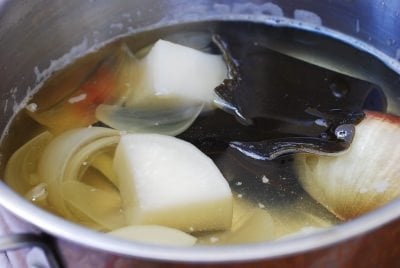
  2. Put 5 cups of water and the broth vegetables in a medium size pot. Bring it to a boil over high heat. Reduce the heat to medium and continue to boil for about 15 minutes. Discard the vegetables. Season with the soup soy sauce, salt and pepper to taste.
    Bulgogi hotpot
  3. Cut the cabbage and carrot into thin, bite size pieces. Thinly slice the onion and mushrooms. Cut the scallions and minari in similar lengths.
    Bulgogi Jeongol
  4. Using a wide, shallow pot, neatly arrange the bulgogi and vegetables in clusters. Add the optional noodles. Pour in 2 to 3 cups of broth and cook over high heat, separating the bulgogi pieces. Depending on the pot size, you can cook in two batches or add more broth and any remaining ingredients while eating if you’re cooking at the table.
    Bulgogi hot pot
Notes
  1. If you buy pre-sliced bulgogi meat, pay a little more to get good quality meat. If cutting the beef at home, partially freeze for about an hour to firm it up for easier slicing. Cut across the grain into very thin slices.
  2. You can use any type of broth (beef broth, anchovy broth, etc.) or simply use water.
Korean Bapsang http://www.koreanbapsang.com/

The post Bulgogi Jeongol (Hot Pot) appeared first on Korean Bapsang.

Deulkkae Soondubu Jjigae (Soft Tofu Stew with Perilla Seeds)

$
0
0

Soft tofu stew with perilla seeds

Soondubu jjigae (순두부 찌개) is a stew made with smooth tofu curds, soondubu (also spelled sundubu), also known as silken or extra soft tofu. This is the third soondubu jjigae recipe on the blog. The stew is more commonly made spicy as I showed in the other two recipes —  kimchi soondubu and haemul (seafood) soondubu. Sometimes, I like it purely white without any red spiciness for the simple pleasure of savoring the nuttiness of the silky tofu.

You can make white soondubu stew with any broth or add-ins, but my favorite is one made with finely ground perilla seeds (deulkkae). It really gives the creamy tofu distinct nutty flavors! Most restaurants specializing in soondubu have this deulkkae variation on their menu.

Although not as common as sesame seeds and oil, perilla seeds and oil are a staple in Korean cuisine. Perilla seeds have a deep, earthy taste with a hint of minty flavor similar to that of perilla leaves. They are used in various dishes such as namul dishes and stews and especially popular in country-style and temple cooking.

Sundubu jjigae with perilla seeds

There are hulled and unhulled ground perilla seeds sold in Korean markets. While the hulled (lighter color) version is better to keep the stew white, either one should be fine for the taste. If perilla seeds are not available, you can substitute with finely ground sesame seeds.

For the broth, I used a small piece of dashima and 1 dried shiitake mushroom. It really doesn’t take much! You can use more. Any kind of dried mushrooms or fresh mushrooms will work. I like dried mushrooms because they, of course, have more intense flavors for making broth.

This recipe is vegan! If preferred, anchovy or meat/seafood based broth can be used as well.   

Sundubu jjigae with perilla seeds

It’s quick and easy to whip up a bubbling pot of flavorful stew with a package of sundubu, which is why it’s one of my favorites for a weeknight meal! Not to mention how warm and comforting it is on a cold fall/winter night. This recipe yields one large serving or two small servings, but you can easily double or triple the recipe for a larger family.

Deulkkae Soondubu Jjigae (Soft Tofu Stew with Perilla Seeds)
Serves 2
Soft tofu stew made with perilla seeds and mushrooms. It's vegan!
Print
Ingredients
  1. 1 or 2 dried shiitake or other mushrooms (2 to 3 any fresh mushroom caps, sliced)
  2. 1 small piece dashima (dried kelp) - about 2 inch square
  3. 1 package (11 ounces) soondubu, 순두부 (extra soft/silken tofu)
  4. 1 teaspoon minced garlic
  5. 1 teaspoon soup soy sauce
  6. pinch black pepper
  7. 1 to 2 tablespoons finely ground perilla seeds, 들깨가루 (or sesame seeds)
  8. 1 teaspoon perilla oil, 들기름 (or sesame oil)
  9. 1 tablespoon finely chopped scallion
Instructions
  1. Add the mushroom and dashima to a small pot with 1 cup of water. Let it sit for about 10 minutes if your dried mushroom is thick, or you can break it up to help rehydrate faster. Bring the pot to a boil, and reduce the heat to medium. Boil for 5 to 7 minutes. Remove the dashima and mushroom. When cool enough to handle, cut the mushroom in half and thinly slice to add back to the pot.
    Sundubu jjigae with perilla seeds
  2. Add the soondubu, garlic, soup soy sauce, and pepper to the pot. Bring it to a boil over medium heat, and cook for 3 to 4 minutes. Stir in the perilla seeds, and boil for another minute or two. Drizzle the perilla (or sesame) oil over the stew. Add the chopped scallion right before turning the heat off.
    Sundubu jjigae with perilla seeds
Korean Bapsang http://www.koreanbapsang.com/

The post Deulkkae Soondubu Jjigae (Soft Tofu Stew with Perilla Seeds) appeared first on Korean Bapsang.

Menus for Korean Dinner Parties

$
0
0

picmonkey-image-dinner-party

The holiday season is upon us! Some of you may be planning on getting together with family and friends for dinner parties. In this post, I hope to give you some menu ideas in case you want to throw a Korean dinner party. The dishes I’ve included here are some of my favorites for dinner parties. I put together three menus for you — a simple, casual dinner for a few people, a more elaborate dinner for a larger group and a vegan dinner.

You can adjust the number of dishes you make from the menu depending on the number of your guests, and double or triple the recipes as necessary. The number of servings is provided in each recipe. These dinner menus can be served family style or buffet style.

For cold days, you can also add a simple soup such as kongnamul guk and mu guk to any of these menus, especially if you have elderly guests. Rice and kimchi are the basics for a Korean table, so I did not add these to the menus here.

A lot can be prepared ahead of time. You can certainly marinate your meat or make namul dishes a day in advance. With some planning and preparation ahead, you too can serve up a Korean feast everyone will be rave about!

Simple dinner:

Simple Korean dinner party
Kimchijeon (Kimchi pancake)
Dakgangjeong (Sweet crispy chicken)
Samgyupsal gui (Grilled pork belly): Or BulgogiJeyuk bokkeum, or Salmon bulgogi if preferred. 
Mu saengchae (Spicy radish salad)
Pa muchim (Scallion salad)

Big feast:

Korean feast
Kkanpung saewu (Sweet and spicy shrimp)
Japchae (Stir-fried starch noodles with beef and vegetables)
LA galbi (Beef short ribs): Outside grilling season, you can broil the ribs in the oven.
Samgyupsal (pork belly): This can be done in the slow cooker or over the stove top.
Sangseonjjim (Korean-style baked fish)
Baby Bok choy kimchi salad
Mu namul

Vegan dinner:

Korean Vegan dinner
Hobak mandu (Zucchini dumplings): Make this in advance and freeze until ready to use.
Buchujeon (Garlic chives pancake)
Eggplant rolls (Gaji mari)
Kongnamul japchae
Tofu bibimbap

The post Menus for Korean Dinner Parties appeared first on Korean Bapsang.

15 Korean New Year Recipes

$
0
0

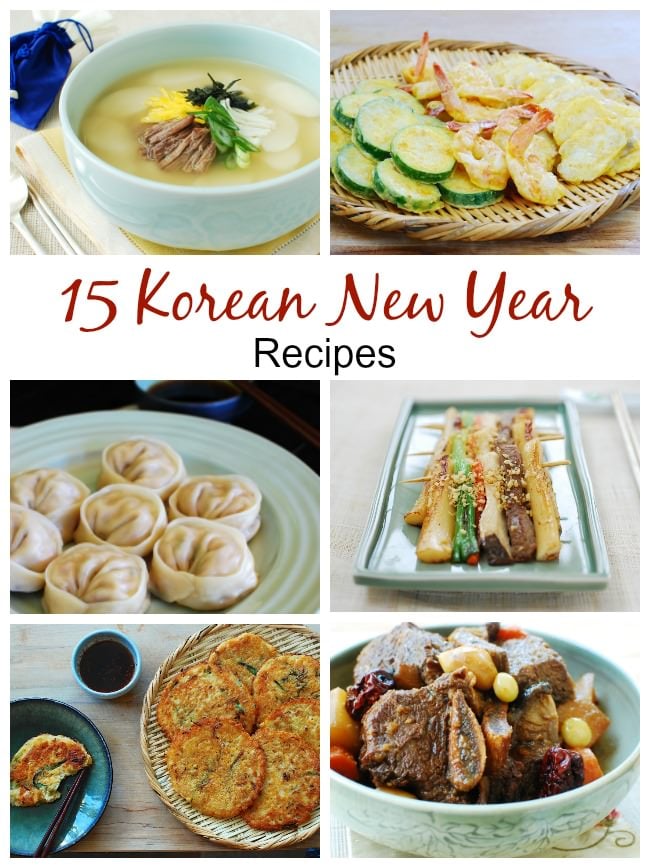
15 Korean New Year Recipes

As 2016 comes to a close, I want to thank everyone for another great year at Korean Bapsang! Thank you so much for reading, cooking, sharing and commenting on my recipes! I hope to share many more delicious recipes for you to try in 2017. 

Here, I’ve updated my New Year recipe roundup for 2017! Hope these traditional Holiday dishes from Korean Bapsang will help inspire you for the New Year celebration the Korean way.

Happy New Year to you and your family! 새해 복 많이 받으세요.

  1. Tteokguk (Rice cake soup)


     2. Mandu (Korean dumplings)

Kimchi mandu


      3. Galbijjim (Braised beef short ribs)

Galbijjim (Braised beef short ribs)

      Also see slow cooker galbijjim

      4. Sataejjim (Slow cooker beef shank)

Satae jjim (Slow cooker braised beef shank)


     5. Tteokgalbi (Beef short rib patties)

Tteokgalbi (Korean short rib patties)


     6. Modeumjeon (Fish, shrimp, zucchini pan-fried in egg batter)

Modeumjeon Modeumjeon (Fish, Shrimp and Zucchini Pan-fried in Egg Batter)


     7.  Nokdujeon (Mungbean pancakes)

Nokdujeon (Savory mungbean pancakes)


     8. Kkaennip jeon (Stuffed perilla jeon)

Kkaennip Jeon (Stuffed Perilla Jeon)


     9. Wanjajeon (Pan-fried meatballs in egg batter)

Wanjajeon (Pan-fried Meatballs in Egg Batter)


     10. Yukjeon (Pan-fried battered beef)

Yukjeon (Pan-fried battered beef)


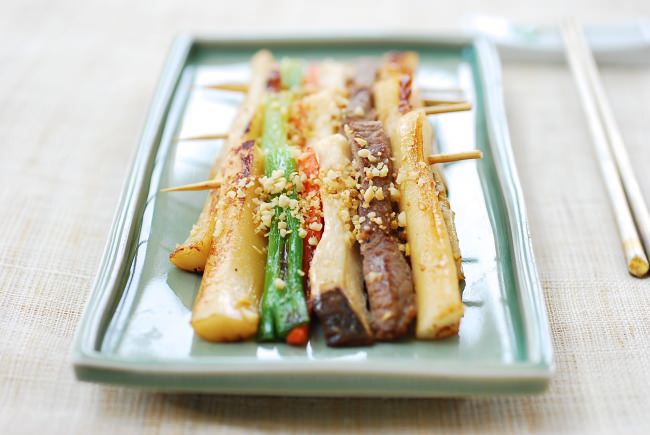
     11. Tteok sanjeok (Skewered rice cake with beef and vegetables) 

Tteok Sanjeok (Skewered Rice Cake with Beef and Vegetables)


     12. Japchae (Stir-fried starch noodles with beef and vegetables)

Japchae (Stir-Fried Starch Noodles with Beef and Vegetables)


     13. Gungjung Tteokbokki

Gungjung tteokbokki


     14.  Nabak kimchi (Water kimchi)

Nabak kimchi (Water kimchi)


     15. Youngyang chaltteok (Healthy sweet rice cake)

Korean sweet rice cake


The post 15 Korean New Year Recipes appeared first on Korean Bapsang.

Gujeolpan (Platter of Nine Delicacies)

$
0
0

Gujeolpan (Platter of Nine Delicacies)
Happy 2017, everyone! What better way to kick off the new year than with this beautiful and nutritionally well-balanced dish called gujeolpan (구절판)?

Historically being a royal court dish during the Yi Dynasty, gujeolpan consists of 8 delicate fillings served around thin crepe-like wheat flour pancakes called miljeonbyeong (밀전병). It’s a dish served on traditional holidays such as lunar New Year and other special occasions.

I often prepare this for elderly birthdays in my family as the centerpiece of the table. It never fails to impress the diners! Also, this dish is where the design inspiration of the Korean Bapsang logo came from!

Gujeolpan (Platter of Nine Delicacies)

Gujeolpan actually refers to a platter with nine sections that’s used to serve traditional delicacies. “Gu” means number 9, “jeol” sectioned, and “pan” a tray or a platter. In Asian culture, the number nine holds a symbolic meaning of fullness and harmony. Gujeolpan as a dish carries that meaning by offering a harmony of colors, textures, and nutrients.

I have a fancy gujeolpan inlaid with mother of pearl — thanks to my sister-in-law in Korea who sent it to me years ago! Before that, I simply used a large plate to serve this dish. You can do the same thing.

Gujeolpan (Platter of Nine Delicacies)

The dish usually contains different vegetables, meat and seafood. As with many Korean dishes, gujeolpan reflects 5 Korean traditional colors, obangsaek (오방색), — white, black, red, yellow, and blue, which represent hope and longevity. In cooking, blue is substituted for green.

You can use any ingredients you like, but try to reflect the 5 different colors. Other filling options are mung bean sprouts, onions, different types of mushrooms, yellow, orange or red bell peppers, beets, minari, etc.

Gujeolpan (Platter of Nine Delicacies)

Don’t let the appearance of the dish intimidate you! Yes, there are quite a few ingredients, and preparing them is a bit time consuming. However, the cooking methods are pretty simple, and you only need to make a little bit for each section. Trust me, it’s well worth the effort for this beautiful and healthy dish!

Gujeolpan (Platter of Nine Delicacies)


Gujeolpan (Platter of Nine Delicacies)
Serves 6
a beautiful and nutritionally well-balanced Korean traditional platter with nine delicacies!
Print
Filling ingredients
Beef
  1. 4 ounces lean beef
  2. 2 teaspoons soy sauce
  3. 1 teaspoon sugar
  4. 1/2 teaspoon minced garlic
  5. 1 teaspoon sesame oil
  6. Pinch pepper
Mushrooms
  1. 3 dried shiitake mushrooms, soaked (or 3 ounces fresh shiitake)
  2. 1/2 teaspoon soy sauce
  3. 1/4 teaspoon garlic
  4. 1/4 teaspoon sugar
  5. 1 teaspoon sesame oil
  6. pinch salt and pepper
Other ingredients
  1. 2 kirby cucumbers (or 1 long variety cucumber)
  2. 1 medium zucchini
  3. 1 medium carrot
  4. 5 large shrimp, de-veined
  5. 3 large eggs
  6. Batter: (makes about 24 pancakes)
  7. 1 cup flour
  8. 1/2 teaspoon salt
  9. 1-1/3 cup water
Dipping Sauce
  1. 1 tablespoon prepared hot mustard
  2. 1 teaspoon sugar
  3. 1 tablespoon vinegar
  4. 1 teaspoon soy sauce
  5. 1 tablespoon water (or maesilcheong, Korean plum extract)
Instructions
  1. Cut the beef into thin strips (about 3-inch long). Remove the stems off the soaked mushrooms. If the mushrooms are thick, place the stem side down, and carefully slice parallel to the cutting board. Then cut into thin strips.
    Gujeolpan (Platter of Nine Delicacies)
  2. Season the beef and mushrooms with the seasoning ingredients.
    Gujeolpan (Platter of Nine Delicacies)
  3. Cut the cucumbers crosswise into 2-½ inch long sections. Cut each one into thin sheets discarding the seedy part, and then cut into matchsticks.
    Gujeolpan (Platter of Nine Delicacies)
  4. Cut the zucchini crosswise into 2-½ inch long sections. Cut each one into thin sheets, discarding the soft, seedy part, and then cut into matchsticks.
    Gujeolpan (Platter of Nine Delicacies)
  5. Cut the carrot into matchsticks.
    Gujeolpan (Platter of Nine Delicacies)
  6. Bring a small pot of water to a boil. To keep the shrimp straight after cooked, insert a toothpick straight through the leg part of each shrimp. Cook briefly, about a minute. Quickly drain and dump in cold water to stop cooking. Drain again. Remove the toothpicks. Cut into thin strips.
    Gujeolpan (Platter of Nine Delicacies)
  7. Add the flour and salt to a bowl. Stir in 1-1/3 cups of cold water, and mix well. The batter should be thin.
    Gujeolpan (Platter of Nine Delicacies)
  8. Separate the eggs. Lightly beat the white by gently cutting it with a spoon. Stir the yoke with a spoon until smooth. Heat a lightly oiled nonstick skillet over medium low heat. Pour each egg part into a thin layer, spreading with a spoon. Cook each side briefly. Do not brown the egg. Cool then first cut into 2-½ inch wide sheets, and then into thin strips.
    Gujeolpan (Platter of Nine Delicacies)
  9. Heat the pan over medium high, add a half tablespoon of oil, and briefly cook each ingredient, sprinkling with a pinch of salt, in this order: cucumber, zucchini, carrot, mushroom, and beef,. Transfer to a large plate.
    Gujeolpan (Platter of Nine Delicacies)
  10. Heat a lightly oiled non-stick pan over medium low heat. Add one tablespoon of the pancake mixture into the pan, and spread it evenly into a thin round shape (about 3 inch round) with a back of the spoon. Cook until the edges start to lift up slightly, about 30 seconds, and flip over for another 30 seconds. Transfer to a large plate. Repeat until all the mixture is used.
    Gujeolpan (Platter of Nine Delicacies)
  11. Arrange the filling ingredients, placing the same/similar color foods on opposite sides. Stack the pancakes up and place in the center section of the platter.
    Gujeolpan (Platter of Nine Delicacies)
  12. In a small bowl, mix the hot mustard paste and sugar until the sugar is dissolved. Add the remaining liquid ingredients and mix well again. Serve with the gujeolpan.
    Gujeolpan (Platter of Nine Delicacies)
Korean Bapsang http://www.koreanbapsang.com/

The post Gujeolpan (Platter of Nine Delicacies) appeared first on Korean Bapsang.

Dakgaejang (Spicy Chicken Soup with Scallions)

$
0
0

Dakgaejang (Spicy chicken soup)

This chicken soup is a simple and easy version of dakgaejang (닭개장), which is a chicken variation of yukgaejang (육개장), a hearty, spicy beef soup. I love it because the recipe calls for minimal ingredients and takes less than 30 minutes from start to finish! Still flavorful and satisfying!

Typically, dakgaejang is made with a whole chicken and lots of scallions and other vegetables such as gosari (fernbrake fiddleheads), bean sprouts, and mushrooms. In the past, I showed you how to make dakgaejang with leftovers of a roasted whole chicken or turkey, using the stock made with leftover bones.

This recipe has two main ingredients — chicken breast and scallions. The chicken can have the skin and bones. You can use chicken thighs as well. To keep the chicken tender and moist, I cook the chicken over relatively low heat. It only takes about 10 minutes to cook, and the resulting broth is nice and refreshing!

Since the scallion is the only vegetable in the soup, use lots of them! The large variety of scallions (daepa, 대파) is generally preferred for soups if you can find them. They are more flavorful! Lately, I’ve been able to find them in Korean markets around here. If you want, you can always throw in some mung bean sprouts (sukju namul, 숙주나물) and/or mushrooms.

Dakgaejang is a summer favorite in Korea as a nourishing soup that boosts the energy level during hot summer days, but this hearty, comforting soup is great all year long! Not to mention weeknight friendly! 

Dakgaejang (Spicy chicken soup)

Dakgaejang (Spicy Chicken Soup with Scallions)
Serves 2
A simple and easy spicy chicken soup with scallions!
Print
Chicken
  1. 1 pound chicken breast or thigh (fat removed)
  2. 1/4 medium onion
  3. 1 scallion
  4. 4 to 5 garlic cloves
Vegetables
  1. 3 to 4 scallions (1 or 2 if using the large variety), cut into 2-inch pieces
Seasoning
  1. 1 tablespoon sesame oil
  2. 1 tablespoon gochugaru
  3. 1/2 tablespoon soup soy sauce (gukganjang, 국간장)
  4. 1 teaspoon minced garlic
  5. salt and pepper
Other
  1. 1 large egg, lightly beaten
Instructions
  1. Add the chicken breast, onion, scallion, and garlic to a medium size pot along with 5 cups of water. Bring it to a boil over high heat. Reduce the heat to medium low. Cover, and continue to boil for about 7 to 8 minutes.
    Dakgaejang (Spicy chicken soup)
  2. Turn the heat off and remove the chicken to a bowl. Strain the broth into another bowl, remove any visible fat and discard the aromatic vegetables. When cool enough to handle, remove the skin and bones if any, shred the chicken and season with salt and pepper.
    Dakgaejang (Spicy chicken soup)
  3. In the same pot, heat the sesame oil until hot (but not smoking hot) over low heat. Add the chili pepper flakes and turn the heat off. Stir gently until the oil turns red and the chili pepper flakes become pasty. Do not burn the flakes. Mix in the soup soy sauce and garlic.
    Dakgaejang (Spicy chicken soup)
  4. Add the broth to the pot, and bring it to a boil. Add the meat and scallions into the stock. Continue to boil for an additional 3 – 4 minutes. Add salt and pepper to taste. Gently drizzle the egg over the soup before turning off the heat. Do not stir. Serve with a bowl of rice.Dakgaejang (Spicy chicken soup)
Korean Bapsang http://www.koreanbapsang.com/

The post Dakgaejang (Spicy Chicken Soup with Scallions) appeared first on Korean Bapsang.


Slow Cooker Chicken Soup with Napa Cabbage

$
0
0

Slow cooker chicken soup with napa cabbage

This slow cooker version of a Korean chicken soup is so easy to make! It’s called dak baechu guk (닭배추국). Dak (닭) is chicken, baechu (배추) is napa cabbage, and guk (국) is soup. Baechu guk is usually made with beef broth or anchovy broth, and sometimes flavored with doenjang (fermented soybean paste). It also works very well with chicken broth!

I often use a whole chicken cut up, but you can use any (or any combination of) chicken parts you want. When I don’t use a whole chicken, I use bone-in, skin-on thighs and legs. They stay tender through long, slow cooking and add richness to the broth. That doesn’t mean you can’t use skinless chicken breast if you want a lighter and cleaner soup.

Slow cooker chicken soup with napa cabbage

I really love the soft, sweet napa cabbage in this soup. Use an ample amount of the large, thick outer leaves. They cook down quite a bit, but hold up pretty well to hours of slow cooking.

I like to serve up the soup as is along with dipping salt on the side, but you can remove the bones from the chicken pieces and shred the meat and add back to the soup to serve.

It takes minimal effort to put together the ingredients. The slow cooker does the rest to create a flavorful soup with tender chicken and soft vegetables!

Slow cooker chicken soup with napa cabbage

Slow Cooker Chicken Soup with Napa Cabbage
Serves 4
This slow cooker version of a Korean chicken soup is packed with tender chicken and soft napa cabbage!
Print
Ingredients
  1. 3 pounds cut chicken parts, bone-in, skin-on preferably
  2. 12 ounces napa cabbage, thick, outer leaves preferably (see note)
  3. 1/2 medium onion
  4. 6 to 7 plump garlic cloves
  5. 3 thin ginger slices (about 1 inch round)
  6. salt and pepper
  7. 2 scallions
Instructions
  1. Clean the chicken, trim off excess fat and place in the slow cooker.
    Slow cooker chicken soup with napa cabbage
  2. Roughly cut the cabbage leaves into big pieces. Cut the onion into 4 big wedges. Add the cabbage, onion, garlic, and ginger to the slow cooker. Add water to fill up to 2/3 of the slow cooker (about 8 cups). Add 1 tablespoon (2 teaspoons if using very fine salt) of salt and 1/4 teaspoon pepper.
    Slow cooker chicken soup with napa cabbage
  3. Cover, and cook for about 4 hours on high or 6 hours on low. Cut the scallions into about 2-inch length pieces, and drop into the soup, with a few minutes remaining. Add salt and pepper to taste.
    Slow cooker chicken soup with napa cabbage
  4. Remove the excess fat. You can spoon off the fat, or use a fat separator. You can transfer the chicken and vegetables to another pot, and strain the broth if you like cleaner broth.
Notes
  1. You can use the leftover napa cabbage for another soup - Baechu Doenjang Guk.
Korean Bapsang http://www.koreanbapsang.com/

The post Slow Cooker Chicken Soup with Napa Cabbage appeared first on Korean Bapsang.

Soupy Tteokbokki (Spicy Braised Rice Cake)

$
0
0

Gukmul tteokbokki

Today, I have another recipe for spicy tteokbokki (떡볶이) for you! In case you’re new to the dish, literally translated “stir-fried rice cake”, tteokbokki is one of the most popular snack/comfort foods at home and on the streets of Korea! The other spicy tteokbokki I have on the blog has been enormously popular! I hope you also love this soupy version called gukmul tteokbokki (국물 떡볶이). Gukmul refers to the liquid in the dish.

Tteokbokki is made with garaetteok (가래떡), a cylinder-shaped white rice cake. Thick ones are sliced into thin oval shapes for making tteokguk (rice cake soup). Thinner, shorter ones are used for tteokbokki, hence called tteokbokki tteok (떡볶이떡). You can use either one for this recipe. They are sold either freshly made, refrigerated, or frozen at Korean markets.

Unlike the more common tteokbokki in a thick sauce, the soupy version uses a lot more broth so the spicy, slightly thick broth can be enjoyed along with the chewy rice cakes. Typically, tteokbokki is made with anchovy broth for a depth of flavor. A flavorful broth makes a big difference in this recipe as well.

For a vegan option, you can use a vegetable broth and omit the fish cake and eggs.

I used gochugaru (고추가루, Korean red pepper flakes) for spiciness in lieu of the gochujang (고추장, Korean red chili pepper paste) that’s used in the other tteokbokki recipe. Gochujang is made with rice powder or flour, and thus it can make the broth thicker. So, gochugaru works better for a cleaner tasting broth. Finely ground gochugaru is best for this recipe, but not absolutely necessary. I finely ground my medium ground gochugaru in a spice grinder.

For vegetables, I used napa cabbage I had in the fridge. The soft, sweet cabbage is delicious with the spicy broth. It can certainly be substituted with green cabbage.

It’s common to add boiled eggs or ramen noodles to this type of tteokbokki, but they are optional. You can also use soaked sweet potato starch noodles (당면, dangmyeon), instead of ramen noodles if preferred.

Soupy tteokbokki

Soupy Tteokbokki (Spicy Braised Rice Cake)
Serves 4
Print
Ingredients
  1. 1 pound tteokbokki tteok, 떡볶이떡 (2 to 3-inch long rice cake pieces or oval shapes)
  2. 8 ounces napa cabbage (or green cabbage)
  3. 2 sheets eomuk, 어묵, (fish cakes - aka oden)
  4. 2 scallions
  5. 1/4 onion
  6. 2 soft boiled eggs - optional
  7. 1/2 of 1 package raw ramen noodles - optional
  8. 5 to 6 cups anchovy broth
Seasoning
  1. 3 tablespoons gochugaru (고추가루, Korean red chili pepper flakes), preferably finely ground
  2. 2 tablespoons soy sauce
  3. 1 tablespoon sugar
  4. 1 tablespoon corn syrup or oligodang (or use 1/2 tablespoon more sugar)
  5. 1 tablespoon garlic
  6. 1/2 teaspoon salt
  7. pinch pepper
Instructions
  1. Soak the rice cakes for about 20 minutes if hardened or refrigerated. Make anchovy broth (see note).
  2. Cut the cabbage, fish cake, and scallions into about 2-inch long pieces. Thinly slice the onion.
    Soupy tteokbokki
  3. Mix all the seasoning ingredients in a small bowl with 3 tablespoons of the broth or water.
    Soupy tteokbokki
  4. Add the anchovy broth (or water) to a large pan or shallow pot. Stir in the prepared seasoning mix. Bring it to a boil over medium high heat.
    Soupy tteokbokki
  5. Add the rice cakes and cook, stirring occasionally. When the rice cakes started to soften, throw in the vegetables, fish cakes, and the optional eggs. Continue to boil, stirring occasionally, until the rice cakes and vegetables are soft, about 10 minutes. Add the optional noodles with 2 minutes remaining.
    Soupy tteokbokki
Notes
  1. Add 12 to 14 medium dried anchovies (the guts removed) and 1 piece of dried dashima (about 4-inch square) to the pan along with 7 cups of water. Bring it to a boil, uncovered, over medium high heat, and boil for 10 minutes. For more ideas for broth, see anchovy broth.
Korean Bapsang http://www.koreanbapsang.com/

The post Soupy Tteokbokki (Spicy Braised Rice Cake) appeared first on Korean Bapsang.

Hongeojjim (Steamed Skate Fish)

$
0
0

Hongeojjim (steamed skate fish)

Unless you go to French restaurants, skate fish (hongeo, 홍어) is not easy to find at restaurants here in America. It’s really not a common fish here. In Korea, skate is a very popular fish! It’s eaten in many ways — raw, fermented, steamed, pan-fried, spicy, mild, etc. Today, I’m showing you how to make steamed skate (hongeojjim, 홍어찜)!

If you think skate is a weird fish, think again and give this wonderful fish a chance! Skate is a delicate, firm fish that has a mild, sweet taste and a unique texture. It has cartilage — no bones.

Korean markets around here usually sell fresh skate wings, skinned and cartilage on. You can make this recipe with a whole wing or serving size pieces by cutting along the line of the cartilage. Koreans don’t usually fillet the skate. When cooked, the strands of flesh peel right off the cartilage, making it very easy to eat.   

Hongeojjim (steamed skate fish)

If you leave fresh skate in the fridge for a day or two, the skate may have a bad ammonia smell developed from the uric acid in the flesh. I know in America, the smell is the sign of fish gone bad. In Korea, a pungent taste of ammonia scented skate is something to be desired for. In fact, fermented skate (hongeohoe, 홍어회 ) with a strong funky aroma is a unique delicacy favored by many including myself.

Growing up in Korea, we ate a lot of skate at home! Hongeohoe is one of my father’s favorite dishes, and I remember having steamed skate quite often. Traditionally, the skate is air dried for a couple of days for a chewier texture and more intense flavor before being steamed. I skip that process and simply steam fresh skates.

Steaming the fish is very easy! If you don’t have a steamer, you can place a large plate over a small heat proof bowl or ramekin in a large pot so the plate sits high enough not to touch the water. You can also achieve a similar result by baking it in parchment paper. I’ve included the parchment paper method in this recipe as an option.

Hongeojjim (steamed skate fish)

Hongeojjim (Steamed Skate Fish)
Serves 2
Steamed skate wing in a simple soy based sauce!
Print
Ingredients
  1. 1 skate wing, hongeo 홍어 (about 3/4 to 1-1/4 pounds)
  2. salt
Sauce
  1. 1 scallion, finely chopped (about 2 tablespoons)
  2. 1 teaspoon minced garlic
  3. 1/4 teaspoon ginger
  4. 2 tablespoons soy sauce
  5. 1 tablespoon rice wine (or mirin or white wine)
  6. 1 tablespoon lemon juice
  7. 1/2 tablespoon sugar (or 1 tablespoon corn syrup or oligodang, 올리고당)
  8. 1/2 teaspoon gochugaru 고추가루 (Korean red chili pepper flakes)
  9. 1/2 tablespoon sesame oil
  10. 1/4 teaspoon sesame seeds
  11. Pinch pepper
Optional Garnish
  1. 1 scallion, cut into about 4 inches and thinly sliced (pachae, 파채)
  2. (or a handful of spring mix or arugula)
Instructions
  1. Clean the skate and lightly season with salt.
    Hongeojjim (steamed skate wing)
  2. Combine the sauce ingredients and mix well until the sugar is dissolved.
    Hongeojjim (steamed skate wing)
  3. Fill a large pot with about two inches of water. Place a steamer on top. If no steamer is available, place a small heat proof baking dish or ramekin that can keep a large plate high enough not to touch the water, and then place a heat proof large plate on top. When the water starts to steam, add the fish and cover. Steam for about 8 to 10 minutes.
    Hongeojjim (steamed skate wing)
  4. Open the lid, and spoon the sauce all over the fish. Cover, and steam for 2 to 3 more minutes. It’s done if the flesh separates from the cartilage easily. Remove from the pot and place the optional scallion while the fish is still hot.
    Hongeojjim (steamed skate wing)
Parchment paper method
  1. Preheat the oven to 450°F. Cut two pieces of parchment paper that’s large enough to completely wrap the fish and leave extra for the folds. On a baking sheet, place the fish in the middle of the double layered parchment paper. You can add some lemon slices if you want. Bring the two long sides together and fold a couple of times to seal tightly. Next, fold and roll the shorter sides, and then tuck each one under the fish to seal the packet.
    Hongeojjim (steamed skate wing)
  2. Bake the fish for about 8 to 10 minutes. Carefully open the packet, and spoon the sauce all over the fish. Return it to the oven, and cook for 2 to 3 minutes.
    Hongeojjim (steamed skate wing)
Korean Bapsang http://www.koreanbapsang.com/

The post Hongeojjim (Steamed Skate Fish) appeared first on Korean Bapsang.

Gamjaguk (Potato Soup)

$
0
0

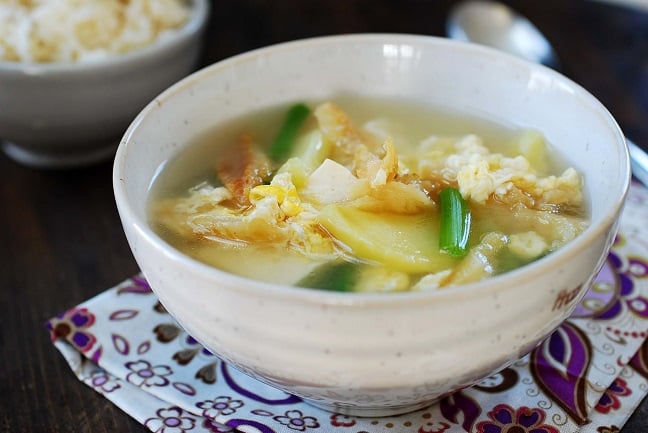
Gamjaguk (Korean Potato Soup)

This simple potato soup is one of my childhood favorite soups! Unlike Western style potato soups, which tend to be rich and creamy, Korean potato soup (gamjaguk, 감자국) is made in clear broth with bite sized potato pieces. Gamja (감자) means potato, and guk (국) is soup. There are many different ways to make gamjaguk, but this recipe is how my mother used to make it when we were growing up.

Made similar to muguk (무국), this soup uses a simple beef soup base. The thinly sliced beef is seasoned with soup soy sauce and sautéed before being boiled in water. The combination of the beef and Korean soup soy sauce creates a simple broth that works deliciously with the soft potato chunks. You can use a different broth such as anchovy broth if preferred.

My mother always added tofu and potato starch noodles (dangmyeon, 당면) to our potato soup, making the soup more filling and nutritionally balanced. You can, of course, skip either one or both. You can also add other vegetables such as onion and mushrooms, drizzle lightly beaten eggs over the soup at the end while boiling, or use some gochugaru (Korean red chili pepper flakes) if you want to make it spicy.

Gamjaguk is decidedly child friendly, but it’s also a healthy, satisfying soup that anyone can enjoy on cold winter days or any time of the year!

Gamjaguk (Korean Potato Soup)

Gamjaguk (Potato Soup)
Serves 4
Healthy, satisfying Korean potato soup with tofu and noodles!
Print
Ingredients
  1. 4 ounces beef (stew meat)
  2. 1 tablespoon soup soy sauce
  3. 12 to 14 ounces potatoes (2 or 3 medium)
  4. 8 ounces tofu
  5. 3 ounces starch noodles, soaked in warm water for 20 minutes
  6. 2 scallions (1 if large)
  7. salt and pepper to taste
Instructions
  1. Thinly slice the beef into short strips and mix with the soup soy sauce and garlic. Cut the potato in half lengthwise, and slice into half-moon shapes (about 1/3-inch thick). Slice the tofu into 1/2-inch thick pieces. Cut the scallions into 1-inch lengths.
    Gamjaguk (Korean potato soup)
  2. In a medium pot, sauté the beef until all the pieces turn brown.
    Gamjaguk (Korean potato soup)
  3. Pour in 6 cups of water, and bring it to a boil. Skim off the foam. Reduce the heat to medium high and continue to boil, covered, for 5 minutes.
    Gamjaguk (Korean potato soup)
  4. Add the potatoes, tofu, and salt (about 1 teaspoon) and pepper to taste. Bring it to a boil, and cook until potatoes are cooked, about 5 minutes. Be careful not to overcook the potato. Drop the the noodles and scallions in, and boil for an additional minute or two.
    Gamjaguk (Korean potato soup)
Korean Bapsang http://www.koreanbapsang.com/

The post Gamjaguk (Potato Soup) appeared first on Korean Bapsang.
Gulguk (Oyster Soup)

$
0
0

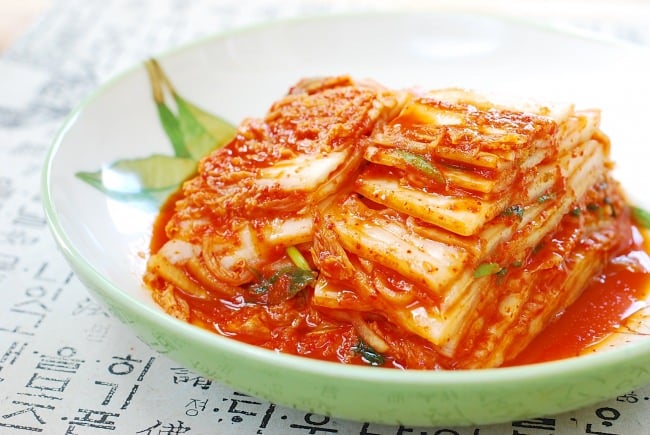
Gulguk (Oyster soup)
Oysters (gul, 굴) are widely used in Korean cuisine. They are delicious with bossam, and in so many other dishes such as jjigae, hot pot, pajeon, rice, kimchi, musaengchae, etc. Oysters take these dishes to the next level of flavor. Oysters are also great in soups! Although there are many minor variations, Korean oyster soups (gulguk, 굴국) are simple, refreshingly clear, and incredibly briny!

Due to their high nutritional value, oysters are often called “the milk of the sea”. They contain several essential vitamins and minerals including protein, iron, omega 3 fatty acids, calcium, and zinc. See more.

In Korea, fresh oysters are plentiful and relatively inexpensive, especially during the cold months when oysters are in season. Around here, fresh oysters are quite pricey and sometimes hard to find. I usually get jarred oysters in the refrigerated section of grocery stores, or sometimes resort to frozen ones in Korean markets.

Interestingly, according to this photo essay by Bloomberg, The World of Oysters: How South Korea’s Sea Farms Feed Global Appetites, Korea is the World’s second largest exporter of oysters. Be sure to check out the essay. The photos are amazing!

Gulguk (Oyster Soup)

As far as making this soup, simple is best! This recipe uses 2 main ingredients — oysters and radish. The oysters impart a strong briny flavor, so you don’t need to use a flavorful broth, such as anchovy broth, as a soup base. I simply add a small piece of dried kelp (dashima) to boost umami, and use salt to season and highlight the briny flavor of the oysters. You can use a little bit of soup soy sauce if you want.

The radish makes the soup even more refreshing. Some napa cabbage and/or soybean sprouts (kongnamul) can be good additions as well. You can even add some tofu if you want to make the soup a bit more substantial.

Gulguk (Oyster Soup)

Gulguk (Oyster Soup)
Serves 3
Simple, refreshingly clear, and briny soup made with oysters!
Print
Ingredients
  1. 8 to 12 ounces shucked oysters
  2. 1 pound Korean radish, mu, 무
  3. 1 scallion
  4. 1 small piece dried kelp, dashima, 다시마 (about a 3-inch square) - optional
  5. 1 teaspoon minced garlic
  6. Salt and pepper
Instructions
  1. Clean the oysters by gently swishing around in salted water. Drain. Rinse again in clean water and drain again.
    Gulguk (Oyster Soup)
  2. Cut the radish into thin, bite size pieces (about 1-inch square, 1/4-inch thick). Thinly slice the scallions crosswise and slightly diagonally.
    Gulguk (Oyster Soup)
  3. Add 6 cups of water, the radish and optional dried kelp to a medium size pot. Bring it to a boil over high heat. Reduce the heat to medium high, and cook until the radish is softened, about 5 minutes.
    Gulguk (Oyster Soup)
  4. Remove the kelp if used, and drop the oysters in. Add the garlic, and season with salt (about 1 teaspoon) and pepper to taste. Cook for another minute after the soup comes to a boil again. Do not overcook oysters. Remove the scum. Drop the scallions in right before turning off the heat.
    Gulguk (Oyster Soup)
Korean Bapsang http://www.koreanbapsang.com/

The post Gulguk (Oyster Soup) appeared first on Korean Bapsang.

Stir-fried Chicken and Baby Bok Choy

$
0
0

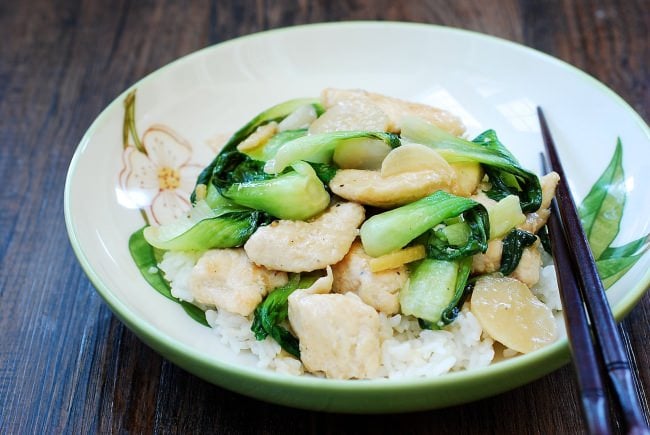
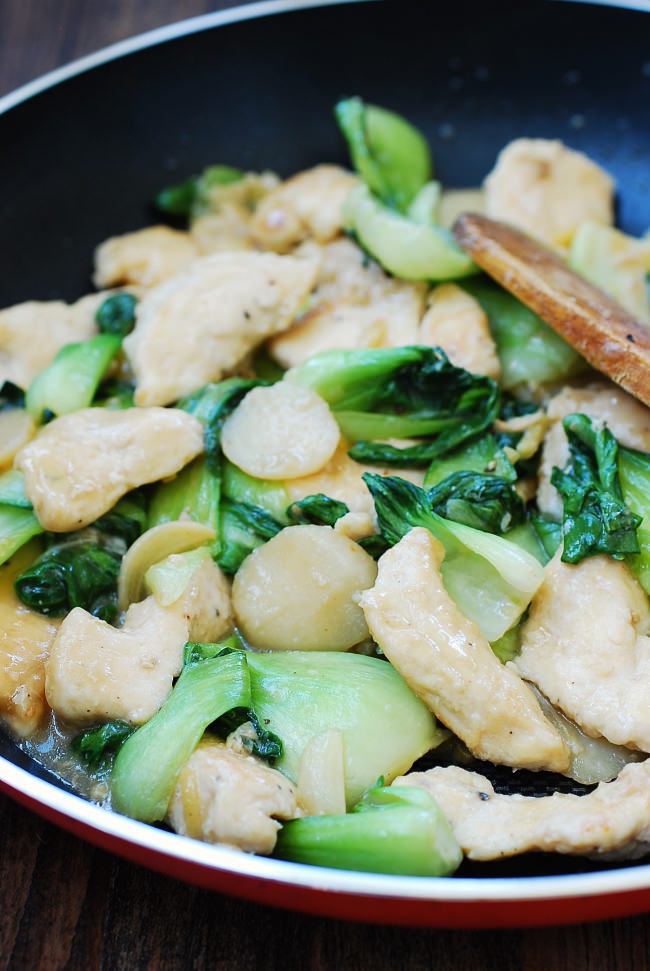
Stir-fried chicken and bok choy

This Chinese-style stir-fried chicken with baby bok choy (cheong-gyeong-chae, 청경채) is perfect for a quick weeknight meal! If you make a larger batch, it’s also great for a dinner party. Quick, easy, and versatile! The Korean name of the dish is dak cheonggyeongchae bokkeum (닭청경채볶음). Bokkeum refers to dishes that are stir-fried or sauteed in oil and/or a sauce. Chinese-style stir-fried dishes are popular in Korea as part of Korean-Chinese cuisine. If you learn a few techniques, you can easily create various stir-fried dishes with different meats and vegetables.  

First, coat the bite sized chicken with cornstarch and egg white. This keeps the chicken moist and tender, and gives a nice sheen. Then, the chicken is quickly pan-fried before the actual stir-frying happens with the sauce and vegetables.  

Stir-fried chicken and bok choy

For chicken breast, I like the sauce to be light yet rich in flavor. I used store-bought good quality chicken broth as a sauce base, but you can simply use water. I flavored the sauce with a little bit of oyster sauce. You can use soy sauce instead if you don’t have oyster sauce.

You can also substitute the bok choy with broccoli, asparagus, kale, or other green leafy vegetables if you like. If you use one of these alternate vegetables which takes longer to cook, blanch them in salted boiling water before stir-frying. Be sure to drain the vegetable well before using in the stir-fry, so it won’t dilute the sauce. I added optional canned water chestnuts in this recipe. Canned bamboo shoots or baby corn will be nice compliment to the dish as well.

The stir-frying process goes very quickly, so prepare all of your ingredients before you begin.

Stir-fried chicken and bok choy

Stir-fried Chicken and Baby Bok Choy
Save Recipe

Ingredients

1 chicken breast (10 to 12 ounces)

salt and pepper

1 tablespoon cornstarch

1 egg white

10 to 12 ounces baby bok choy (or regular bok choy cut into small pieces)

2 - 3 ounces of water chestnut, drained - optional

2 tablespoons canola or vegetable oil for frying, divided

Sauce:

2 plump garlic cloves

1 inch chunk ginger

1 tablespoon rice wine (or mirin)

1/2 cup chicken broth or water

1/2 tablespoon oyster sauce (or soy sauce with 1/4 teaspoon sugar)

1 tablespoon cornstarch mixed in 2 tablespoons water (starch slurry)

salt and pepper

1 teaspoon sesame oil

Instructions

  1. Cut the chicken into thin bite size pieces against the grain (about 1/4-inch thick).
    Stir-fried chicken and bok choy
  2. Season the chicken with salt (about 1/4 teaspoon) and pepper, and then mix well with the cornstarch and egg white until the chicken is well coated. Let it sit while you prepare the other ingredients.
    Stir-fried chicken and bok choy
  3. Separate the leaves by cutting off the stem of each bok choy. Rinse them a couple of times, and drain well.
    Stir-fried chicken and bok choy
  4. Thinly slice the garlic, and julienne the ginger.
    Stir-fried chicken and bok choy
  5. Heat a large non-stick skillet or wok over high heat. Add a tablespoon of oil. Add the chicken pieces in one layer and cook until they are no longer pink, about a minute each side. The chicken does not need to be cooked through at this point. Transfer the chicken to a plate. Stir-fried chicken and bok choy
  6. Reheat the skillet over high heat. Add a tablespoon of the oil. Stir in the garlic and ginger, and cook just enough to infuse the oil with flavor. Add the rice wine, and cook for a minute. Pour in the chicken broth (or water), add the oyster sauce (or soy sauce and sugar), and boil for a couple of minutes.
    Stir-fried chicken and bok choy
  7. Return the chicken to the skillet, and add the bok choy. Stir-fry everything together, for one or two minutes, until the bok choy is wilted. Taste the sauce, and sprinkle with salt and pepper to taste. Drizzle the starch slurry over and quickly stir everything together until the sauce is well incorporated. Add the sesame oil, and give it a quick stir.
    Stir-fried chicken and bok choy
  8. Serve hot with or over steamed rice.
6.6.15
http://www.koreanbapsang.com/2017/02/stir-fried-chicken-baby-bok-choy.html


The post Stir-fried Chicken and Baby Bok Choy appeared first on Korean Bapsang.

Pressure Cooker Braised Oxtail (Kkorijjim)

$
0
0

Pressure cooker Korean braised oxtail!

I have a new favorite kitchen appliance! Thanks to many of you who have asked for pressure cooker (or Instant Pot) recipes, I finally bought an Instant Pot, and I’m very pleased with it! The Instant Pot is a multi-function gadget that pressure-cooks, slow-cooks, steams, etc. To start out, I made this braised oxtail (kkorijjim or ggorijjim, 꼬리찜) using its pressure cooking function. Amazing!

Oxtail is a tough cut of meat that usually takes hours to bring out its tenderness, but it only takes 45 minutes in the pressure cooker. Stovetop pressure cookers may take less cooking time.  

Pressure cooker Korean braised oxtail!

In Korea, oxtails are common but very expensive. They are typically braised (kkorijjim) or made into soup (kkori gomtang, 꼬리곰탕), both of which are extremely popular as nourishing dishes. Lucky for us, oxtails are relatively affordable around here. Look for a package with larger pieces.

For those of you who’re not familiar with oxtail, it is the tail of a cow which is bony, fatty, and highly rich in connective tissues and collagen. Slow or pressure cooking breaks down the collagen into a rich, flavorful gelatin, making the dish incredibly delicious and satisfying!

Pressure cooker Korean braised oxtail!

As I mentioned in my slow cooker galbijjim recipe, the Korean traditional braising technique does not involve initial searing of the meat. However, since I’m using one of the latest technology kitchen gadgets, that has the “Sauté” function, I decided to try it and sear the meat. You can skip this step if you want.

The braising liquid is similar to the one used for galbijjim (braised short ribs). As a sweetener, I like to use honey (or a combination of honey and sugar) for a richer flavor. Here, I also used a little bit of Korean green plum syrup (maesilcheong), which is a staple in modern Korean cooking as a sugar substitute. It gives the dish slightly acidic, fruity sweetness which rounds up the flavors nicely. Pineapple juice can be a good substitute, or simply use sugar and/or honey.  

Pressure cooker Kkorijjim (Korean braised oxtail)!

Pressure Cooker Braised Oxtail (Kkorijjim)
Serves 4
Pressure cooker Korean braised oxtail (kkorijjim) - flavorful and fork tender!
Print
Ingredients
  1. 3 to 4 pounds oxtail
  2. 1/2 medium onion, cut into large chunks
  3. 1 to 2 carrots, cut into large chunks
  4. 3 to 4 dried shiitake mushrooms, briefly soaked and quartered (omit if unavailable)
Braising liquid
  1. 1/2 cup soy sauce
  2. 1/2 cup rice wine (or mirin or dry white wine)
  3. 1/2 medium Korean/Asian pear (or 1 bosc pear or apple), grated
  4. 2 tablespoons minced garlic
  5. 1 inch ginger, grated (about 1 teaspoon)
  6. 3 tablespoons honey (or sugar)
  7. 3 tablespoons maesil cheong (or 1 more tablespoon honey or sugar)
  8. pepper to taste
Other additions and garnishes
  1. 1 tablespoon sesame oil
  2. 2 scallions, roughly chopped (and some finely sliced for optional garnish)
  3. sesame seeds - optional
Instructions
  1. Trim off excess fat. Rinse the oxtail pieces and let them sit in cold water for 10 to 20 minutes to draw out excess blood. Drain well, and pat dry with paper towels.
    Pressure cooker Korean braised oxtail (kkorijjim)!
  2. Press the “Saute” button on the Instant Pot. When the pot is hot, add 1 tablespoon of canola or vegetable oil. Sear the oxtail pieces in two batches, browning all sides. You can sear the meat in a separate pan or skip this step if you want.
    Pressure cooker Korean braised oxtail (kkorijjim)!
  3. Mix together the braising liquid ingredients. Place the oxtail pieces in one layer in the pot, and pour the braising liquid over.
    Pressure cooker Korean braised oxtail (kkorijjim)!
  4. Add the vegetables.
    Pressure cooker Korean braised oxtail!
  5. Close the lid tightly. Press the “Meat” function, and using the “+” button, increase the time to 45 minutes. When finished, the Instant Pot will automatically turn to the “Keep Warm” mode. Leave the pressure cooker alone for about 10 minutes before opening the lid.
    Pressure cooker Korean braised oxtail!
  6. Stir in the scallion and the sesame oil. Remove the meat and vegetables from the pressure cooker. Strain the cooking liquid into a bowl to skim off the fat. I use a fat separator. Pour the sauce over the ribs to serve. You can also cool it in the fridge or freezer until the fat solidifies to spoon off, and then reheat the sauce. Garnish with the optional scallions and sesame seeds.
    Pressure cooker Korean braised oxtail (kkorijjim)!
Korean Bapsang http://www.koreanbapsang.com/

The post Pressure Cooker Braised Oxtail (Kkorijjim) appeared first on Korean Bapsang.


15 Korean Soup Recipes

$
0
0

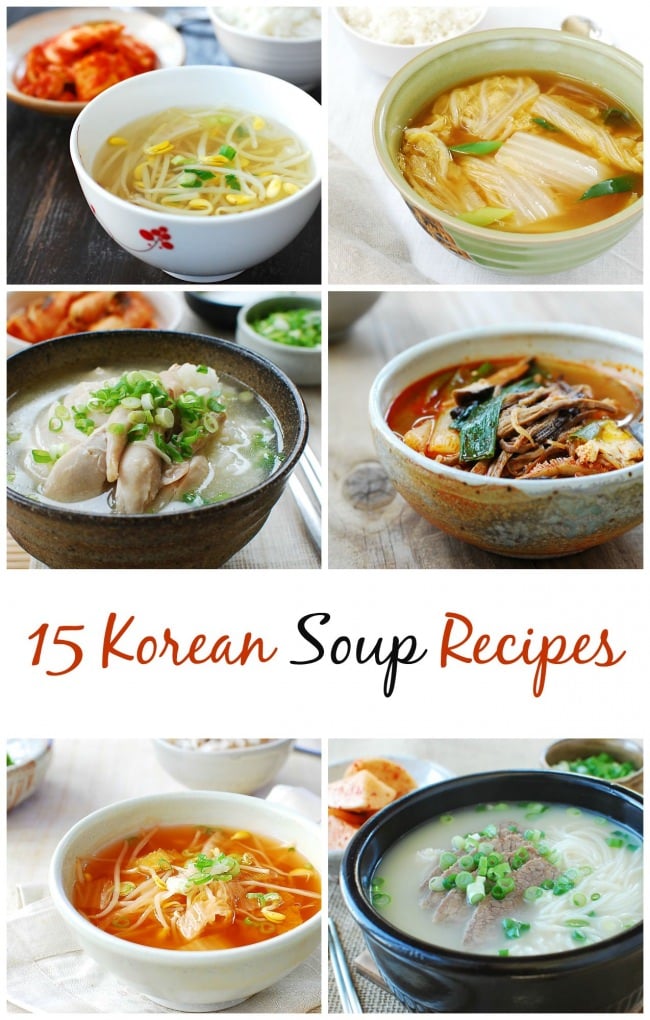
15 Easy Korean Soup Recipes

It’s almost mid-March, but we’re expecting the biggest snowstorm of the season starting tonight. It’s actually the first real snow this winter. While these soups will definitely help you stay warm during cold days, soups are an essential part of Korean meals all year round. Some of these dishes are served as a main dish, and some are served to accompany other dishes as part of a main meal. This list includes many of the common soups enjoyed in Korean homes. Enjoy!

1. Kimchi Kongnamul Guk (Soybean Sprout Soup with Kimchi)

kimchi soybean sprout soup
 

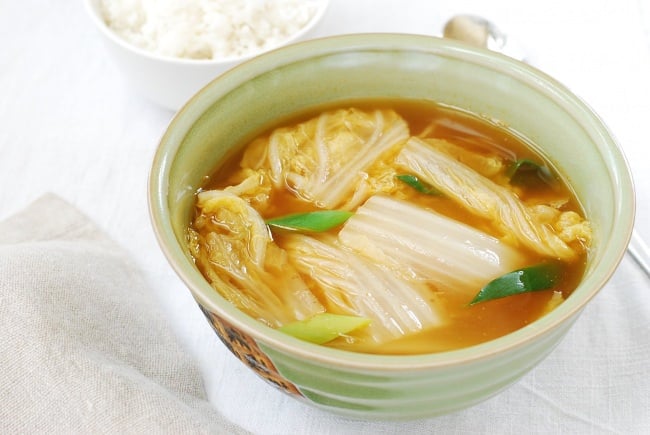
2. Baechu Doenjang Guk (Korean Soybean Paste Soup with Napa Cabbage)

Baechu Doenjang Guk (Soybean paste soup with napa cabbage)!


Miyeok guk (Seaweed soup) with beef 
Kongnamul Guk (Soybean Sprout Soup)
Siguemchi guk (Spinach soup)


Galbitang (Beef Short Rib Soup)
  
 Mu guk (Radish soup)


Yukgaejang (Spicy Beef Soup with Vegetables)
 
 
Gamjaguk (Korean Potato Soup)
 
 
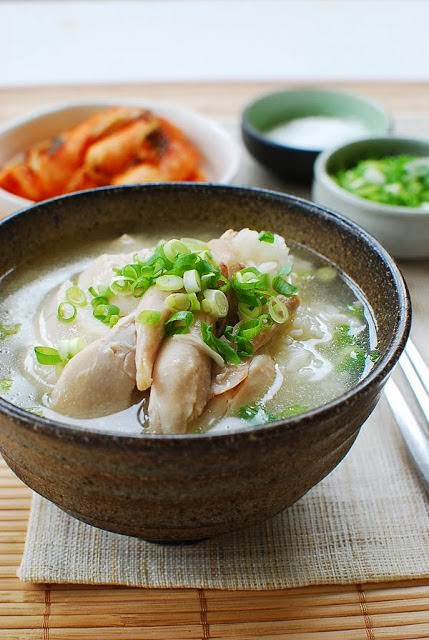
Samgyetang (Ginseng Chicken Soup) Recipe!
 
 
rice cake soup recipe
 
 
Gulguk (Oyster soup)


The post 15 Korean Soup Recipes appeared first on Korean Bapsang.

Spicy Braised Tofu (Dubu Jorim)

$
0
0

Spicy braised tofu (dubu jorim)

Need another tofu dish? Dubu jorim (braised tofu) is a popular Korean side dish which is typically pan-fried and then braised in a soy sauce-based sauce. This spicy braised tofu doesn’t require pan-frying and uses a lot more liquid. It resembles a stew (jjigae, 찌개), but is not a jjigae as the term is used in Korean cuisine.

This dish is totally fine just with the onion and scallion, but I also used mushrooms and a chili pepper in this recipe. I sometimes add a little bit of thinly sliced Korean radish and spread in the bottom of the pot before adding the tofu.

For the liquid, I usually use anchovy broth. Dashima broth is a good option for a vegetarian dish, but water is fine too. If available, a little bit of salted shrimp (saewujeot) will give an extra boost of umami.

Spicy braised tofu (dubu jorim)

The perilla oil makes this dish extra earthy and rustic. It’s distinctly nutty with a hint of minty flavor similar to that of perilla leaves and commonly used in country-style and temple cooking. I love perilla oil and use it quite often in various dishes such as namul and stews. If you don’t have it, use sesame oil instead.

My daughter likes this version because she doesn’t have to pan fry the tofu, and it’s deliciously spicy. The slightly thickened, flavor packed braising liquid is so delicious mixed with steamed rice!

Spicy braised tofu (dubu jorim)

Spicy Braised Tofu (Dubu Jorim)
Serves 2
Spicy braised tofu that's packed with flavors!
Print
Ingredients
  1. 1 package tofu (15 to 16 ounces)
  2. 1 scallion
  3. 1/4 medium onion
  4. 2 to 3 mushroom caps - optional
  5. 1 small green or red chili pepper - optional
Braising liquid
  1. 2 tablespoons gochugaru, Korean red chili pepper flakes (use less for a milder dish)
  2. 1 teaspoon gochujang, Korean red chili pepper paste
  3. 2 tablespoons soy sauce
  4. 2 teaspoons liquid from salted shrimp (or use 1 more tablespoon soy sauce)
  5. 1 tablespoon corn syrup or Korean oligodang (or 1/2 tablespoon sugar)
  6. 1 tablespoon garlic
  7. 1 cup water or anchovy broth (or dashima broth - see note)
Other ingredients
  1. 2 tablespoons perilla oil or sesame oil
  2. 1/4 sesame seeds
Instructions
  1. Cut the tofu into 1/2-inch thick slices. You can further cut the slices in half crosswise if you like smaller slices. Slice the onion, scallion, and the optional mushrooms and chili pepper.
    Spicy braised tofu (Dubu jorim)
  2. Combine all of the braising liquid except the perilla oil (or sesame oil).
    Spicy braised tofu (Dubu jorim)
  3. Spread the onion slices at the bottom of a small pot. Arrange the tofu on top, and then pour the braising liquid over. Bring it to a boil, and then reduce the heat to medium. Cook for about 5 minutes.
    Spicy braised tofu (Dubu jorim)
  4. Add the remaining vegetables, and drizzle the perilla oil (or sesame oil) over. Continue to boil for 5 more minutes. Sprinkle with the sesame seeds.
    Spicy braised tofu (Dubu jorim)
Notes
  1. You can make dashima broth by boiling a small (2-inch) piece of dried kelp in 1-1/4 cup water for 5 minutes.
Korean Bapsang http://www.koreanbapsang.com/

The post Spicy Braised Tofu (Dubu Jorim) appeared first on Korean Bapsang.

Stir-fried Lotus Root with Peppers and Mushrooms

$
0
0

Stir-fried lotus root with peppers and mushrooms

Lotus root (yeon-geun, 연근) is the underwater stem of the lotus plant. It’s a commonly used vegetable in Asian countries, including Korea, and highly praised for being rich in fiber and essential nutrients such as Vitamin C and potassium. My favorite way to eat this crunchy and starchy lotus root is to simply stir-fry (bokkeum, 볶음) with some other vegetables.

To prepare the lotus root for cooking, peel the skin, slice or cut into bite size pieces, rinse, and then soak in the vinegar water. This will remove any impurities inside and the slight bitterness of the lotus root and prevent from discoloring. You can also prepare lotus root by pre-boiling in vinegar water for a couple of minutes if you like it softer.

Stir-fried lotus root with peppers and mushrooms

For other vegetables, I like to use a mix of bell peppers and hot chili peppers. I love colorful bell peppers, and am trying to eat more of them because they are also loaded with fiber, antioxidants, vitamins, and minerals. You can use any color bell peppers or hot chili peppers. These vegetables pair really well with the mild tasting lotus roots, adding slightly peppery flavors to the dish, while doubling the health benefits.

Another vegetable I’d like to add to my stir-fries is mushrooms. I love earthy flavors of mushrooms! You can use any mushrooms to this dish. They add another dimension to the flavors of the dish, and are again highly nutritional!

This stir-fry dish comes together very quickly once you have prepared the vegetables. Enjoy it as a side dish or a light meal with a bowl of rice! 

Stir-fried lotus root with peppers and mushrooms

Stir-fried lotus root with peppers and mushrooms (Yeon-geun Bokkeum)
Serves 4
Healthy, delicious stir-fried dish made with lotus root, peppers, and mushrooms!
Print
Ingredients
  1. 12 to 14 ounces lotus root
  2. 1/2 yellow bell pepper
  3. 1/2 red bell pepper
  4. 4 ounces mushrooms
  5. 3 to 4 green chili pepper (or use green bell pepper)
  6. 2 to 3 plump garlic cloves, thinly sliced
  7. 2 tablespoons cooking oil
  8. salt
  9. 1 tablespoon soy sauce
  10. 1/2 tablespoon oyster sauce (or use more soy sauce for a vegan dish)
  11. 1 tablespoon rice wine (or mirin or white wine)
  12. 1 tablespoon corn syrup (or oligodang)
  13. 1/2 tablespoon sesame oil
  14. 1/4 teaspoon sesame seeds
Instructions
  1. Cut the tough ends of the lotus root, and peel the skin with a potato peeler.
    Stir-fried lotus root with peppers and mushrooms
  2. Cut the lotus root in half lengthwise and then into bite size pieces. Rinse in water. Add 2 tablespoons vinegar in 3 cups of water, and soak the lotus root for 20 to 30 minutes.
    Stir-fried lotus root with peppers and mushrooms
  3. Cut the peppers and mushrooms into small bite size pieces.
    Stir-fried lotus root with peppers and mushrooms
  4. Heat a large skillet with two tablespoons oil. Add the garlic and lotus root, and lightly sprinkle with salt. Stir fry until the lotus root pieces turn translucent, 3 to 5 minutes, stirring occasionally.
    Stir-fried lotus root with peppers and mushrooms
  5. Add the mushrooms, and stir fry until the mushrooms turn soft, 2 to 3 minutes.
    Stir-fried lotus root with peppers and mushrooms
  6. Add the peppers, and stir fry until the peppers are slightly wilted, 2 to 3 minutes. Stir in the soy sauce, oyster sauce, rice wine, and corn syrup. Continue to cook, stirring well, until the sauce is almost gone, 2 to 3 minutes. Drizzle the sesame oil at the end, and sprinkle with the sesame seeds to serve.
    Stir-fried lotus root with peppers and mushrooms
Korean Bapsang http://www.koreanbapsang.com/

The post Stir-fried Lotus Root with Peppers and Mushrooms appeared first on Korean Bapsang.

Egg Fried Rice (Gyeran Bokkeumbap)

$
0
0

Egg fried rice (Gyeran bokkeumbap)

As a small child in Korea, I grew up on eggs served with rice. We all did! A fried egg mixed with warm steamed rice and a little bit of soy sauce and sesame oil was so delicious. We also had countless lunch boxes with a fried egg on top of the rice, gyeran mari (rolled omelette) or gyeranjjim (steamed eggs). Eggs are still a big part of Korean cuisine. This egg fried rice is flavored with lots of scallions! It’s a quick and easy way to whip up a light meal and use up leftover rice and eggs.

The key to this recipe is the oil flavored with scallions that’s used to cook the eggs and fry the rice. It gives this simple dish a nice flavor.

Egg fried rice (Gyeran bokkeumbap)

To keep the eggs soft, I first make scrambled eggs that are a bit runny, remove from the pan, fry the rice, and then add the eggs back to the pan to combine with the rice at the end. The eggs remain nice and fluffy this way.

If you want to add any other protein such as shrimp, chicken, beef, etc. to the fried rice, separately cook them and combine with the rice and eggs at the end. You can also fry frozen peas or finely chopped carrots with the rice.  I added some shrimp in the photo below. 

Egg and Shrimp fried rice (Gyeran bokkeumbap)

As you probably know, the secret to good fried rice is day old rice. If the rice is a bit too hard after being in the fridge, heat it up in the microwave to soften it a little, and break it up if clumped up before frying. If you need to make fresh rice for it, make it slightly drier by using a little less water than usual, fluff it up, and then leave it out to cool and dry out a bit.

This egg fried rice is simply delicious! Also, the scallion scrambled eggs are great on their own as breakfast or as a quick side dish to any Korean meal.

Egg fried rice (Gyeran bokkeumbap)

Egg Fried Rice (Gyeran Bokkeumbap)
Serves 2
A simple fried rice made with eggs and scallions!
Print
Ingredients
  1. 2 servings of rice (about 3 cups cooked rice)
  2. 3 large eggs
  3. 3 to 4 scallions (or 1 Korean large scallion, daepa 대파), finely chopped (about 1 cup)
  4. vegetable or canola oil for frying
  5. 1 tablespoon soy sauce
  6. salt and pepper
  7. 1/2 tablespoon sesame oil
  8. 1/2 teaspoon sesame seeds
Instructions
  1. Finely chop the scallions.
    Gyeran Bokkeumbap
  2. Crack and beat the eggs in a bowl with chopsticks or a fork.
    Gyeran bokkeumbap
  3. Heat a large skillet over medium high heat with 2 tablespoons of oil. Add 2/3 of the scallions, and stir fry until the scallions turn soft and fragrant.
    gyeran bokkeumbap
  4. Reduce the heat to medium low and add the eggs, and gently stir to scramble until the eggs are set but still a bit runny. Transfer to a plate.
    Gyeran bokkeumbap
  5. Turn the heat up to medium high. Add 2 tablespoons of oil, and stir in the remaining scallions until the scallions turn soft and fragrant. Stir in 1 tablespoon of soy sauce.
    Gyeran bokkeumbap
  6. Add the rice, and fry the rice, stirring well and breaking up the clumped up rice, until well toasted.
    gyeran bokkeumbap
  7. Return the eggs to the pan and mix well with the rice, breaking up the eggs. Add salt and pepper to taste, sesame oil, and sesame seeds.
    Gyeran bokkeumbap
Korean Bapsang http://www.koreanbapsang.com/

The post Egg Fried Rice (Gyeran Bokkeumbap) appeared first on Korean Bapsang.

Ddangkong Jorim (Soy Braised Peanuts)

$
0
0

Ddangkkong jorim (Soy braised peanuts)

This is a simple but delicious side dish that’s made with peanuts. Made similar to kongjang (soy braised soybeans), this braised peanut dish (ddang-kong jorim, 땅콩조림) is sweet, sticky, savory, and nutty with a pleasant chewy texture! It’s a popular basic side dish (mit-banchan, 밑반찬).

Did you know peanuts are legumes, not nuts, in the botanical sense? They are seeds in the pot like beans. Peanuts actually grow underground, unlike other nuts such as walnuts and almonds, which are fruit of the trees.

For this dish, use raw shelled peanuts with skins. Around here, we’re lucky to have good quality Virginia peanuts, one of the largest varieties. Raw peanuts retain the skins intact and absorb the sauce better with a softer texture as a result, but you can use roasted peanuts if desired.

Ddangkkong jorim (Soy braised peanuts)

The peanuts are first par-boiled, before being braised, and the brownish cooking liquid is discarded. This will remove the tartness of the skins and any impurities the skins might have.

These sweet, savory, and soft peanuts are quite addictive! I often find myself picking at a few to eat as a snack. They are also great as a drinking snack (anju, 안주).

Ddangkong Jorim (Soy Braised Peanuts)
Serves 4
A simple, delicious side dish made with peanuts - sweet, savory, sticky and nutty with a pleasant texture!
Print
Ingredients
  1. 1 cup raw shelled peanuts with skins
  2. 2 tablespoons soy sauce
  3. 2 tablespoons rice wine (or mirin)
  4. 1 tablespoon sugar
  5. 2 tablespoons corn syrup (or Korean oligodang)
  6. 1 cup water or dasima broth
  7. 1/4 teaspoon sesame seeds
  8. Ddangkkong jorim (Soy braised peanuts)
Instructions
  1. Add the peanuts and 2 cups of water to a small pot, bring it to a boil, and boil for about 5 minutes.
    Ddangkkong jorim (Soy braised peanuts)
  2. Drain the peanuts, discarding the cooking liquid.
    Ddangkkong jorim (Soy braised peanuts)
  3. Return the peanuts to the pot. Add the soy sauce, rice wine (or mirin), sugar, corn syrup, and water (or dasima broth).
    Ddangkkong jorim (Soy braised peanuts)
  4. Bring it to a boil. Reduce the heat to medium and gently boil, uncovered, until almost all the sauce has evaporated, about 20 to 25 minutes. You can increase the heat to medium high during the last few minutes. Stir occasionally and keep your eyes on the pot to avoid burning the peanuts. Sprinkle with the sesame seeds.
    Ddangkkong jorim (Soy braised peanuts)
Korean Bapsang http://www.koreanbapsang.com/

The post Ddangkong Jorim (Soy Braised Peanuts) appeared first on Korean Bapsang.

Viewing all 1019 articles
Browse latest View live