Quantcast
Channel: Korean Bapsang
Viewing all 1019 articles
Browse latest View live

Gosari Namul (Fiddlehead Ferns Side Dish)

$
0
0

Gosari (bracken fiddleheads) side dish

In a couple of days, Korea and many other Asian countries will be celebrating the Lunar New Year. To help you prepare for the holiday feast, I previously posted 15 Korean New Year Dishes. Here, I’m showing you how to make a side dish made with dried gosari (고사리, fiddlehead ferns or bracken).

As I mentioned in my doraji (도라지, bellflower roots) namul post, a Korean traditional feast includes vegetable side dishes in three colors, collectively called (samsaek namul, 삼색 나물). Sam means three, and saek means color in Korean. Typically, they are doraji (bellflower roots) for white, gosari (fiddlehead ferns) for black/brown, and siguemchi (시금치, spinach) for green.

Gosari (bracken fiddleheads) side dish

Other vegetables in similar colors can also be used. For the photos of this post, I used mu namul (Korean radish) for the white color instead of doraji. Stir-fried shiitake mushrooms are often used for the black/brown color as well.

What is gosari? Gosari is the immature frond (known as fiddlehead) of a bracken (aka fernbrake) which grows in the hills and mountains. It has a deep, earthy flavor with a chewy texture, which makes it an essential addition to dishes such as bibimbap and yukgaejang.

Gosari (bracken fiddleheads) side dish

You can buy dried gosari (고사리) at any Korean market. Look for the ones with short, thin stems.  

Lucky for me, I grew up eating quality gosari from Halla Mountain on Jeju Island (my parents’ hometown) which is known for the best gosari in Korea. We actually still get a constant supply from our relatives who pick the fiddleheads from Halla Mountain, when they are most tender, boil and dry for preserving. My parents and I have been happy recipients of the fruits of their labor for decades.

Rehydrating gosari takes a combination of soaking and boiling. I find it quicker to boil first and then soak until it reaches the desired tenderness. The time can vary depending on the gosari.

Gosari (bracken fiddleheads) side dish

Gosari Namul (Fiddlehead Ferns Side Dish)
Serves 4
A Korean side dish made with dry fiddlehead ferns (gosari)!
Print
Ingredients
  1. 1 ounce dried gosari (고사리), fiddlehead ferns (about 1-1/2 cups, rehydrated)
  2. 1 tablespoon soup soy sauce, gukganjang (국간장)
  3. 1/4 teaspoon sugar
  4. 1 teaspoon minced garlic
  5. black pepper to taste
  6. 1 tablespoon vegetable or canola oil
  7. 1/4 cup water (or dashima or beef broth)
  8. 1 scallion, roughly chopped
  9. 1/2 tablespoon sesame oil
  10. 1/2 teaspoon sesame seeds
Instructions
  1. Add the gosari and 4 to 5 cups of water to a medium pot. Boil over medium heat, covered, until tender, 30 to 40 minutes. The time can vary depending on the gosari. Turn the heat off and let it cool in the cooking water. When ready to use, rinse in cold water and drain.
  2. Cut into 3 to 4-inch lengths, removing tough ends of the stems, if any.
  3. Mix the gosari with the soy sauce, sugar and garlic. Let stand for 10 minutes.
  4. Sauté in a skillet with 1 tablespoon of vegetable/canola oil for about 4 to 5 minutes over medium heat. Pour in 1/4 cup of water (or dashima or beef broth). Cook for a few more minutes, stirring occasionally, until the liquid is almost gone. Add the scallion, sesame oil, and sesame seeds. Stir well before turning the heat off.
Korean Bapsang https://www.koreanbapsang.com/

The post Gosari Namul (Fiddlehead Ferns Side Dish) appeared first on Korean Bapsang.


Pa Kimchi (Green Onion Kimchi)

$
0
0

Pa Kimchi (Green Onion Kimchi)

I’ve shared sixteen kimchi recipes so far on this blog, and here’s another one! This easy kimchi made with tender green onions (also called scallions) is a favorite of mine. Green onions are called pa (파) in Korean. Pa kimchi (파김치) is popular in the spring, when the thin variety of green onions is in season.  

There are two types of thin green onions in Korea — jjokpa (쪽파), and silpa (실파). Jjokpa is a small variety that has dark green leaves and slightly bulged out white stems. On the other hand, silpa simply is regular scallions that are harvested early when they are young and tender. Jjokpa is sweeter with a stronger aroma, so it’s typically used in dishes such as pa kimchi, pajeon, and pa ganghwe, while silpa is used more as a garnish or herb.

Pa Kimchi (Scallion Kimchi)

Unfortunately, jjokpa is not that common outside Korea, so I often make this kimchi with regular scallions that are nicely thin (silpa). Use jjokpa if you can find them. They briefly appear at Korean markets around here in the spring.

Pa kimchi is typically seasoned with myulchiaekjeot (fermented fish sauce made with anchovies). Some people pre-salt the green onions with fish sauce, but I don’t find it necessary.

For a vegan version, you can substitute the fish sauce with soup soy sauce.

Pa Kimchi (Scallion Kimchi)

The one ingredient that’s nice to add but absolutely optional is dried (or half-dried) squid, mareun ojingeo (마른오징어), which is a popular snack food in Korea. I got the idea from a Korean culinary travel TV show which featured kimchi making in a coastal town of Korea. It works as an umami booster while adding an interesting chewy texture to the kimchi.

Yields 24

Pa Kimchi (Green Onion Kimchi)

An easy kimchi made with thin green onions (also called scallions)!

Save RecipeSave Recipe
Recipe Image

Ingredients

1 pound thin scallions (silpa or jjokpa)

4 tablespoons gochugaru

4 tablespoons myulchi aekjeot

2 teaspoons sugar

1 tablespoon minced garlic

1 teaspoon grated ginger

1 small dried (or half-dried) squid body part only (about 3 ounce), mareun ojingeo - optional

Instructions

  1. Clean the green onions by removing the root part and any tough/brown outer skins. Wash them thoroughly a couple of times. Shake off excess water, and drain well.
    Pa Kimchi (Scallion Kimchi)
  2. Mix all the seasoning ingredients in a bowl.
    Pa Kimchi (Scallion Kimchi)
  3. Cut the dried squid into about 2-inch long thin strips. Soak in water until slightly softened if very dry and hard, but this is generally not necessary.
    Dried squid for scallion kimchi
  4. In a large bowl, gently rub the seasoning mixture all over the green onions and the optional squid to evenly coat them.
    Pa Kimchi (Scallion Kimchi)
  5. Hold a couple of green onions together, and fold them before arranging in an airtight container to store. Another option is to tie them together by wrapping the other end of the green onion around the white part, making a circle in the middle, and then running the leafy part through the circle.
    Pa Kimchi (Scallion Kimchi)
  6. Keep it at room temperature for a day, and then refrigerate. Pa kimchi can be eaten right away, but the flavor develops as it ferments over 2 to 3 weeks in the fridge. Run a knife (or a pair of kitchen scissors) through the folded or tied green onions a couple of times to serve.
    Pa Kimchi (Scallion Kimchi)
7.6.7
5
https://www.koreanbapsang.com/2018/03/pa-kimchi-green-onion-kimchi.html

The post Pa Kimchi (Green Onion Kimchi) appeared first on Korean Bapsang.

Pressure Cooker Dakbokkeumtang (Korean Spicy Chicken Stew)

$
0
0

Instant Pot Dakbokkeumtang (Korean Spicy Chicken Stew)

My love for the Instant Pot grows with each use! I’ve been making this classic Korean chicken dish, called dakbokkeumtang (닭볶음탕) or dakdoritang (닭도리탕), using the Pressure Cooker function of the Instant Pot. I love how quick this juicy, flavorful dish is!  

If you’ve tried my original dakdoritang recipe, it takes 3 to 4 hours of cooking time in the slow cooker, or 45 minutes over the stove top. With this Instant Pot recipe, a few minutes to sear, a few minutes for pressure to build up, and 10 minutes to pressure cook! That’s it! 

The flavor of this Instant Pot adaptation is very similar to the original recipe — spicy, savory, and slightly sweet! However, I’ve made a few minor changes for this recipe, adding some doenjang (Korean fermented soybean paste) and oyster sauce, which are packed with intense savory flavors.

Instant Pot Dakdoritang (Korean Spicy Chicken Stew)

Dakbokkeumtang is made with small, bone-in chicken pieces. Since this dish is very commonly made at home, you can buy a whole chicken pre-cut for this dish at markets in Korea.  

Korean markets around here also sell small chicken pieces which are labeled for dakbokkeumtang or dakdoritang, but they are large drumsticks cut in half crosswise. I used them in this post. Wings, small drumsticks, and thighs are all good choices.

If the chicken parts are big and you don’t want to bother cutting them in half through the bones, make a couple of slits on the thick parts of the meat for the sauce to penetrate well.

Instant Pot Dakbokkeumtang (Korean Spicy Chicken Stew)

Frequently asked questions:

Can I use boneless and/or skinless chicken parts? Although not the best option, you can certainly use boneless and/or skinless chicken. If using boneless, reduce the cooking time by a couple of minutes.

Do I need to add water to this recipe? The sauce (which includes 1/4 cup water or broth) and other ingredients in this recipe yield sufficient liquid for pressure cooking, leaving a good amount of sauce at the end. The sauce is delicious mixed in with steamed rice.

Can I cook this recipe in a slow cooker or over the stove top? Yes, you can. Simply omit 1/4 cup water (or broth) from the sauce recipe and follow the applicable cooking methods in my original dakdoritang post which provides both slow cooker and stove top methods.  

What do I need to adjust if I want to use a stove-top pressure cooker? You can sear the chicken in a skillet before adding to your pressure cooker. Also, stovetop pressure cookers have a higher pressure point. You will need to reduce the cooking time slightly depending on your pressure cooker.

Will this sauce be good for braising other types of meat? The sauce will be great with any meat of your choice.

Yields 4

Pressure Cooker Dak Bokkeumtang (Korean Spicy Chicken Stew)

Classic Korean chicken dish that’s adapted for the pressure cooker! You’ll love how quick this juicy, flavorful dish is.

Save RecipeSave Recipe
Recipe Image

Ingredients

2.5 pounds bone-in chicken parts, cut into small pieces (excess fat removed)

6 ounces potatoes, cut in big chunks (or mini potatoes)

1/2 medium onion, cut in big chunks

2 small carrots, cut in big chunks (or baby carrots)

2 scallions or a few stalks of garlic chives

Sauce

3 tablespoons gochugaru

3 tablespoons sugar

2 tablespoons gochujang

1/2 tablespoon doenjang

2 tablespoons rice wine

4 tablespoons oyster sauce or soy sauce

1 tablespoon minced garlic

1 teaspoon grated ginger

black pepper to taste

1/4 cup water or chicken broth

1 tablespoon sesame oil

1 teaspoon sesame seeds

Instructions

  1. Combine the sauce ingredients except sesame oil and seeds, and mix well.
    Instant Pot Dakbokkeumtang (Korean Spicy Chicken Stew)
  2. Rinse the chicken pieces, drain, and pat dry with paper towels.
    Instant Pot Dakbokkeumtang (Korean Spicy Chicken Stew)
  3. Press the “Saute” button on the Instant Pot. When the pot is hot, add 1 tablespoon of canola or vegetable oil. Sear the pieces in two batches.
    Instant Pot Dakbokkeumtang (Korean Spicy Chicken Stew)
  4. Place all the chicken pieces in the pot, and add the potatoes, onion, and carrots. Pour the sauce over, and mix well to evenly coat the chicken and vegetables.
    Instant Pot Dakbokkeumtang (Korean Spicy Chicken Stew)
  5. Close the lid tightly, and seal the vent. Press the “poultry” function, and using the “+” or “-” button, adjust the time to 10 minutes. When finished, the Instant Pot will automatically turn to the “Keep Warm” mode. Turn the pressure valve to “venting” to quickly release the pressure. Open the lid.
    Instant Pot Dakbokkeumtang (Korean Spicy Chicken Stew)
  6. Stir in the scallion (or garlic chives) and the sesame oil and sesame seeds. If you want, remove the meat and vegetables from the pressure cooker, turn the Instant Pot Saute function back on, and reduce the sauce to the desired level with the lid open.
    Instant Pot Dakbokkeumtang (Korean Spicy Chicken Stew)
7.6.7
7
https://www.koreanbapsang.com/2018/03/pressure-cooker-dakbokkeumtang-korean-spicy-chicken-stew.html

The post Pressure Cooker Dakbokkeumtang (Korean Spicy Chicken Stew) appeared first on Korean Bapsang.

Domi Maeuntang (Spicy Fish Stew with Red Snapper)

$
0
0

Maeuntang (Korean spicy fish stew)

One of the classic Korean stew dishes is this spicy fish stew, called maeuntang (매운탕). In Korea, maeuntang is made with all sorts of fish, including freshwater ones. For this recipe, I made it with a red snapper (domi, 도미), which has a firm, white flesh with a mildly sweet and nutty flavor.

Maeuntang is a general term for spicy stews, but it’s commonly used to refer to spicy fish stews. “Maeun” means spicy. “Tang” is a term used for certain types of soup (guk), such as seolleongtang and galbitang, or sometimes for certain types of stew (jjigae) dishes, such as gamjatang and maeuntang. Traditionally, the term “tang” was used for elaborate soups or stews, but it’s loosely used in modern days.

For this stew, you can use any firm, white flesh fish. Cod fish (daegu, 대구), monkfish (agu, 아구), black rockfish (wooreok, 우럭) and yellow croaker (jogi, 조기) are some of the common ones.

Maeuntang (Korean spicy fish stew)

We normally use a whole fish cut up for this dish, including the head and bones. You can ask the fishmonger to clean and cut it for you. If preferred, use fish fillets, but the head and bones are great for flavoring the stew. Be sure the fish you buy is absolutely fresh!

In Korea, a great number of restaurants specializing in seafood have an aquarium(s) in house, where live fish are kept. This reminds me of maeuntang we had in Tongyeoung last fall, a southern coastal city of Korea. We arrived late and very hungry. After being turned away by several restaurants which were closing, we were invited in by a nice lady at a small restaurant. She made us maeuntang with a couple of fish she caught from her fish tank outside. She also allowed me in her kitchen to watch her making the stew. Her maeuntang was a memorable one!

Maeuntang (Korean spicy fish stew)

As with most of Korean stews (jjigae), anchovy broth is used for this dish to add depth to the stew. I like to throw in some clams (or shrimp) to add another layer of flavor to the broth.

Finally, adjust the spicy level to your taste by reducing or increasing gochugaru. For a mild tasting fish stew, see my daegu tang recipe.

Maeuntang (Korean spicy fish stew)

Domi Maeuntang (Spicy Fish Stew with Red Snapper)
Save RecipeSave Recipe
Recipe Image

Ingredients

1 whole snapper (about 1-1/4 pounds)

3 little neck clams (or any other small clams)

6 ounces mu (1 inch disk)

6 ounces tofu

3 ounces zucchini

1 scallion

1 ounce ssukgat (crown daisy) or watercress

Seasoning:

1-1/2 tablespoons gochugaru (Korean red chili pepper flakes)

1 teaspoon gochujang (Korean red chili pepper paste)

1 teaspoon doenjang (Korean fermented soybean paste)

1 tablespoon fish sauce (or soup soy sauce)

1 tablespoon garlic

1 teaspoon ginger

Other:

3 cups anchovy broth or water

salt to taste (about 1 teaspoon)

pepper to taste

Instructions

  1. Clean the fish, remove guts, scales, and fins, if not already done by the fishmonger. Rinse and scrub the clams. Place the clams in salted water (1 tablespoon of salt in 2 to 3 cups of water) for 30 minutes or longer to get the clams to spit out the sand.
    maeuntang (Korean spicy fish stew)
  2. Clean the vegetables. Cut the radish into bite sizes. Thinly slice the scallions and the pepper. Cut the tofu into 1/2-inch thick small pieces.
    maeuntang (Korean spicy fish stew)
  3. In a small bowl, combine all the seasoning ingredients and mix well.
    maeuntang (Korean spicy fish stew)
  4. Add the broth to a medium size pot along with the radish and the seasoning mix. Bring it to a boil over high heat. Cook until the radish turns soft, about 3 minutes.
    maeuntang (Korean spicy fish stew)
  5. Drop in the fish, clams and tofu. When it comes to a boil again, reduce the heat to medium. Cook until the clams are open and the fish is almost cooked through, about 5 minutes. (Do not overcook. The fish will continue to cook in the boiling hot broth while being served and eaten.
    maeuntang (Korean spicy fish stew)
  6. Add the watercress or crown daisy leaves, enoki mushrooms, and scallions. Turn the heat off. Serve piping hot with the optional lemon slice on top.maeuntang (Korean spicy fish stew)
7.6.8
8
https://www.koreanbapsang.com/2018/04/domi-maeuntang-spicy-fish-stew-with-red-snapper.html

The post Domi Maeuntang (Spicy Fish Stew with Red Snapper) appeared first on Korean Bapsang.

Jeonbokjuk (Abalone Porridge)

$
0
0

Jeonbokjuk (abalone porridge)

On Jeju Island (Jeju-do, 제주도), where my parents are from, fresh abalone (jeonbok, 전복) are abundant. Porridge made with abalone (jeonbokjuk, 전복죽) is one of the most iconic dishes of the island. When we visited last fall, my cousin, who’s a Jeju native and always happy to show us around, took us to a place famous for its abalone porridge. It was deliciously briny, with a distinct greenish hue and chunky abalone pieces. As my parents would say, that’s how jeonbokjuk should be! So, here’s abalone porridge recipe Jeju-style!

Abalone are highly prized shellfish. For centuries, female divers in Jeju-do collected abalone and other seafood for a living by diving deep into the ocean floor for several hours a day. They are known as haenyeo (해녀) in Korea, meaning sea women. The number of haenyeo has sharply declined in modern days as other job options have become more available. As such, today’s high demand for abalone in Korea is being mostly met by farmed abalone.  

Jeju Island Korea

Finding abalones fresh from the ocean is almost impossible where I live. Some Korean markets carry fresh abalone in their fish tanks, but they tend to be small and quite expensive. So, I normally buy frozen abalone in shells, which are usually from Chile. If you’re in Korea or any other part of the world where fresh abalones are more plentiful and affordable, needless to say, use the fresh ones.

The Jeju-style jeonbokjuk is made simply with rice and abalone. It captures all the flavor the abalone have to give by also using the internal organs (viscera), hence the greenish hue. The dark green sac of guts may not look all that appetizing, but it really enriches the porridge. The color of the porridge depends on the number and the size of the abalone used.

Jeonbokjuk (abalone porridge)

If you don’t care for the guts in your porridge, you can leave them out. You can also add chopped vegetables if you’d like.

Easy to digest and nourishing, this porridge is especially comforting when one feels under the weather.

Jeonbokjuk (abalone porridge)

Serves 1

Jeonbokjuk (Abalone Porridge)

Rich, creamy Korean porridge made with abalone!

Save RecipeSave Recipe
Recipe Image

Ingredients

1 cup short grain rice (measuring cup not the cup that came with your rice cooker)

2 or 3 medium size (3.5 to 4 ounces each) abalone (use 3 or 4 if smaller in size)

2 tablespoons sesame oil

Salt or soup soy sauce to taste

1/2 teaspoon sesame seeds - optional garnish

Instructions

  1. Soak the rice for about an hour and drain.
    Jeonbokjuk (abalone porridge)
  2. Scrub off the dark edges of the abalone with a kitchen brush or toothbrush. Remove the abalone from the shell by working a spoon or small spatula around the muscle attached to the shell.
    Jeonbokjuk (abalone porridge)
  3. Carefully cut off the viscera (guts) with a knife, or pull it off by hand.
    Jeonbokjuk (abalone porridge)
  4. Cut off the tough pointed end. Slice the abalone meat into the desired thickness. Chop up the guts into small pieces, and scrape it off with a knife in to a small bowl.
    Jeonbokjuk (abalone porridge)
  5. Add the rice and the guts to a medium size pot. Mix them well, breaking up any lumps of guts. Add the sesame oil and stir until the rice starts to turn translucent over medium heat, about 5 minutes. Throw in the abalone pieces and stir for a couple more minutes.
    Jeonbokjuk (abalone porridge)
  6. Add 6 cups of water and bring it to a boil over medium high heat.
    Jeonbokjuk (abalone porridge)
  7. Reduce the heat to medium, and continue to boil, stirring occasionally (more frequently as the stock is reduced so the rice doesn’t stick to the bottom of the pot), for about 25 minutes.
    Jeonbokjuk (abalone porridge)
  8. At this point you can adjust the consistency of the porridge to your taste by adding more water, up to 1 cup. If adding more water, cook for a few more minutes, stirring well. Further reduce the heat to medium low heat as necessary. Add salt or soup soy sauce to taste right before serving.

Notes

The seasoned porridge can become watery over time, so the porridge should be seasoned right before serving.

7.6.8
9
https://www.koreanbapsang.com/2018/04/jeonbokjuk-abalone-porridge.html

The post Jeonbokjuk (Abalone Porridge) appeared first on Korean Bapsang.

Instant Pot Kimchi Jjigae (Stew)

$
0
0

Instant Pot Kimchi Jjigae (Stew)

Kimchi jjigae (김치찌개) is a classic Korean stew made with flavor-packed old kimchi! It absolutely is one of my favorite comfort foods of all time. Lately, I’ve been making it in my Instant Pot, and I really like how it turns out. The stew is flavorful and rich, and the texture of the kimchi turns out nice and soft in a fraction of the time. I’ve adapted my stovetop kimchi stew recipe for my 6 quart Instant Pot.

To develop extra flavor, I usually stir-fry the kimchi and pork before adding water or broth. The Saute mode of the Instant Pot comes in handy for this step.

Once the liquid is added, use the Soup mode for pressure cooking. The actual cooking time is substantially shorter than the stovetop method. But, the time saving benefit diminishes if you count the time for the Instant Pot to build up the pressure.

Instant Pot Kimchi Jjigae (Stew)

After the quick release of the pressure, add some tofu slices and scallions (and onion slices if you like) and cook for a few additional minutes, using the Saute button. If you don’t use tofu, you can wait for a few minutes for the natural pressure release, and then stir in the scallions.

When cooking with kimchi, you should always use fully fermented, sour kimchi. The older the better! If you don’t have old kimchi, don’t let that stop you from making this kimchi stew or other dishes made with kimchi. Your Korean market may carry commercially packaged kimchi called mukeunji (묵은지), meaning old kimchi.

If the kimchi is overly sour, add a teaspoon or two of sugar to the stew to balance out the sour taste.

I make kimchi stew mostly with fatty pork. It’s simply the best! However, I know some of you don’t like or eat pork. If so, use beef or canned tuna. You can cut the meat into large chunks if you like! You won’t have a problem with tough meat after it has been cooked in the Instant Pot. This reminds me, kimchi jjigae with pork ribs will be great cooked in the Instant Pot.

Instant Pot Kimchi Jjigae (Stew)

Instant Pot Kimchi Jjigae (Stew)

More recipes made with kimchi

Everything tastes better with kimchi, right? Try these other favorites: kimchi soondubu jjigae (soft tofu stew), tofu kimchi, kimchijeon (pancake), kimchi mandu (dumplings), kimchi fried rice, kimchi kongnamul guk, kimchi bibim guksu, kimchi ssambap, spaghetti with kimchi and kimchi jjim.

If you’re inspired to make some napa cabbage kimchi at home and let it get old for some of these dishes, here are my time tested pogi kimchi, mak kimchi and vegan kimchi recipes.

More Instant Pot recipes

Braised Oxtail (kkorijjim)Dakbokkeumtang (spicy chicken stew) and Boiled chicken and rice.

Instant Pot Kimchi Jjigae (Stew)

Instant Pot Kimchi Jjigae (Stew)

This Instant Pot adaptation of the classic Korean stew made with flavor-packed old kimchi is so flavorful and rich! The texture of the kimchi turns out nice and soft in a fraction of the time. If you don’t have an instant pot, see my stovetop kimchi stew recipe on the blog.

  • Ingredients:
  • 1-1/2 pounds well fermented kimchi (about 3 cups of cut kimchi packed)
  • 8 ounces fatty pork (or beef)
  • 1 tablespoon sesame oil
  • 1 to 3 teaspoons Korean red chili pepper flakes (gochugaru – adjust to taste)
  • 1/2 cup juice from kimchi (if available)
  • 2 cups of water* (1/2 cup more if not using kimchi juice)
  • 1 tablespoon soup soy sauce
  • 1 tablespoon minced garlic
  • 8 ounces tofu
  • 2 scallions
  • black pepper to taste
  • 1 to 2 teaspoons of sugar – optional
  1. Cut the meat and kimchi into bite sizes. Slice the tofu (about 1/2-inch thick), and roughly chop the scallions.
    Instant Pot Kimchi Jjigae (Stew)
  2. Push the Saute button of the Instant Pot. When it becomes hot, add the pork and kimchi along with the sesame oil and red pepper flakes until the kimchi is slightly softened and pork is no longer pink, about 5 minutes.
    Instant Pot Kimchi Jjigae (Stew)
  3. Add the kimchi juice, water, soup soy sauce, and garlic. Lock the lid, change it to the Soup mode, and adjust the time to 10 minutes. Set the steam valve to “Sealing”.
  4. When the Instant Pot beeps, turn the steam valve to “Vent” to quick release the pressure. Open the lid, and add tofu and scallions. Push the Saute button again, and boil for an additional 5 minutes or longer until the kimchi reaches the desired tenderness.
    Instant Pot Kimchi Jjigae (Stew)

For added flavor, save the water used to rinse rice, ssal ddeum mul, and use for the jjigae/stew. The water used to rinse rice is commonly used for Korean jjigae. Use the water from the second or third round of rinsing. Another option is to use anchovy broth (about 7 or 8 medium dry anchovies and one 3-inch square dried kelp boiled in 3 cups of water for 10 minutes).

The post Instant Pot Kimchi Jjigae (Stew) appeared first on Korean Bapsang.

Kkakdugi (Cubed Radish Kimchi)

$
0
0

Kkakdugi (cubed radish kimchi)

Kkakdugi (깍두기) is a kimchi made with Korean radish, mu (or moo, 무). It’s an easy kimchi to make! The radishes are first cubed and salted for a short time and then mixed with the seasonings. The name kkakdugi comes from how the radish is cut — cubed.

This recipe was originally posted in Nov. 2011. Here, I’ve updated the post with new photos and streamlined recipe steps.  

Although Korean radish, mu (or moo), is a cool weather vegetable, kkakdugi is enjoyed all year round! Korean radish is a variety of white radish and has firm crisp flesh and a slightly sweet and peppery taste. 

Summer radish can be slightly bitter. You can add more sugar than the recipe calls for to balance out the bitterness.

Kkakdugi (cubed radish kimchi)

The taste of kimchi depends a lot on the types, the quality, and the ratio of the seasoning ingredients. Each Korean household has its own ways.

Traditionally, various jeotgal (salted seafood) are used in kimchi for the distinct pungency and depth of flavors. Saeujeot (salted shrimp) and myulchiaekjeot (fish sauce made with anchovies) are the two that are most commonly used. I almost always use both of these in my kimchi. Sometimes, I also use fresh shrimp which is my mother’s secret ingredient for adding extra freshness to the kimchi flavor. In this updated recipe, I didn’t use it. However, if you can’t find saeujeot (salted shrimp) in your area, use some raw shrimp instead if you wish. 

Kkakdugi (cubed radish kimchi)

Kkakdugi (cubed radish kimchi)

You can enjoy kkakdugi with any Korean meal, but it’s especially good with a bowl of mild soup such as seolleongtang. It’s a delicious side dish that will add a robust spicy kick and some crunch to a meal!

More recipes made with Korean radish

Mu guk(soup)
Mu Doenjang Guk (Korean Soybean Paste Radish Soup)
Musaengchae (spicy radish salad)
Musaengchae (sweet and sour radish salad)
mu namul (stir-fried radish side dish)
Quick Dongchimi (Radish water kimchi)

Kkakdugi (Cubed Radish Kimchi)

Kkakdugi is an easy and quick kimchi to make. It’s a delicious side dish that will add a pungent kick and some crunch to your Korean meal!

  • 3 medium to large Korean radishes (about 6.5 pounds – see note 1)
  • 1/3 cup coarse sea salt (less if using finer salt)
  • 3 – 4 scallions (cut into about 1-inch lengths)

Seasonings

  • 2/3 cup gochugaru (고추가루, Korean red chili pepper flakes)
  • 1/4 cup saeujeot (새우젓, salted shrimp, finely minced – see note 2)
  • 2 tablespoons myulchiaekjeot (멸치액젓, fish sauce)
  • 3 tablespoons minced garlic
  • 1 teaspoon grated ginger
  • 2 tablespoons sugar (use more to taste or for summer radish)

Kitchen Tools

  • a large bowl (7 – 8 qt)
  • a large colander
  • kitchen gloves
  • 1 gallon or 2 half-gallon airtight container or jar
  1. Clean the radishes by scrubbing with a brush and/or scratching off the stubborn impurities with a small knife. Peel the skin only if necessary. You don’t need to peel if the skin is smooth and clean. Cut into 1-inch thick discs, and then cut each disc into 1-inch cubes, placing in a large bowl. (The cubes will look big but will shrink during the salting and fermentation processes.)

  2. Sprinkle the salt over the radishes and toss well to coat evenly. Let sit for about 30 – 40 minutes until the radish cubes have softened and released some liquid.
    kkakdugi (cubed radish kimchi)
  3. Meanwhile, prepare the seasoning ingredients. Mix everything well. Set it aside for a while for the red pepper flakes to dissolve a little and become pasty.
    kkakdugi (cubed radish kimchi)
  4. Drain the radishes in a colander and discard the liquid. Do NOT rinse. Rinsing will wash the flavor away. (The radishes still contain sufficient water content that will be released during the fermentation process. With this method, the resulting kkakdugi will have a nice thick juice.)
    kkakdugi (cubed radish kimchi)
  5. Place the radishes back in the bowl. Add the seasoning mix and scallions.
    kkakdugi (cubed radish kimchi)
  6. Mix everything well, preferably by hand, until the radish cubes are evenly coated with the seasonings. (Make sure to wear kitchen gloves.) Taste a little bit of the seasoning off of a radish cube. It should be a little too salty to eat as is. Add more salted shrimp or fish sauce if necessary. (The radishes will be a little dry at this point, but they will release water during the fermentation process.)kkakdugi (cubed radish kimchi)
  7. Store in an airtight container or jar. Before closing the lid, press the kkakdugi down hard with your hand to remove air pockets between the radish cubes. Leave it out at room temperature for a full day or two, depending on the room temperature and how fast you want your kimchi to ripe. Then, store in the fridge. Kkakdugi tastes best after a week or two in the fridge to fully develop the flavors. It maintains great flavor and texture for several weeks. 

1. Buy the ones with smooth skins that are firm and heavy.
2. If salted shrimp is not available, increase the fish sauce by the same amount.

*Originally posted in Nov. 2011 and updated here with new photos and streamlined recipe steps. 


The post Kkakdugi (Cubed Radish Kimchi) appeared first on Korean Bapsang.

Doenjang Jjigae (Korean Soybean Paste Stew)

$
0
0
Doenjang jjigae (Korean soybean paste stew)
 
Doenjang jjigae (된장찌개) is a staple Korean stew made with doenjang (된장), fermented soybean paste. It is one of the most representative dishes of everyday home-cooked Korean meals. Depending on the other ingredients added, you can make endless variations of the stew. This recipe is made with fatty pork, which is the most common version.  

This recipe was originally posted in April 2010. I’ve updated it here with minor changes to the recipe and new photos.  

Doenjang is essential in Korean cuisine, and every Korean home has it all year round along with other staple condiments such as gochujang (fermented chili pepper paste). Its deep, rich flavor is created by several months of fermentation and aging. Doenjang is traditionally homemade, but there are many commercial brands available at Korean markets.  If you’re lucky, you may be able to find locally made home-style doenjang that’s sold at some Korean markets. 
 
Doenjang jjigae (Korean soybean paste stew)
 
Tofu is typically added along with some vegetables. For vegetables, I usually use Korean white radish (mu, 무), zucchini, onion, and fresh green and/or red chili pepper. It adds flavor and helps create a clean, refreshing broth. You can also add potatoes if you like slightly thicker stews. Mushrooms will be a good addition as well. 
 
Tips for delicious doenjang jjigae
By now, you know Korean home cooks save the water used to rinse rice (ssalddeumul, 쌀뜨물) and use it as a stew or soup base. The rice water adds starch to the stew and works as a binding agent between the soybean paste and the broth. It also enhances the flavor of the doenjang. If you didn’t have to make rice, or forgot to save the water, add a little bit of flour or rice powder to tap water.
 
Use a small amount of vinegar at the end to make doenjang jjigae even more delicious! It will brighten the doenjang taste in the stew.
 
This hearty stew is my husband’s all-time favorite meal and my go-to dish when I want to make a quick satisfying meal. The distinct aroma of sizzling doenjang makes my mouth water every time I make this dish!
 
Try these other variations

Seafood doenjang jjigae
Beef doenjang jjigae

Doenjang jjigae (Korean soybean paste stew)

Doenjang Jjigae (Korean Soybean Paste Stew)

A staple Korean stew made with fermented soybean paste (doenjang)

  • 3 ounces pork (preferably fatty pork) (shoulder, or loin (or use beef, clams or shrimp if desired))
  • 9 ounces tofu
  • 1/2 medium zucchini
  • 2 ounces Korean radish (mu)
  • 1/4 medium onion
  • 1 chili pepper (green or red)
  • 1 scallion
  • 2 tablespoons Korean soybean paste (doenjang)
  • 1 teaspoon Korean chili pepper flakes (gochugaru) (gochugaru)
  • 1 teaspoon minced garlic
  • 2 cups water (see note)
  • 1 teaspoon vinegar
  1. Cut the tofu and zucchini into about 1-inch cubes. Cut the radish into thin small squares. Thinly slice the onion and pepper. Roughly chop the scallion. Slice the meat into thin strips.

  2. Preheat a small pot with a little bit of oil. Sauté the meat, soybean paste, and chili pepper flakes, over medium heat for 3 to 4 minutes.

  3. Add the water (or anchovy broth) and stir well to dissolve the soy bean paste. Add the radish. Boil over medium high heat for 4 to 5 minutes.

  4. Add the onion, garlic, tofu, zucchini, and chili pepper. Boil for an additional 5 to 6 minutes. Throw in the scallion with a minute or two remaining.

  5. Serve with rice while it is still bubbling from the heat.

Use the water used to rinse rice, ssalddeumul for jjigae/stew.  

Originally posted in April 2010 and updated here with an improved  recipe and new photos. 

The post Doenjang Jjigae (Korean Soybean Paste Stew) appeared first on Korean Bapsang.


Cucumber Kimchi (Oi Kimchi)

$
0
0

Cucumber kimchi (oi kimchi)

If you ask me which is the easiest kimchi you can try to make this summer, I’d say this cucumber kimchi (oi kimchi, 오이김치)! It’s summer, and we all should be eating more cucumbers. This recipe is super easy! Simply cut up the cucumbers, salt briefly, and then mix with the seasoning!

As such, it’s an excellent alternative to the stuffed cucumber kimchi, oi sobagi (오이 소박이), if you don’t want to bother stuffing the cucumbers.

Because the cucumbers are cut similar to cubes, this cucumber kimchi is also called oi kkakdugi (오이깍두기), named after cubed radish kimchi — kkakdugi.

Cucumber kimchi (oi kimchi)

I originally posted this recipe in August 2011. This post is a long overdue update with new photos, more information, and an improved recipe.

Cucumbers and other vegetables

As mentioned in the stuffed cucumber kimchi recipe, use Korean cucumbers if available. Otherwise, use a thin-skinned variety with crisp flesh and small seeds such as Kirby, Persian, Japanese, or English cucumbers. If you have a choice, select cucumbers that are firm and slender. Thicker cucumbers tend to have more seeds and softer flesh.

In this update, I also used Korean garlic chives (buchu, 부추), which is commonly added to oi kimchi in Korea. It’s easier now to find garlic chives around here, and summer garlic chives are tender and delicious. You can leave them out if you can’t find them. Simply use some scallions instead.

A little bit of julienned carrot or red pepper will give the kimchi a nice pop of color.

Cucumber kimchi (oi kimchi)
What about the seasoning?

Because this is kimchi, unlike oi muchim, I use salted shrimp (saeujeot/saewujeot, 새우젓) and fish sauce (myeolchiaekjeot, 멸치액젓). The ratio of these two ingredients is always a matter of preference among Korean cooks. In general, more salted shrimp is used than fish sauce in summer kimchi for a lighter taste, but it’s really up to you!

How to make cucumber kimchi vegan?

This is actually a question for all kimchi types. There are various ways to make vegan kimchi depending on kimchi types and personal preference. For this cucumber kimchi, use Korean soup soy sauce (gukganjang, 국간장) as a substitute for salted shrimp and/or fish sauce. Use an equal amount and supplement with salt as necessary, or simply use salt to season the cucumbers.

How long will this kimchi stay good?

You can eat this kimchi on the same day you make it. However, it will get better over a few days. If you like it ripe, leave it out at room temperature overnight to expedite the fermentation process. Then, refrigerate. It will be good for a week or two, depending on the salt level.

More cucumber recipes 

Oi muchim (spicy cucumber salad)
Oi sobagi (stuffed cucumber kimchi)
Oiji (Korean pickled cucumbers)
Oi naengguk (chilled cucumber soup)
Oi bokkeum (stir-fried cucumbers)

Cucumber kimchi (oi kimchi)

Cucumber kimchi (Oi kimchi)

Super easy kimchi made with cucumbers! Crisp, crunchy, and delicious!

  • 3 Korean cucumbers or 5 – 6 Kirby pickling cucumbers (about 1.5 pounds)
  • 1 tablespoon coarse sea salt (less if using table salt)
  • 2 to 3 ounces garlic chives buchu (부추)
  • 1/4 medium onion

Seasonings:

  • 2 to 3 tablespoons Korean red chili pepper flakes gochugaru (고추가루)
  • 1 tablespoon salted shrimp saeujeot (새우젓)
  • 1 tablespoon or fish sauce (myulchi aekjeot (멸치액젓))
  • 2 teaspoons minced garlic
  • 1/2 teaspoon grated ginger
  • 1 tablespoon sugar
  • 1 teaspoon roasted sesame seeds
  1. Cut the cucumbers crosswise into about 1-1/2 inch-long pieces. Quarter each piece lengthwise. Sprinkle the salt evenly all over the cucumber pieces. Let them sit for about 30 minutes.
  2. Drain the cucumbers well in a strainer to remove any water released. Do not rinse the cucumbers.
  3. Cut the garlic chives into 1-1/2 inch long pieces. Thinly slice the onions.
  4. Add the onions and garlic chives along with all the remaining ingredients to the salted cucumbers. Toss everything until the cucumbers are well coated with the seasoning. The cucumbers will look dry at this point, but will release moisture as they absorb the seasonings.

You can start eating this kimchi on the same day. If you like it ripe, leave it out at room temperature for a few hours to overnight to expedite the fermentation process. Then, refrigerate.

The post Cucumber Kimchi (Oi Kimchi) appeared first on Korean Bapsang.

Samgyetang (Ginseng Chicken Soup)

$
0
0

Ginseng chicken soup recipe

This boiling hot ginseng chicken soup, called samgyetang (삼계탕), is an iconic summer dish in Korea. Sam (삼) refers to ginseng (insam, 인삼), gye (계) means chicken, and tang (탕) is soup. It’s extremely popular as a nourishing food which helps fight the summer heat. As the Korean saying goes, eating the hot soup is “fighting the heat with heat.” 

On sambok (삼복) days, it’s a Korean tradition to eat foods that are healthy and restorative. Samgyetang is a popular choice. Sambok days are 3 distinct days that mark the hottest summer period. Based on the lunar calendar, they are chobok (초복, beginning), jungbok (중복, middle) and malbok (말복, end). Tomorrow is malbok, which means the summer is winding down!

Hope you get to enjoy samgyetang before the summer goes by. But, don’t worry about it even if you don’t get to, this ginseng soup is a nutritious, comfort food which you can enjoy all year around!

In this post, I’m updating my samgyetang recipe which was originally posted in August 2014 with new photos, answers to frequently asked questions and minor changes to the recipe. Here’s everything you need to know about Korean ginseng chicken soup!

Ginseng chicken soup recipe


Ginseng for samgyetang

Ginseng is highly prized for its medicinal benefits, including boosting energy and the immune system. 

If you can’t find ginseng,  you can omit the ginseng from this recipe and still make a tasty chicken soup, although, without ginseng, it can’t be called ginseng soup. When I don’t have ginseng, I make another type of chicken soup called dak gomtang (닭곰탕). 

Korean markets around here sell fresh ginseng in the summer for samgyetang. I usually buy a pack and freeze the leftovers. You can also use dried ginseng roots after soaking in the water to soften.

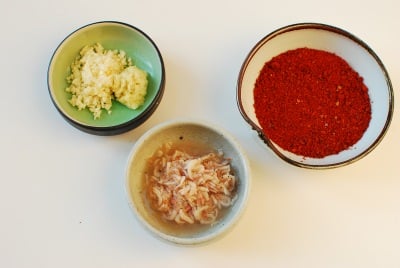
Garlic, ginger, and jujubes (daechu, 대추) are other common ingredients. Jujubes are quite sweet, so do not use too many of them. Sometimes, other medicinal herbs such as milk vetch roots (hwanggi, 황기) are added as well as chestnuts and ginkgo nuts. 

For the convenience, you can find samgyetang kits in Korean markets. They usually contain dried ginseng, jujubes, dried chestnuts, sweet rice, etc. If you choose to use a kit, follow the package instructions to prepare the ingredients (such as soaking) before using. 

How to stuff the chicken

Samgyetang is made with a small, young chicken (known as Cornish hen in America) for its tender and tasty meat. If you can’t find a Cornish hen, use the smallest chicken you can find, adjusting cooking time. If you need to feed more people, it’s better to cook two small chickens in a larger pot rather than one large one. It takes much longer to cook the inside if the chicken is big, which will cause the outside to be overcooked. 

The chicken is stuffed with soaked sweet rice (aka glutinous rice), chapssal (찹쌀). Some people stuff the chicken with ginseng, jujubes, etc., along with the rice, but I  boil them in the broth to draw out the maximum flavors. Be sure to leave enough room in the cavity for the rice to expand in volume as it cooks.

Samgyetang recipe 2

How to make the soup more flavorful

In Korea, the restaurants specializing samgyetang are very popular. Some are also highly sought-after by tourists. Those restaurants usually feature a deeply flavored, thickened soup. They use all sorts of medicinal herbs and aromatic vegetables, and start with well-prepared chicken stock to boil the chicken. 

At home, we don’t generally go that far. But, if you like a deeper flavor, start with good quality chicken stock (commercially prepared or homemade). I sometimes make chicken stock with the roast or boiled chicken remains and use it as a base for samgyetang. 

To make the soup slightly thick, soak more sweet rice than the amount called for the stuffing and then add to the water or chicken stock while boiling the chicken. It would be even better if you blend the rice with a little bit of water for a creamier texture. The starch of the sweet rice will thicken the soup slightly and give a bit of sweetness to the soup. 

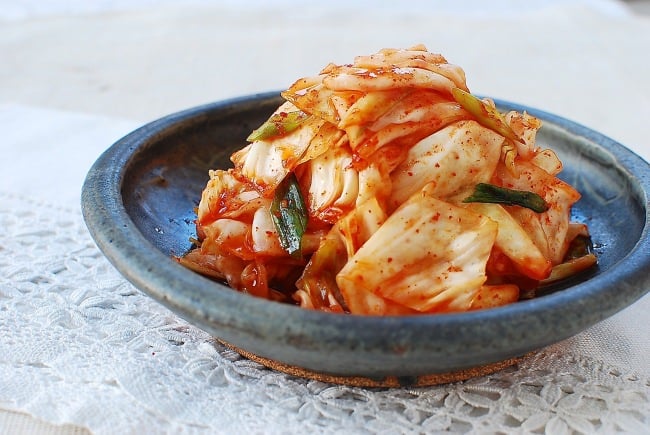
How to serve samgyetang

At restaurants, the whole chicken is served uncut as one serving, but it can easily be two servings. The soup is usually not seasoned while being cooked. It’s served with salt and pepper on the side, so each person can season the broth to taste and  use the remainder to dip the meat in.

The ginseng flavored meat is tasty and tender, and the broth is rich and delicious. Also, the sticky rice stuffing that’s infused with the chicken and ginseng flavors is to die for. If you’re trying it for the first time, samgyetang will be nothing like any other chicken soup you’ve had before.

More chicken soup recipes

Dak Gomtang (Korean Chicken Soup) 
Dak Kalguksu (Chicken Noodle Soup)
Chogyetang (Chilled Chicken Soup)
Dakgaejang (Spicy Chicken Soup with Scallions)
Slow Cooker Chicken Soup with Napa Cabbage
Pressure Cooker Nurungji Baeksuk (Boiled Chicken with Rice)

Samgyetang (ginseng chicken soup)

Ginseng chicken soup recipe

Samgyetang (Ginseng Chicken Soup)

A classic Korean chicken soup made with a small, whole chicken and ginseng.

  • 1 cornish hen ((about 1.5 to 2 pounds))
  • 1 fresh ginseng root (or dried ginseng, rehydrated)
  • 3 tablespoons sweet rice (2 to 3 tablespoons more to boil with liquid if desired) (– soaked for 1 hour (yields about 4 tablespoons soaked))
  • 5 – 6 plump garlic cloves
  • 1 thin ginger slice ((about 1 inch))
  • 2 to 3 jujubes, daechu (대추) ((dried red dates))
  • 1 scallion white part
  • 5 cups of water (or good quality chicken stock)
  • 2 scallions (finely chopped, to garnish)
  • salt and pepper to taste
  1. Clean the chicken. Do not cut off the neck and/or tail, if they are still attached. They help keep the rice inside the cavity. Place the cleaned chicken on a cutting board or a large plate. Clean the inside of the cavity with a paper towel to remove any blood. Fold the attached neck into the cavity to close the hole. 

  2. Stuff the cavity with the sweet rice and a couple of garlic cloves, leaving room (about 1/4 of the cavity) for the rice to expand as it cooks.
  3. To keep the rice inside the cavity while being cooked, use of one of these two methods: (1) Make a small cut through the thick skin part between one thigh and the cavity opening, but not too close to the edge. Then, use your finger to expand the hole enough to fit the end part of a leg. Bring the other leg over, and insert the end part through the hole to keep the legs crossed together, tucking the tail in to close the opening (see the photos above); or (2) Simply cross the legs and tie together with kitchen twine. Tightly close the cavity with a toothpick if necessary. 

  4. In a medium size pot, place the chicken and add 4 to 5 cups (or enough to cover most of the chicken) of water or chicken stock. Add the garlic, ginger, jujubes, and ginseng. If the chicken came with the neck that’s been cut off, add to the pot. Also add the extra sweet rice to thicken the soup, if using. Blend the extra soaked rice with a little bit of water for a creamier texture, if desired.

  5. Bring it to a boil over medium high heat. Skim off the foam on top. Cover, and boil for 10 to 15 minutes. Reduce the heat to medium low and boil, covered, for about 20 to 25 minutes, depending on the size of the chicken. See the note. 

  6. Serve piping hot with the chopped scallions and salt and pepper on the side so each person can season to taste.

This recipe is an update of the original recipe posted in August 2014.

You can also use a samgyetang kit (commercially packaged dry ingredients for samgyetang). Follow the package instructions to prepare the dry ingredients to use in this recipe. Usually soaking is required.

The minimum cooking time is for a chicken about 1.5 pounds. 

The post Samgyetang (Ginseng Chicken Soup) appeared first on Korean Bapsang.

Hobak Buchim (Zucchini Pancakes)

$
0
0
Korean savory pancakes made with summer zucchini are quick and easy to make and so delicious! Make these for a snack, an appetizer, or a light meal!
 
Hobak buchimgae (Korean zucchini pancake)

What’s your favorite things to make with summer’s bountiful zucchinis? These Korean savory pancakes, called hobak buchim (호박부침) or buchimgae (부침개), are quick and easy to make and so delicious with summer zucchini! Perfect as a snack, an appetizer, or a light meal!

Over the years, I posted several different Korean savory pancakes. They are essential in Korean cuisine and made with all sorts of ingredients — kimchi (kimchijeon, 김치전), seafood and scallions (haemul pajeon, 해물파전), potato (gamjajeon, 감자전), garlic chives (buchujeon, 부추전), mung beans (nokdujeon, 녹두전),  and many more.  

If you wonder why the zucchini version is not called hobakjeon, it’s not wrong to call it hobakjeon, but hobakjeon generally refers to zucchini rounds that are pan-fried in egg batter.

This is a recipe I make over and over every summer. It was originally posted in August 2013. Here, I’m updating it with more information, new photos and minor changes to the recipe.  

Hobak buchimgae (Korean zucchini pancake)

Zucchini and Vegetables

You can make these zucchini pancakes simply with a zucchini, but I like to throw in thinly sliced sweet onion and green hot chili peppers to complement. The onion adds delicious sweetness to the pancakes, and the hot chili peppers give a nice spicy kick, kal-kal-han-mat (칼칼한맛) as Koreans say. Or, try a little bit of perilla leaves (kkaennip, 깻잎) or garlic chives (buchu, 부추).   

Since zucchini contains lots of water, you will need to salt the julienned zucchini and squeeze out the liquid as much as you can, reserving the liquid for the batter. Squeezing will give a little bit of crunch to the zucchini. The zucchini-flavored liquid along with a lightly beaten egg is all you need for the batter.

Korean savory pancake batter

As I mentioned in the other Korean pancake recipes, commercially available savory pancake mix (buchimgaru, 부침가루) is best to use for Korean savory pancake mix. The ready-made mix typically includes flour, cornstarch and/or rice powder for crispy pancakes. It’s flavored with garlic and onion powder and seasoned with salt. If unavailable, use flour with a couple of tablespoons of cornstarch for this recipe. The cornstarch gives a slightly elastic texture and crispness to the pancakes.

This recipe makes 6 to 8 small pancakes. You can make 2 large pancakes instead if you want, and cut into small pieces before serving, or simply tear with the chopsticks to eat.

Hobak buchimgae (Korean zucchini pancake)

More zucchini recipes:

Modeumjeon (Fish, Shrimp and Zucchini Pan-fried in Egg Batter)
Hobak Bokkeum (Stir-fried Zucchini)
Hobak Gochujang Jjigae (Korean Spicy Zucchini Stew)
Gaji Hobak Muchim (Grilled Eggplant and Zucchini with Korean Seasoning)
Doenjang Jjigae (Korean Soybean Paste Stew)

Did you make and love this Korean zucchini pancake recipe? Please rate the recipe below in the recipe card or in the comment section! And make sure to share your creations by tagging me on Instagram! Stay in touch by following me on Pinterest, Twitter, Facebook, and Instagram

Hobak Buchim (Zucchini Pancakes)

Korean savory pancakes made with zucchini!

  • 1 medium zucchini (about 8 ounces)
  • 1/2 teaspoon salt
  • 1/4 medium sweet onion (thinly sliced)
  • 2 green hot chili peppers (thinly sliced)
  • 1/2 cup buchim garu (Korean savory pancake mix) (or flour (see note))
  • 1 large egg
  • vegetable or canola oil for frying

Dipping Sauce:

  • 1 tablespoon soy sauce
  • 1 teaspoon vinegar
  • 1 tablespoon water
  • 1/2 teaspoon sugar
  • pinch of black pepper
  • pinch gochugaru (Korean red chili pepper flakes)
  1. Cut the zucchini into matchsticks. Place them in a bowl, and sprinkle with 1/2 teaspoon of salt. Let sit for about 10 minutes until wilted and released some liquid. Squeeze the liquid out from the zucchini as much as possible, reserving the liquid in the bowl. Set the zucchini aside. 

  2. Add the egg and pancake mix (or flour) to the bowl with the zucchini squeezed mix. Mix everything well with a spoon, and then combine with the zucchini, onion and chili peppers. The zucchini mix may look stiff when mixing, but it will become more liquidly after a few minutes. If it’s still too stiff, mix in 2 to 3 tablespoons of water.

  3. Heat a skillet with two tablespoons of oil over medium high heat. Add about 2 heaping tablespoons of the batter and spread it evenly into a thin round shape. Depending on the size of your pan, you can cook 3 to 4 pancakes at once. Reduce the heat to medium, and cook until the bottom is light golden brown, about 2 minutes on each side. Repeat the process with the remaining batter. Serve hot with a dipping sauce.

Use 5 tablespoons all purpose flour with 3 tablespoons cornstarch if available.

This recipe makes 6 to 8 3-inch round pancakes, or two large pancakes.

This recipe was originally posted in August 2013 and has been updated here with minor changes. 

The post Hobak Buchim (Zucchini Pancakes) appeared first on Korean Bapsang.

Tteokbokki (Spicy Stir-fried Rice Cakes)

$
0
0

Tteokbokki, a spicy stir-fried rice cake dish, is a highly popular Korean street food and a delicious comfort food you can easily make at home. The spicy, slightly sweet, and chewy rice cakes are simply addictive!

Tteokbokki (Korean spicy stir-fried rice cake)
What is tteokbokki?

Tteokbokki (or ddeokbokki), 떡볶이, is a beloved Korean dish with many variations and a rich history. Literally translated as “stir-fried rice cake”, tteokbokki is made with garaetteok, a cylinder-shaped white rice cake. This spicy rice cake dish is enormously popular as a street food and also often enjoyed at home

Unlike gungjung tteokbokki, which has been around for hundreds of years, the red spicy tteokbokki has a relatively short history. It was developed in 1953, the year the Korean War ended, by a woman named Ma Bok-rim in the Sindang-dong neighborhood in Seoul. The chewy rice cake in a spicy gochujang sauce instantly became popular as an affordable comfort snack.

The dish has continued to evolve over time. Other ingredients such as fishcake, ramen, dumplings, egg, seafood and even cheese have been added, and it has become highly commercialized by small vendors and restaurants. 

Korean rice cake with a red, spicy sauce

By the time I was growing up as a child, tteokbokki had become quite popular as a street food. The tteokbokki I grew up with was in its classic form without all the add-ins you see today. I have fond memories of eating it from street carts or market stalls as an after-school snack.

This tteokbokki recipe was originally posted in March 2012. I’ve updated it here with more information, new photos and minor changes to the recipe. 

Tteokbokki rice cake

Garaetteok (가래떡), a cylinder-shaped white rice cake, is used in various ways in Korea. The thick type is  sliced into thin oval shapes for making tteokguk (rice cake soup). The thinner, shorter type is used for tteokbokki, hence the name tteokbokki tteok (떡볶이떡).

You can use either one for this recipe, but the thick type needs to be cut thinner and shorter for this recipe, or it will take much longer to cook.

Tteokbokki rice cakes are sold freshly made, refrigerated, or frozen at Korean markets. They come in various shapes and sizes. Needless to say, locally made fresh ones are the best ones to use, but good quality refrigerated ones are fine as well. Avoid buying frozen ones: they tend to be dry, easy to crack and not chewy. 

Korean rice cake with a red, spicy sauce

Tteokbokki sauce

The spicy tteokbokki sauce is usually made with a combination of gochujang (고추장, Korean red chili pepper paste) and gochugaru (고추가루, Korean red chili pepper flakes). Some people simply make it with gochujang, and some only use gochugaru. 

If you don’t like it too spicy, simply use gochujang without any red chili pepper flakes. To make it really spicy, adding more red chili pepper flakes is the way to increase the heat level without altering the saltiness and sweetness.

In this updated recipe, I provided another ratio of gochujang and gochugaru for you to try. It gives a cleaner-tasting spicy kick. 

In any case, be aware that the level of spiciness varies widely among different brands of gochujang and gochugaru. 

Tteokbokki (Korean spicy stir-fried rice cake)

Other ingredients

As mentioned above, other ingredients such as ramen, dumplings, boiled eggs, seafood, and even cheese are often added to this dish. 

Here, I kept the recipe simple with eomuk (fish cake), green cabbage, and scallions, which is how we used to eat tteokbokki growing up. 

Anchovy broth is typically used for a depth of flavor, but you can simply use water if you like. For vegan tteokbokki, use water or vegetable broth and omit the fish cake.

More tteokbokki variations

Gungjung tteokbokki
Seafood cheese tteokbokki
Soupy tteokbokki

Did you make and love this tteokbokki recipe? Please rate the recipe below in the recipe card or in the comment section! And make sure to share your creations by tagging me on Instagram! Stay in touch by following me on PinterestTwitterFacebook, and Instagram


Korean spicy rice cakes

Tteokbokki – Spicy stir-fried rice cakes

Spicy stir-fried Korean rice cakes

  • 1 pound tteokbokki tteok (떡볶이 떡 (about 24 3-inch long rice cake pieces) – See note.)
  • 1 sheet eomuk 어묵 (fish cake – aka oden)
  • 4 ounces green cabbage (yangbaechu, 양배추)
  • 1 – 2 scallions
  • 3 cups anchovy broth (or water)
  • 3 tablespoons Korean red chili pepper paste (gochujang, 고추장 – see note))
  • 1 – 3 teaspoons Korean red chili pepper flakes (gochugaru, 고추가루 preferably finely ground) – see note)
  • 1 tablespoons soy sauce
  • 2 tablespoons sugar ((or use 1 tablespoon if you like it less sweet))
  • 1 tablespoon corn syrup (or 1 more tablespoon sugar)
  • 1 tablespoon minced garlic
  1. Make anchovy broth (see note). Soak the rice cakes for about 20 minutes if hardened or refrigerated. Cut the fish cake, cabbage, and scallions into about 2-inch long pieces.
    Korean spicy rice cakes
  2. Add the anchovy broth (or water) to a large pan. Stir in the sauce ingredients. Bring it to a boil over medium high heat, stirring to dissolve the red chili pepper paste (gochujang).
    tteokbokki
  3. Add the rice cakes. Boil until the rice cakes become very soft and the sauce is thickened, about 8 – 10 minutes. Stir frequently so the rice cakes don’t stick to the bottom of the pan.
    Korean spicy stir-fried rice cakes
  4. Add the vegetables and fish cakes. Continue to boil, stirring constantly, for an additional 4 – 6 minutes. Depending on rice cakes, you may need more time to reach a desired level of softness. Add more broth or water as necessary. Taste the sauce, and adjust the seasoning if needed. Serve immediately.
    spicy stir-fried rice cakes

1. You can find tteokbokki rice cakes fresh, refrigerated, or frozen at Korean markets. Locally made fresh rice cakes are the best ones to use, but good quality refrigerated ones are okay too. Try avoiding frozen ones if you have other options.

2. Another combination I like that you should try: 2 tablespoons gochujang, 2 tablespoons finely ground gochugaru, and 1-1/2 tablespoons soy sauce. Everything else stays the same. 

3. Finely ground gochugaru works better with this recipe. You can grind your normal gochugaru in a spice grinder to make it finer. 

4. Tteokbokki doesn’t reheat well in the microwave. Reheat any leftovers, along with a little bit of broth or water, in a small pan over low heat.

5. This recipe is an update of the tteokbokki recipe that was originally posted in March 2012. I’ve updated it here with more information, new photos, and minor changes to the recipe.  

The post Tteokbokki (Spicy Stir-fried Rice Cakes) appeared first on Korean Bapsang.

Gimbap (Korean Seaweed Rice Rolls)

$
0
0

Gimbap (or kimbap) is the most popular on-the-go meal in Korea! Learn how to make classic gimbap at home with my step-by-step guide!

Korean seaweed rice rolls with beef and vegetables

What is gimbap (or kimbap)? 

Gimbap (김밥) is a Korean seaweed rice roll filled with a variety of delicious fillings. Gim is dried sheets of seaweed, and bap means rice. 

We all grew up on these rice rolls. They were a must for our school field trips and outdoor activities as well as family road trips! Whether it’s the anticipation the night before or watching the early morning preparation by mom to pack these in lunch boxes, there is no other dish that takes me back to my childhood like these gimbap rolls!

Today, gimbap is the most popular on-the-go meal in Korea. They are practically sold everywhere and are popular with adults and kids alike. Try them yourself and be prepared to fall in love with these delicious Korean rice rolls.

Korean seaweed rice rolls with beef and vegetables

This gimbap recipe was originally posted in May 2012. I’ve updated it here with more information, new photos and minor changes to the recipe. 

There are many variations of gimbap these days, but the best one for me is classic gimbap my mother used to make for us on our field trip/picnic days.

It takes some time to prepare the individual fillings, but the process is easy and fun. 

Gimbap rice

Gimbap rice is typically made with white, short grain rice. For healthier options, you can mix in some brown rice or multi-grain rice. 

It’s important to cook the rice slightly drier than normal by using a bit less water. 

Traditionally, gimbap rice is lightly seasoned with sesame oil and salt for a nutty flavor and a savory note.

three gimpab rolls (Korean sushi rolls) with seasoned burdock, veggies and eggs, stacked on top of each other

Gimbap gim (seaweed sheets for gimbap)

For making gimbap, seaweed sheets need to be slightly thick to be able to hold the rice and all the fillings. They are also lightly roasted. You can find seaweed sheets specially prepared for gimbap at Korean markets. 

Gimbap fillings

Although gimbap fillings have evolved to include all sorts of things, the classic ingredients are yellow pickled radish (danmuji), eomuk (fish cake), carrots, spinach, eggs, and beef. You can use any tender cut of beef. Thin bulgogi meat or ground beef works fine as well.

Braised burdock root (우엉) is also commonly used in classic gimbap. You can usually find packages burdock root pre-prepared for gimbap next to yellow pickled radishes (danmuji). Or, you can make your own, using my recipe.

The fillings are individually seasoned and cooked, yielding an interesting combination of textures and flavors.

Everything is well seasoned, so gimbap typically is not served with a sauce.

Rolling gimbap

How hard is the rolling process? It takes some practice, but don’t be scared! You’ll find it much easier with your second roll. Just remember to roll it tightly by putting firm, even pressure with your hands all over the roll. 

Korean seaweed rice rolls with beef and vegetables

 Tips for the perfect gimbap: 

Freshly cooked rice is best for making gimbap. Start preparing the recipe by making the rice, and mix with sesame oil and salt while the rice is still warm. 

Wet your fingers before spreading the rice onto the seaweed to prevent the rice from sticking to your hands. It’s easiest to have a small bowl with water next to your rolling-station so that you can wet your hand in between rolls.

Use a sharp knife for cutting your rolls. You need to make a clean slicing motion and make the full slice in one go without pressing on the roll. 

Store your sliced gimbap in an airtight container. Gimbap is best eaten on the day it’s made, but you can keep it in the fridge and reheat either in the microwave or in a pan. Sometimes, we dip refrigerated gimbap in egg batter and pan fry. A delicious way to revive gimbap!

More gimbap recipes

Tofu gimbap – vegan gimbap
Mini gimbap (Mayak gimbap)
Tuna gimbap
Myulchu gimbap

Did you make and love this gimbap recipe? Please rate the recipe below by either clicking the stars or with a comment! And make sure to share your creations by tagging me on Instagram! Stay in touch by following me on PinterestTwitterFacebook, and Instagram.

gimbap recipe

Gimbap (Korean dried seaweed rice rolls)

Gimbap (or kimbap) is Korean rice rolls. The sesame oil flavored rice and colorful fillings are rolled in a seaweed sheet. Learn how to make classic gimbap at home with my step-by-step guide!

  • 2 cups uncooked short grain rice (standard measuring cup not the cup that comes with a rice cooker)
  • 1 tablespoon sesame oil
  • salt to taste (start with 1/2 teaspoon)

For the beef

  • 8 ounces lean tender beef, cut into 1/2 inch-thick long strips ((or bulgogi meat or ground beef))
  • 2 teaspoons soy sauce
  • 1 teaspoon rice wine ((or mirin))
  • 1 teaspoon sugar
  • 1 teaspoon sesame oil
  • 1/2 teaspoon minced garlic

For the vegetables

  • 1 bunch spinach, about 8 ounces
  • 1 teaspoon sesame oil
  • salt to taste – about 1/4 teaspoon
  • 2 medium carrots, julienned (or 1/2-inch thick long strips)
  • 5 yellow pickled radish (danmuji, 단무지) strips, 1/2-inch thick

For the fish cake

  • 1 sheet fish cake – eomuk (어묵)
  • 1 teaspoon soy sauce
  • 1/2 teaspoon sugar
  • 1/2 teaspoon sesame oil
  • 2 eggs
  • 5 gimbap gim (김밥용 김), seaweed sheets
  1. Cook the rice using a little less water than usual. (Freshly cooked rice is best for gimbap.)
  2. Cut the beef into thin strips (about 1/2-inch thick). Mix well with the next 5 seasoning ingredients. Stir-fry over medium-high heat until cooked through, 2 – 3 minutes.
    gimbap-recipe
  3. Bring a large pot of water to a boil over high heat and prepare an ice bath. Blanch the spinach, place immediately in the ice bath, then squeeze out water. Season with the sesame oil and salt.
    gimbap-recipe 4
  4. Julienne the carrots. Heat a lightly oiled pan over medium-high heat. Stir-fry the carrots until softened. Lightly season with a pinch of salt.
    gimbap-recipe 5
  5. Cut the pickled radish lengthwise into 1/2-inch thick strips (unless you bought a pre-cut package).
    gimbap-recipe 8
  6. Crack and beat the eggs, in a bowl with a spoon or a fork. Stir in a pinch of salt. Heat a small non-stick pan over medium-low heat. Add the eggs to the pan. When the bottom is set, flip it over. Transfer to a cutting board. Cut lengthwise into 3/4-inch thick strips. 
  7. Cut the fish cake lengthwise into 3/4-inch thick strips. Heat the pan with a little bit of oil over medium heat. Stir fry with the soy sauce, sugar, sesame oil and a little bit (about 1 teaspoon) of vegetable oil over medium heat until softened, about 2 minutes.
    gimbap-recipe 7
  8. Arrange all the ingredients together on a plate.When all the other ingredients are ready, remove the rice from the rice cooker.
    gimbap-recipe 15
  9. While the rice is still hot, add the sesame oil and salt. Mix well by lightly folding with a rice paddle or large spoon until evenly seasoned. Add more salt to taste. The rice will cool down during this process and be ready to be used.
    gimbap-recipe 9
  10. Put a sheet of nori, shiny side down and longer side towards you, on a cutting board or a bamboo mat if available. Spread about 3/4 cup to 1 cup of rice evenly over the seaweed sheet, using a rice paddle or your fingers preferably.
    gimbap-recipe 10
  11. Lay the prepared ingredients on top of the rice close to the side toward you.
    gimbap-recipe 11
  12. Lift the entire bottom edge with both hands and roll over the filling away from you, tucking in the filling with your fingers.
    gimbap-recipe 11(1)
  13. Put firm pressure over the roll with the help of the bamboo mat, if using, to close everything in tightly. Then, continue to roll again, putting pressure evenly over the roll using both hands.
    gimbap-recipe 14
  14. Rub or brush the roll with a little bit of sesame oil for extra flavor and shiny look. Apply a little bit of sesame oil to a sharp knife. (This will keep rice from sticking to the knife. Repeat as necessary after each cut. Wipe the knife with a damp towel if the rice still sticks.) Cut the roll into 1/2-inch thick bite sizes.
    gimbap-recipe 13

The post Gimbap (Korean Seaweed Rice Rolls) appeared first on Korean Bapsang.

20 Back to School Korean Recipes

$
0
0

A collection of 20 back to school Korean recipes your kids will love!

a collection of kid-friendly snacks, lunch and dinner ideas

It’s back to school time. I’ve put together a collection of recipes to make feeding yourself and your family fun and easy. 

From Korean lunch box ideas and after-school snacks to easy kid-friendly dinners, these are some of the dishes that kids grow up eating in Korea. Your kids will love them too!

Some of these can be prepared and stored in the freezer. Simply take them out and reheat to feed your hungry kids. Some of them are easy dinners you can whip up quickly or prepare ahead of time.  

1. Dakgangjeong (sweet crispy chicken)

Bite-sized boneless chicken pieces make this dish so easy to make. The sauce is sweet and tangy with a little spicy kick from the gochujang (Korean red chili pepper paste). Replace gochujang partially or entirely with ketchup for your younger children. 

Dakgangjeong (Sweet Crispy Chicken)


2. Gimbap (Korean seaweed rice rolls) 

The most popular on-the-go meal in Korea! Your children will love to see these rice rolls in their lunch box. Gimbap (or kimbap) is really not that hard to make it at home with my step-by-step guide!

gimbap recipe


3. Mini gimbap

Gimbap (or kimbap) can’t get any easier than this! But, they are addictive with or without a sauce! 

A small size gimbap rolled with a couple of filling ingredients


4. Tteokbokki (Spicy stir-fried rice cake)

A highly popular Korean street food and a delicious comfort food you can easily make at home! This was a popular after school snack growing up. Your can adjust the spicy level to your kids’ taste.  

Korean rice cakes stir-fried in a spicy gochujang sauce


5. Gungjung tteokbokki (royal court rice cake)

This traditional version of tteokbokki is perfect for those who don’t do well with the spiciness of the red spicy tteokbokki above. It’s mildly flavored with a soy sauce based sauce.

Gungjung tteokbokki (stir-fried rice cake) 

6. Mandu (Korean dumplings) 

Make these Korean dumplings ahead of time and freeze. You’ll be able to feed your hungry kids in no time when the time comes!

Korean dumplings made with meat and vegetables and then pan-fried and steamed


7. Hobak Hotteok (Sweet Stuffed Pumpkin Pancakes)

Give your children a sweet treat! This chewy, gooey and nutty Korean stuffed pancake, hotteok, is a popular street snack. The pancakes freeze really well, so just pop them in the toaster or microwave to reheat.

Hotteok (Korean sweet stuffed pancake)


8. Gyeran mari (rolled omelette)

Gyeran mari is hugely popular as a lunch box item! It’s also a delicious side dish that you can whip up last minute for any Korean meal. 

Gyeran Mari (Korean Rolled Omelette)


9.  Gogi wanjajeon (pan-fried meatballs in egg batter)

Another childhood favorite! These little egg-battered meatballs were a favorite for packing in the school lunch boxes. It was always a special treat to have a few of these meatballs with a meal. 

Wanjajeon (Pan-fried Meatballs in Egg Batter)


10. Galbi taco (Korean-style taco with beef short ribs)

Turn your Korean BBQ short ribs into a popular Korean/Mexican fusion dish. You can also make these with bulgogidak (chicken) bulgogi, or dweji (pork) bulgogi.  A delicious way to use up the leftover marinated meat too!

Korean-style taco with beef short ribs and kimchi salsa


11. Omurice (omellete rice)

Who wouldn’t like fried rice wrapped in egg omelette? Flavored with sweet and tangy ketchup, omurice is especially popular among children. 

Omurice (omelette rice) recipe


12. Korean Curry rice

A delicious, comfort food we all grew up eating! The instant curry mix makes this dish so easy to make. Add lots of meat and vegetables to make it a hearty dish everyone loves. 

Korean curry rice


13. Eomuk guk (Korean fish cake soup)

Skewered eomuk simmered in a light savory broth is hugely popular at street food carts and stalls in Korea. At home, eomuk guk can be prepared without skewers as an easy everyday soup!

Eomuk guk (fish cake soup)


14. Gamjaguk (potato soup with tofu and starch noodles)

This simple potato soup is one of my childhood favorite soups! There are many different ways to make gamjaguk, but this recipe is how my mother used to make it when we were growing up.

Gamjaguk (Korean Potato Soup)


15. Tangsuyuk (sweet and sour beef or pork)

Tangsuyuk is a Chinese sweet and sour pork (or beef) dish adapted for Korean taste. It’s a beloved Korean-Chinese dish along with the two noodle dishes, jajangmyeon (noodles in black bean sauce) and jjambbong (spicy noodle soup). You’ll find it surprisingly easy to make!

Tangsuyuk (Sweet and sour pork)


16. Tonkatsu (donkkaseu)

Tonkatsy is a dish that made its way into Korea by way of Japan and became widely popular, especially among children! The Korean version usually is thinner and larger than the Japanese version, so it cooks up very quickly! 

Tonkatsu (Donkkaseu)


17. Jajangmyeon (noodles in black bean sauce)

Deeply embedded in the childhood memories of every Korean, jajangmyeon (or jjajangmyeon), is another popular Korean-Chinese noodle dish. Everyone loves it! 

Korean-Chinese Noodles in black bean sauce


18. Japchae (stir-fried starch noodles with beef and vegetables)

I haven’t met any child who doesn’t like this classic noodle dish with beef and vegetables! Great as an appetizer, snack, light meal or side dish. 

Japchae (Stir-Fried Starch Noodles with Beef and Vegetables)


19. Bulgogi (Korean BBQ Beef)

Made with thinly sliced beef, bulgogi doesn’t take much time to prepare or marinate, making it perfect for a weeknight meal your family will love! 

Korean thinly sliced beef marinated in a soy based sauce


20. Dak bulgogi (Korean BBQ Chicken)

Another easy dinner recipe that’s hugely popular on the blog. The bite size chicken pieces marinate and cook quickly, making this dish another great option for a weeknight meal!

Chicken bulgogi


The post 20 Back to School Korean Recipes appeared first on Korean Bapsang.

15 Chuseok (Korean Thanksgiving) Recipes

$
0
0

A collection of 15 traditional recipes for Chuseok (Korean Thanksgiving)

Chuseok (추석) is coming up! It’s a major traditional holiday in Korea, which is celebrated over 3 days. Also referred to as Hangawi (한가위), it falls on the 15th day of the 8th lunar month. Outside Korea, Chuseok is also known as a Mid-Autumn Festival or Korean Thanksgiving.

Families gather and celebrate the year’s harvest, paying tribute to their ancestors with a scrumptious spread which includes many traditional dishes, such as songpyeon, (송편, half-moon shaped rice cake), galbijjim (갈비찜), japchae (잡채), various jeon (전) dishes, soup, three color vegetable side dishes (samsaek namul, 삼색 나물), etc. 

Here, I’ve collected 15 most common, traditional Chuseok recipes! Hope you have a wonderful Chuseok with your family!

1. Songpyeon (half-moon shaped rice cake)

These little rice cakes are made with natural food coloring and stuffed with sweetened sesame seed filling. There are 4 natural food color options in the recipe, but you may also like this beautiful red beet songpyeon

Songpyeon recipe (how to make Korean half-moon shaped rice cake)


2. Youngyang Chaltteok (Healthy Sweet Rice Cake)

This rice cake is one of the easiest rice cakes you can make at home! No kneading, no shaping, no pounding, and no special tool other than a steamer is required! 

Korean sweet rice cake


3. Kkaennip Jeon (Stuffed Perilla Jeon)

This variation of jeon is stuffed with a meat mixture and then coated with the egg batter. The perilla leaves lend a distinct, robust flavor to the mildly flavored filling as well as provide an overall textural contrast.

Kkaennip Jeon (Stuffed Perilla Jeon)


4. Modeumjeon (zucchini, shrimp, and fish pan-fried in egg batter)

A platter of small delicacies! The small ingredient pieces are individually pan-fried in egg batter to create a soft skin. 

Modeumjeon Modeumjeon (Fish, Shrimp and Zucchini Pan-fried in Egg Batter)


5.  Gogi Wanjajeon (pan-fried meatballs in egg batter)

Most Korean homes make several types of jeon dishes (pan-fried battered food) for their holiday feast. Wanjajeon, egg-battered and pan-fried Korean meatballs, is among the popular choices.  

Wanjajeon (Pan-fried Meatballs in Egg Batter)


6.  Nokdujeon (mung bean pancake)

A family favorite! Nokdujeon (녹두전), aka nokdu bindaetteok (녹두 빈대떡), is a type of savory Korean pancake made with ground nokdu (mung beans). Soak the beans, and then ground into a batter. The rest is easy!

Nokdujeon (Savory mungbean pancakes)


7.  Doraji namul (bellflower root side dish)

For the white color of samsaek namul, doraji namul is classic! A common substitute is mu namul (radish).  

Doraji namul (Sautéed Bellflower Roots)


8.  Gosari namul (fiddlehead ferns side dish)

Gosari, which is also commonly used in bibimbap and yukgaejang, is the immature frond (known as fiddlehead) of a bracken (aka fernbrake). With a deep, earthy flavor and a chewy texture, it’s delicious when seasoned and stir-fried! You can substitute it with stir-fried shiitake mushrooms for the black/brown color of samsaek (3-color) namul.

Gosari (bracken fiddleheads) side dish


9. Sigeumchi namul (spinach side dish)

Korean spinach side dish


10.  Japchae (Stir-fried starch noodles with beef and vegetables)

This japchae recipe is the traditional version! If you want to try something different, try my spicy seafood japchae

Korean starch noodles with beef and vegetables


11.  Gujeolpan (platter of nine delicacies)

Gujeolpan (Platter of Nine Delicacies)


12. Muguk (radish soup)

Growing up, my family served mu guk for Chuseok, but toran guk (soup made with taro) is also common.

Mu guk (Radish soup)


13. Galbijjim (Braised short ribs)

This is a stove-top, traditional galbijjim recipe! You can also use my slow cooker galbijjim or Instant Pot spicy galbijjim.  

Galbijim recipe - learn how to make Korean braised beef short ribs


14. Spicy Braised Pork Ribs

Although galbijjm made with beef short ribs are classic for Chuseok, depending on personal preferences, some people prepare dakjjim (braised chicken) or dweji galbijjim (braised pork ribs). This recipe is a spicy version. For a mild version, use the beef galbijjim braising liquid instead. 

Slow cooker Korean spicy pork ribs


15. Tteokgalbi (beef short rib patties)

Tteokgalbi (Korean short rib patties)

The post 15 Chuseok (Korean Thanksgiving) Recipes appeared first on Korean Bapsang.


Dubu Kimchi (Tofu with Stir-fried Kimchi and Pork)

$
0
0
Dubu kimchi is a popular dish made with old kimchi. This recipe is simple and easy! Stir-fry the kimchi and pork and serve with sliced tofu that has been boiled or pan-fried. Simply omit the pork to make it a meatless dish if you like. 
Stir-fried kimchi and pork served with boiled tofu

What’s your favorite way to use up aging kimchi? Dubu kimchi (두부김치) is one of many classic Korean dishes that use sour, old kimchi. The kimchi is stir-fried with fatty pork and served with sliced tofu.

In Korean cooking, kimchi and pork is a classic combination which is used in many different dishes, such as kimchi jjigae. The taste is intoxicating, with the pungency of kimchi and the rich flavor of fatty pork.

This easy dubu kimchi recipe was originally posted in October 2010. It’s been very popular, but I’ve updated it here with more information, new photos and minor changes to the recipe. 

To make dubu kimchi, mix the kimchi, pork and aromatic vegetables with a few basic seasoning ingredients and stir-fry together. 

You can omit the pork to make it a meatless dish if desired! Kimchi stir-fried on its own is still very tasty. 

how to make dubu kimchi

I usually boil the tofu because I like it soft. You can also steam it. Pan-frying will make the tofu a little crispy on the outside, if preferred. 

You can serve this dubu kimchi as a side or a main dish with a bowl of rice. In Korea, dubu kimchi is a popular drinking snack (anju, 안주), especially with Korean alcohol beverage soju (소주) or makgeolli (막걸리). My preference is with makgeolli!

dubu kimchi recipe with pan-fried tofu

More ideas for using up old kimchi
 

Did you make and love this dubu kimchi recipe? Please rate the recipe below by either clicking the stars or with a comment! And make sure to share your creations by tagging me on Instagram! Stay in touch by following me on PinterestTwitterFacebook, and Instagram.

 
Boiled tofu served with stir-fried kimchi and pork

Dubu Kimchi (Tofu with Stir-fried Kimchi and Pork)

Kimchi is stir-fried with pork and served with sliced tofu that has been boiled, steamed, or pan-fried.

  • 2 cups fully fermented kimchi
  • 1/2 pound thinly sliced pork or pork belly
  • 1/2 onion
  • 2 scallions
  • 1 teaspoon grated ginger
  • 1 tablespoon minced garlic
  • 1 tablespoon soy sauce
  • 1 tablespoon sugar
  • 1 tablespoon sesame oil
  • 2 – 3 tablespoons gochujang (고추장), Korean red chili pepper paste
  • 1 teaspoon sesame seeds
  • pinch pepper
  • 1 18- oz package tofu
  1. Cut kimchi and pork into bite sizes. Thinly slice onion and scallions. In a large bowl, combine kimchi, pork, onion, scallions and the remaining ingredients and mix well. Let it stand for 15 minutes.
  2. In a medium size pot, bring about 4 cups of water to a boil. Cut the tofu into two blocks. Reduce the heat to medium high, and add the tofu. Gently boil for 5 minutes. Carefully transfer the tofu to a colander to drain. Cut each block into about 1/2-inch thick slices.

  3. Heat a large pan over medium high heat and add the kimchi and pork mix. Cook until the kimchi becomes soft, the pork is cooked through, and most of the liquid generated during the cooking process is evaporated, about 5 – 6 minutes.
  4. Arrange the tofu slices nicely on a plate leaving an open space in the middle part. Place the stir-fried kimchi and pork in the middle and serve. Or, you can serve the stir-fried kimchi and tofu side by side. 

The post Dubu Kimchi (Tofu with Stir-fried Kimchi and Pork) appeared first on Korean Bapsang.

Mandu (Korean Dumplings)

$
0
0

Learn how to make Korean dumplings (mandu) with this easy-to-follow recipe! Dumplings are much easier to make than you think, especially with store-bought dumpling wrappers. Delicious and versatile, homemade dumplings are well worth the effort!

Deep fried Korean dumplings

I’ve been making some variation of this Korean dumpling recipe for decades. Korean dumplings are called mandu (만두), and they are so delicious and versatile! Hope you’ll try making your own dumplings at home with this easy step-by-step mandu recipe. Homemade dumplings are always worth the effort!

When I make mandu, I make in large quantities and freeze them for later use. My mother used to make hundreds of these at a time, and so did my my mother-in-law. We Koreans grew up with fond memories of watching our mothers make these tasty little dumplings, being a helping hand at times, and devouring them when they are cooked.

It feels so good to have bags of frozen dumplings in the freezer. They are quick and easy to cook as a delicious snack, appetizer, or a light meal!  

Steamed Korean mandu (dumplings)

There are many variations of mandu. Depending on the filling ingredients, they are called gogi mandu (고기만두, meat as the main ingredient in the filling), yachae mandu (야채만두, vegetables), saewu mandu (새우만두, shrimp) , kimchi mandu (김치만두), and so on.

Also, depending on how they are cooked, they are called jjin mandu (찐만두, steamed), tuigin mandu (튀긴만두, deep fried), gun mandu (군만두, pan fried), or mul mandu (물만두, boiled). My favorite is steamed, followed by boiled, but my children prefer either deep-fried or pan-fried for the crispy skins.

This mandu recipe was originally posted in September 2009. That was a long time ago! Thanks to you guys, it’s been very popular! Here, I’ve updated it with more information, new photos and minor changes to the recipe. 

Pan-fried Korean dumplings (mandu)
Dumpling filling

Korean dumplings are filled with a mixture of various meats and vegetables. Mandu is so versatile that you can use any type of meat you like (or none at all). I typically use two types of meat/seafood for the complexity of flavor: pork and beef or pork and shrimp.

Common vegetables for the filling include baechu (배추, napa cabbage), green cabbage, kimchi, bean sprouts, mushrooms, zucchinis, garlic chives, onions, scallions, etc. Tofu and dangmyeon (당면, sweet potato starch noodles) are also common in Korean dumplings.

I like the meat and vegetable ratio in this classic recipe. It creates a filling that is moist and juicy and has a good texture, but you can increase or decrease any ingredients to your liking.

If you want to taste the filling to make sure it’s well seasoned, microwave a teaspoonful of it for 20 to 30 seconds and taste it. Adjust the seasoning as necessary by adding more salt or soy sauce, or add more ingredients if it’s too salty. Season lightly if you plan to serve the dumplings with a dipping sauce.  

How to make Korean dumplings (mandu)
Dumpling wrappers

In this recipe, I used ready-made dumpling wrappers I bought at a Korean market. You may be able to find dumpling skins at your local grocery stores. If you want to make your own wrappers, see my saewu (shrimp) mandu recipe.

The number of wrappers in a package varies widely, ranging from 20 to 50. For this recipe, you’ll need about 40 to 50 round wrappers, depending on the size of the wrapper and how much filling you use for each one.

How to fold dumplings

A dumpling can be fold in many different ways. With a little bit of practice, you can add some variation of pleats. The easiest is a half-moon shape, which you can do by simply folding the dumpling wrap in half and sealing it by tightly pinching the edges together. You will need to wet the edges of store-bought dumpling wrappers so they can be glued together, a step that is not necessary for homemade wrappers. If you’re new to making dumplings, be light on the filling for easier folding and crimping.

How to fold dumplings

Tips for freezing

Freeze mandu on a tray with the pieces not touching each other for about an hour before storing them in a freezer bag. Otherwise, the mandu skins will get soggy from the moisture in the filling and stick together in the freezing process. You can also freeze cooked mandu the same way. Frozen mandu don’t need to be thawed before being cooked; just cook a little longer.

More dumpling recipes

Kimchi mandu
Saewu (shrimp) mandu – with homemade wrappers
Hobak (zucchini) mandu – vegan

Have you tried this recipe?  Please rate the recipe below by either clicking the stars in the recipe card or in the comment section! And make sure to share your creations by tagging me on Instagram! Stay in touch by following me on PinterestTwitterFacebook, and Instagram.

Mandu (Korean dumplings)

Learn how to make Korean dumplings (mandu) with this easy to follow recipe! They are so delicious and versatile! Much easier than you think!

  • 1 package dumpling skins/wrappers (about 40 pieces), 만두피 (mandu pi)

For the filling

  • 8 ounces zucchini (finely chopped)
  • 10 ounces green cabbage (finely chopped)
  • 4 ounces fresh mushrooms (finely chopped (shiitaki preferably))
  • 1/2 medium onion (finely chopped)
  • 2 scallions (finely chopped)
  • 1/2 pound ground pork (or other meat if preferred)
  • 1/4 pound ground beef
  • 1 tablespoon minced garlic
  • 1 to 2 teaspoons finely minced ginger (or juiced)
  • 1 tablespoon soy sauce
  • 1 tablespoon sesame oil
  • 1 egg
  • 1/4 teaspoon salt to season the filling and more for salting vegetables
  • 1/8 teaspoon pepper

For the dipping sauce

  • 1 tablespoon soy sauce
  • 1 teaspoon vinegar
  • 1 tablespoon water
  • 1/2 teaspoon sugar
  • pinch of black pepper
  • pinch of red pepper flakes (gochugaru)
  1. Finely chop zucchini and cabbage. 

  2. In two separate bowls, generously sprinkle salt over the chopped zucchini and cabbage and set aside (for at least 15 minutes) while preparing other ingredients. (This process will draw out water, soften the texture, and add flavor.) Squeeze out as much water as possible from the salted zucchini and cabbage by hand. Transfer to a large mixing bowl.

  3. Prepare all the remaining ingredients and add to the mixing bowl. Mix all ingredients well with your hand.

  4. Place one heaping teaspoonful of the filling on a wrapper. Wet the edges of the wrapper with water and seal tightly (pushing the air out with your fingers) into a half-moon shape. Repeat this process until all the filling/wrappers are used.

Gun mandu (pan fried)

  1. Heat the pan with 2 tablespoons of vegetable oil over medium high heat. Add the dumplings, making sure they aren’t touching each other. Fry for 1 – 2 minutes, until the bottoms are golden brown. Add 1/3 cup of water to the pan, and cover immediately with a lid. Reduce the heat to medium low, and steam for 4 to 5 minutes. Or cook 2 – 3 minutes on each side over medium heat until golden brown without adding water. If the dumplings are frozen, cook a little longer.

Tuigin mandu (deep-fried dumplings)

  1. Heat a deep fryer or skillet with about 2-3 inches of canola or vegetable oil over medium-high heat to 350°F. Fry the dumplings for 2-3 minutes until golden brown.

Jjin mandu (steamed)

  1. Steam the dumplings for about 10 minutes in a steamer (12 minutes if frozen). Make sure to line the steamer with a wet cheesecloth or cabbage leaves to prevent the mandu from sticking.

Mul mandu (boiled)

  1. Bring a pot of water to a boil. Add mandu (stirring gently so they don’t stick to the bottom of the pot) a few at a time, and cook until all of them come up to the surface. Continue to cook for another minute or two.

How to freeze dumplings: Place mandu pieces on a tray without pieces touching and freeze for about an hour before storing them in a freezer bag. Frozen mandu don’t need to be thawed before being cooked. Just cook a little longer.

This mandu recipe recipe was originally posted in September 2009. It’s been very popular, but I’ve updated it here with more information, new photos and minor changes to the recipe. 


The post Mandu (Korean Dumplings) appeared first on Korean Bapsang.

Jjamppong (Spicy Seafood Noodle Soup)

$
0
0
Jjamppong is a popular Korean-Chinese noodle soup, loaded with pork, seafood, and vegetables. The combination of all the natural ingredients creates a hearty bowl of soup that is packed with robust flavors. The spiciness will surely clear your sinuses!Korean-Chinese spicy seafood noodle soup

As the weather started to cool around here, I decided to update my jjamppong (짬뽕) recipe that was originally posted in April 2011. Jjamppong (also spelled jjambbong) is a spicy noodle soup, and it’s one of the two most popular Korean-Chinese dishes alongside jajangmyeon (짜장면, noodles in a black bean sauce). Often times, Koreans have a hard time choosing between the two when eating out.

Korean-Chinese cuisine was developed by early Chinese immigrants in Korea, and has become a huge part of Korean food culture. In Japan, a Chinese restaurant created Champon, a noodle dish loaded with pork, seafood and vegetables in a rich broth. Jjamppong is a similar dish but with a lot of red spiciness!

Korean Spicy Seafood noodle soup

You don’t need to go to a Korean-Chinese restaurant to enjoy jajangmyeon and jjamppong. My jjajangmyeon recipe has been a reader’s favorite. Here, you’ll also find it surprisingly easy to make jjamppong at home with easy-to-find ingredients.

Jjamppong noodles

Both jajangmyeon and jjamppong use the same type of wheat noodles. Good restaurants use hand-pulled noodles, which are nicely chewy. For home cooking, you can find ready-made fresh noodles in the refrigerator section of Korean markets, or use dried noodles. These noodles are generally labeled for udon and jajangmyeon (우동 짜장면) or jungwhamyeon (중화면). Udon noodles for Korean-Chinese cooking are not the same as Japanese udon noodles, which are thicker and softer.

If you can’t find any of these, simply use spaghetti or linguine noodles.

Korean jajangmyeon and jjamppong noodles

How do you make a jjamppong soup?

The soup base is typically made with chicken stock for a rich flavor, but you can also use anchovy broth for a lighter taste. I often make it simply with water, and it still tastes delicious.

The combination of pork, seafood, various vegetables, stir-fried in gochugaru infused oil, creates a hearty bowl of soup with robust flavors. 

Jjamppong - spicy, hearty seafood noodle soup 

For the meat, pork is classic, but use beef if you prefer. Of course, you can omit the meat if you want.  

The types of seafood used in this recipe are what you’ll find in jjamppong at Korean-Chinese restaurants: clams, mussels, shrimp, squid and sometimes oysters. Sometimes oysters are also added. But, it’s versatile! Use what you like or have.

There are many options for vegetables! I used green cabbage, carrot, zucchini, mushrooms, onions, and scallions. Napa cabbage or bok choy will be a good substitute for green cabbage. Bamboo shoots and baby corns are great additions as well. You’ll only need a little bit of each vegetable for this recipe.

As always, the level of spiciness can be adjusted to your taste. You can increase or decrease the amount of gochugaru, or even add dried red chili peppers to increase the heat level.

Have you tried this jjamppong recipe?  Please rate the recipe below by either clicking the stars or when you leave a comment! And make sure to share your creations by tagging me on Instagram! Stay in touch by following me on PinterestTwitterFacebook, and Instagram.

Korean-Chinese Spicy Noodle Soup

Jjamppong (spicy seafood noodle soup)

Jjamppong is a popular Korean-Chinese noodle soup! It’s loaded with pork, seafood and vegetables! The combination of all the natural ingredients creates a hearty bowl of soup that is packed with robust flavors. The spiciness will surely clear your sinuses!

For the vegetables:

  • 1/4 onion (thinly sliced)
  • 1/2 small carrot (about 2 ounces, thinly sliced into 2-inch lengths)
  • 1/2 zucchini (about 3 ounces, thinly sliced into 2-inch lengths)
  • 3 ounces green cabbage (cut into 2-inch lengths (or napa cabbage or bok choy))
  • 2 to 3 fresh shiitake mushrooms (or 2 shiitake mushrooms, soaked and thinly sliced)
  • 2 scallions (cut into 2 inch lengths)

For the meat and seafood

  • 3 ounces fatty pork (thinly sliced)
  • 4 to 6 littleneck clams
  • 4 to 6 mussels
  • 4 to 6 shrimps
  • 3 ounces squid (cut into bite sizes (Do not cut squids too small as they shrink a lot when cooked.))

Other ingredients

  • 1 teaspoon julienned or minced ginger
  • 1 tablespoon minced garlic
  • 1 tablespoon Korean chili pepper flakes (gochugaru (adjust to your liking))
  • 1 tablespoon oil (vegetable or canola)
  • 1 tablespoon soy sauce
  • salt and pepper
  • 5 cups chicken stock (or anchovy broth or water)
  • 2 servings (12 – 14 ounces fresh jajangmyeon/udon noodles)
  1. Have a pot of water ready to cook the noodles. (Turn the heat on when you start cooking the soup ingredients. This way you can time it so that the noodles are cooked at the same time the soup is ready.) While making the soup, cook the noodles according to the package instructions and drain.

  2. Prepare the vegetables.
  3. Prepare the pork and seafood.
  4. Heat a wok or a large pot over high heat. Add the oil, ginger, scallion, gochugaru and soy sauce and stir-fry for a minute.

  5. Add the pork and stir-fry until the pork is almost cooked, about 2 minutes.

  6. Stir in the onion, carrot, cabbage, zucchini and optional mushrooms. Lightly salt, and cook until the vegetables are slightly softened, about 2 minutes, stirring occasionally.

  7. Pour in the chicken stock (or anchovy broth/water) and boil until the vegetables are completely cooked.
  8. Add the seafood starting with the clams, which require more time to cook, followed by the mussels, shrimps and squid. Bring everything to a boil again and cook until the shells have opened. Salt and pepper to taste.
  9. Cook the noodles, rinse in cold water, and drain.

  10. Place a serving of the noodles in a large soup bowl and ladle the soup on top. Serve immediately while piping hot.

The post Jjamppong (Spicy Seafood Noodle Soup) appeared first on Korean Bapsang.

Yangbaechu Kimchi (Green Cabbage Kimchi)

$
0
0

Need some quick kimchi? Or can’t find napa cabbage where you are? Try this kimchi recipe made with a head of your normal green cabbage. It’s light, crunchy, and refreshing!

Quick and easy kimchi made with green cabbage

When napa cabbages are not in their prime season during the warm months, green cabbages (called yangbaechu in Korean, 양배추) come in handy for making kimchi. Great for kimchi beginners, this yangbaechu kimchi recipe is a good alternative if you can’t find napa cabbages at your local groceries or need a quick kimchi.

The Korean name for green cabbage, yangbaechu, actually means Western cabbage. Green cabbages are healthy, naturally sweet and crunchy, which makes it a good vegetable for kimchi.

This recipe was originally posted in July 2011. I’ve updated it here with new photos, more information, and an improved recipe.

Unlike napa cabbage (baechu, 배추), you don’t need to salt green cabbage for very long. All you need is about an hour or two to soften the cabbage and bring out the flavors. The salting time varies depending on the cabbage and the salt.

Salting the green cabbage

Koreans use coarse sea salt (aka Korean brining salt) for salting vegetables to make kimchi. It’s natural salt with a coarse texture that was minimally processed. However, if Korean sea salt is unavailable, use your normal kitchen salt. If using finer salt, you’ll need to use less than what’s called for in the recipe.

Quick and easy kimchi made with green cabbage

Yangbaechu kimchi seasonings

While Korean red chili pepper powder (gochugaru, 고추가루) is indispensable for authentic kimchi, this yangbaechu kimchi is a good kimchi for you to experiment with other types of chili pepper powder available to you. Some readers have reported a success with their substitution. Also, if your chili pepper powder is extremely spicy, puree some red bell pepper (or mild fresh red chili peppers) with a little bit of water and mix it with your chili pepper powder. It’ll give the kimchi a bit more red color and flavor.

For a deliciously savory flavor, I used salted shrimp (saeujeot, 새우젓) in this recipe. Use fish sauce instead if preferred. For vegan kimchi, Korean soup soy sauce (guk ganjang, 국간장) is a good substitute. Many years ago while visiting my son who was in Berlin, Germany, at the time, I made this kimchi without any of these ingredients, and it was still very good!

Yangbaechu kimchi is one of my mother’s favorite summer kimchi varieties, so we grew up eating it a lot. She would tell me not to use a lot of seasoning because this kimchi should be light and refreshing. However, feel free to increase the amount of gochugaru or salted shrimp (or fish sauce) to season the kimchi a bit stronger if preferred.

How to store yangbaechu kimchi

Keep the kimchi out at room temperature for a few hours or overnight before storing it in the fridge. You can start eating yangbaechu kimchi right away, but it’ll taste better over a couple of weeks in the fridge. Because it’s lightly seasoned, it’s best consumed within 3 to 4 weeks.

Have you tried this kimchi recipe?  Please rate the recipe below by either clicking the stars or leaving a comment! And make sure to share your creations by tagging me on Instagram! Stay in touch by following me on Pinterest, Twitter, Facebook, and Instagram.

Green cabbage kimchi

Yangbaechu Kimchi (Green Cabbage Kimchi)

Need some quick kimchi? Or can’t find napa cabbage where you are? Try this kimchi recipe made with a head of your normal green cabbage. It’s light, crunchy, and refreshing!

  • 1 head green cabbage, 양배추 ((about 2.5 pounds))
  • 4 tablespoons coarse sea salt (less if using table salt, about 3 tablespoons))
  • 3 scallions (roughly chopped)
  • 1/4 cup Korean red chili pepper flakes, gochugaru (고추가루) ((add 1 more tablespoon for spicier kimchi))
  • 3 tablespoons salted shrimp, saeujeot (새우젓) (finely chopped, (or fish sauce))
  • 1 tablespoon sugar
  • 1 tablespoon minced garlic
  • 1/2 teaspoon grated ginger
  1. Remove tough outer leaves of the cabbage if any. Cut the cabbage head into quarters and remove the core from each quarter. Cut each quarter into bite-sized pieces (about 2-inch squares). Rinse the cabbage and drain.

    Yangbaechu kimchi

  2. Place the cabbage in a large bowl. Dissolve the salt in 2 cups of water, and toss well to coat evenly. Leave it for an hour or 2 until the cabbages have softened, flipping over once or twice halfway through or every 30 minutes. Rinse the salted cabbage once, and drain to remove excess water.

    Yangbaechu Kimchi

  3. Mix the chili pepper flakes (gochugaru), saeujeot, sugar, garlic, and ginger with 1/2 cup of water.

    Yangbaechu kimchi

  4. Add the chopped scallions, the gochugaru mix, and 1 cup of water to the salted cabbage. 
    Yangbaechu kimchi
  5. Using a kitchen glove, mix everything well by hand until the cabbage pieces are well coated with the gochugaru mix. 

    Yangbaechu Kimchi

  6. Place in an airtight container or a jar, pressing down hard to remove air pockets. Leave it out in room temperature for half a day or overnight. Then, refrigerate.

This recipe was originally posted in July 2011. I’ve updated it here with new photos, more information and an improved recipe.  

The post Yangbaechu Kimchi (Green Cabbage Kimchi) appeared first on Korean Bapsang.

15 Easy Kimchi Recipes

$
0
0

It’s kimchi making season in Korea! Here’s a collection of 15 easy kimchi recipes you can make right now and all year round. Making good authentic kimchi at home is much easier than you think. This list has something for everyone and every season! 

how to make 15 common kimchi types

In late fall, Korean households make a large batch of traditional napa cabbage kimchi (배추), also called pogi kimchi (포기김치), to last through the winter and early spring. Also, it’s very common to make a few other kimchi varieties during this season. This annual kimchi making event is called gimjang (김장, also spelled kimjang). I grew up watching my mother make kimchi with over 100 cabbages for her gimjang. Her friends in the neighborhood would rotate their gimjang schedule to help each other. Most people don’t make that much kimchi anymore, but the tradition of gimjang continues.

Here, I’ve collected 15 of my easy kimchi recipes! There’s something for everyone and every season! You’ll find kimchi recipes with or without gochugaru (red chili pepper flakes), vegan kimchi, kimchi made with other vegetables such as radishes, scallions, cucumbers, etc. These kimchi recipes feature pretty much all you need to know about how to make the most common kimchi types!

1. Traditional napa cabbage kimchi (or pogi kimchi)

This napa cabbage kimchi is the most common kimchi in Korea. To help you start making kimchi at home, I came up with a recipe using one napa cabbage. 

Traditional kimchi (Napa cabbage kimchi)


2.  Vegan kimchi

Vegan kimchi that’s as good as the traditional version!

Best Vegan kimchi recipe


3. white kimchi (baek kimchi)

Made without gochugarau, this traditional white kimchi is light and refreshing! 

White kimchi


4. Mak kimchi (easy kimchi)

Cut up the cabbage, salt, rinse, and mix with the seasoning! Simple, right? That’s what this easy kimchi recipe is about. 

Mak kimchi


5. Baechu geotjeori (fresh kimchi)

Getjeori is a kimchi that’s made to be eaten fresh without fermentation. It’s a quick, delicious kimchi you can enjoy right after making it! 

Fresh kimchi


6. Yangbaechu kimchi (green cabbage kimchi)

Can’t find napa cabbage where you are? Try this kimchi recipe made with a head of your normal green cabbage. It’s light, crunchy, and refreshing!

Green cabbage kimchi


7. Kkakdugi (cubed radish kimchi)

Kkadugi is the most common kimchi that’s made with Korean radish. Simply cut the radishes into cubes, salt for a short time, and then mix with the seasonings. Easy!

Cubed radish kimchi in a jar


8. Chonggak kimchi (ponytail radish kimchi)

Chonggak kimchi is made with a small variety of white radish with long leafy stems, which is firmer and crunchier than the large varieties. 

Chonggak Kimchi


9. Quick Dongchimi (radish water kimchi)

Dongchimi (동치미) is a mild water-based kimchi made with a small variety of white radish called dongchimi mu. 

refreshing radish water kimchi


10. Nabak kimchi (water kimchi with napa cabbage and radish)

Nabak kimchi is a type of water kimchi that’s made with thinly sliced radish squares and other vegetables. It is easy to make, yet deliciously refreshing! 

Nabak kimchi (Water kimchi)


11. Pa kimchi (green onion kimchi)

This easy kimchi made with tender green onions (also called scallions) is a favorite of mine!

Pa Kimchi (Green Onion Kimchi)


12. Buchu kimchi (garlic chives kimchi)

This kimchi made with tender garlic chives (buchu – 부추) is one of the easiest kimchi variety to make! 

Kimchi made with garlic chives


13. Oi sobagi (stuffed cucumber kimchi)

Cucumbers are salted and then stuffed with a seasoning mix. Oi sobagi is crisp, crunchy and delicious!

Oi Sobagi (Korean stuffed cucumber kimchi)


14. Kkaennip kimchi (perilla leaf kimchi)

Kkaennip kimchi is a traditional way to preserve fragrant perilla leaves to be enjoyed during the off season. 

kimchi recipe made with perilla kimchi


15.Bok choy kimchi

Geotjeori (fresh kimchi) is typically made with napa cabbage. This one is made with tender baby bok choy, cheongyeongchae (청경채) in Korean. 

Baby bok choy kimchi salad

The post 15 Easy Kimchi Recipes appeared first on Korean Bapsang.

Viewing all 1019 articles
Browse latest View live