Quantcast
Channel: Korean Bapsang
Viewing all 1019 articles
Browse latest View live

Tangsuyuk (Sweet and Sour Beef or Pork)

$
0
0
Tangsuyuk is a popular Korean-Chinese sweet and sour pork (or beef) dish! Learn how to make this crispy deep-fried meat in a delicious sweet and tangy sauce at home with this easy to follow recipe. 

sweet and sour beef in a sweet and sour sauce

Tangsuyuk (탕수육) is crispy deep-fried pork (or beef) in a delightfully sweet and tangy sauce! It’s Chinese sweet and sour pork (or beef) dish adapted for Korean taste. Tangsuyuk (also spelled tangsooyuk) is another beloved Korean-Chinese dish along with the two noodle dishes – jajangmyeon and jjamppong.

Every time my family goes out to a Korean-Chinese restaurant, we almost always order a large plate of tangsuyuk to share as an appetizer.  At home, I often make this dish for special occasions or gatherings, especially when my extended family gets together. Everyone loves it!

Tangsuyuk is easy to make, but the process goes very quickly. So, have all your kitchen equipment and ingredients ready before starting to cook. This tangsuyuk recipe was originally posted in September 2011. I’ve updated it here with new photos, more information, and an improved recipe.

Tangsuyuk meat

Growing up, my mother usually made this dish with pork. I usually do the same thing except when my sister-in-law who does not eat pork will be coming. You can use any meat of your choice for this recipe.

For a vegan tangsuyuk, try rehydrated dried shiitake mushrooms. They are meaty, chewy, and packed with earthy flavor.

deep fried beef served with a sweet and sour sauce on the side

How to make tangsuyuk batter

You’ll need to pre-soak the potato starch used to make the batter for about an hour or two. This is a traditional method used to create a slightly chewy yet crispy crust. It is important to deep-fry the meat twice for extra crispiness.

How to make tangsuyuk sauce

The key to a successful tangsuyuk sauce is the balance between the sweetness and sourness. This tangsuyuk recipe produces a well-balanced sauce, but you can always adjust to your taste.

The vegetables add different textures and a colorful touch to the dish. In this updated recipe, I used carrot, onion, cucumbers, and wood ear mushrooms. Red and green peppers and green peas are also good options. You can also add some fruits, such as pineapple or apple slices. 

Some people like to have the sauce on the side and dip the meat in the sauce as they eat. I prefer the sauce poured over the meat. One of my readers once called the former a “dipper” and the latter a “pourer”.  Which one are you?

deep-fried pork in a sweet and sour sauce

sweet and sour beef in a sweet and sour sauce

Have you tried this tangsuyuk recipe?  Please rate the recipe below by either clicking the stars or leaving a comment! And make sure to share your creations by tagging me on Instagram! Stay in touch by following me on Pinterest, Twitter, Facebook, and Instagram.

Tangsuyuk (Sweet and sour beef or pork)

A Korean-Chinese style sweet and sour pork or beef 

  • 10 ounces pork or beef (pork loin or beef sirloin)
  • salt and pepper
  • 1/2 teaspoon grated ginger

Batter

  • 1 cup potato starch (or corn starch, soaked in 1 cup of water for 2 to 3 hours)
  • 2 tablespoons lightly beaten egg
  • 1 tablespoon canola oil
  • 4 cups canola or vegetable oil for deep frying

Vegetables

  • 1/2 small carrot (cut into thin bite size slices)
  • 1/4 small onion (cut into bite size chunks)
  • 1/2 small cucumber (cut into thin bite sized slices)
  • 1 ounce wood ear mushrooms – optional (cut into bit sized pieces)

Sauce

  • 1 cup water
  • 1 tablespoon soy sauce
  • 4 tablespoons sugar
  • 2 tablespoons vinegar (or to taste)
  • pinch salt
  • Starch slurry – 2 tablespoons starch* in 4 tablespoons water

Dipping sauce

  • 1 tablespoon soy sauce
  • 1 tablespoon water
  • 1 teaspoon vinegar
  • pinch black pepper
  • pinch red chili pepper flakes (gochugaru)
  1. At least an hour before cooking this dish, combine 1 cup of the starch with 1 cup of water and refrigerate until ready to use. The starch and water will separate, and you will need to pour out the water on top to use the soaked starch at the bottom. 

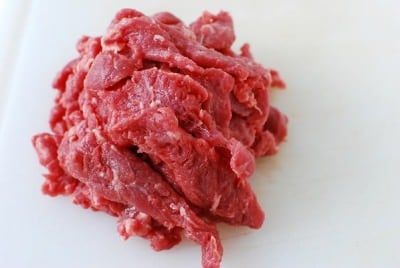
  2. Cut the beef (or pork) into 2 to 2.5-inch long strips (about 3/4-inch wide and 1/8-inch thick). Lightly sprinkle with salt and pepper. Let it sit until ready to deep fry.
    tangsuyuk beef
  3. Prepare the vegetables by cutting into thin bite size pieces.
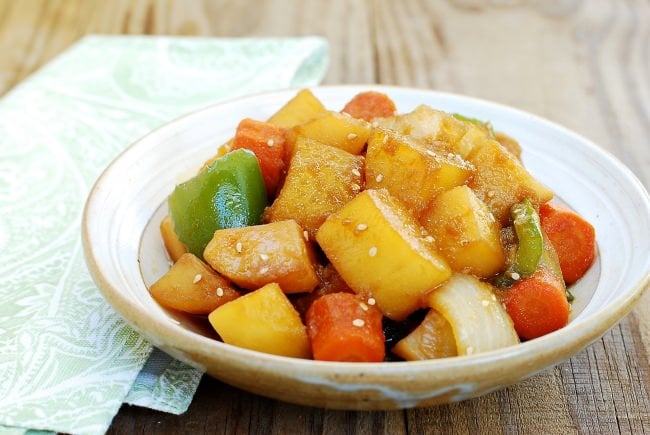
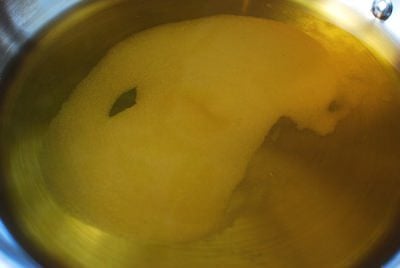
  4. In a pan, add 1 cup of water along with the remaining sauce ingredients except the starch slurry. Boil just until the sugar melts and turn off the heat. You will finish the sauce when the meat has been deep fried.
    tangsuyuk
  5. Carefully pour out the soaking water from the starch. Use your hand to mix the soaked starch with the egg and oil. The starch will be very stiff. The addition of oil will help loosen it a little. 
  6. Coat the meat with the starch batter.
    tangsuyuk
  7. Add 4 cups of oil to a deep fryer, wok or large pot. Heat over high heat to 350°F. Using metal tongs or chopsticks, drop the meat in the oil one piece at a time. Do not crowd the oil. Cook until golden brown, about 3 minutes, in two or three batches, reheating the oil to 350°F between the batches. 

  8. Remove them with a wire skimmer or a slotted spoon. Drain on a wire rack or in a large mesh strainer set on a bowl.
  9. Reheat the oil to 350°F. Add the meat (you can do this in one batch for the second frying) and deep fry again for 2 to 3 minute. Drain on a wire rack or in a large mesh strainer set on a bowl.

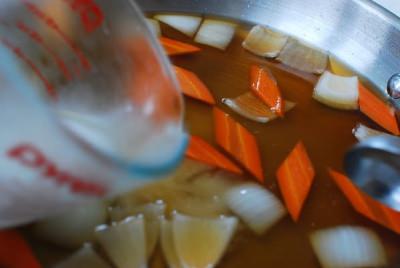
  10. Bring the sauce to a boil again. Add the carrot and onion pieces, which take longer to cook. When the sauce boils, add the starch slurry, stirring well. Taste the sauce and add a little more sugar or vinegar if desired. Turn the heat off, and then add the green pepper and pineapple pieces. The green vegetables, such as cucumber, lose their color quickly if boiled in the sauce.
    tangsuyuk sauce
  11. Place the meat on a large serving plate and pour the sauce on top or serve the sauce on the side. Serve immediately with a dipping sauce.

The post Tangsuyuk (Sweet and Sour Beef or Pork) appeared first on Korean Bapsang.


Haemul Sundubu Jjigae (Seafood Soft Tofu Stew)

$
0
0
This bubbling hot, hearty stew is made with extra soft tofu (sundubu or soondubu) and seafood. It cooks up so fast, making it perfect for a weeknight meal!
 
Korean stew made with silken tofu
 
The Korean stew (jjigae, 찌개) made with sundubu (or soondubu, 순두부) is enormously popular both in and outside Korea. There are even tofu houses that specialize in this dish, offering several variations (seafood, meat, vegetables, combination, etc.) on the menu. For me, sundubu jjigae is a flavorful, hearty stew I can quickly whip up in less than 30 minutes, making it perfect for a weeknight meal. I always keep a package or two of sundubu in the fridge. I think you should too. Here’s a variation made with seafood (haemul, 해물)!

This haemul sundubu jjigae recipe was originally posted in February 2012. It’s updated here with new photos and minor changes to the recipe.
 
Korean stew made with soft tofu

What is sundubu (or soondubu)? 

Sundubu is unpressed tofu with high water content. It’s normally labeled as extra soft tofu in English, and also known as silken tofu. However, Korean sundubu is not exactly the same as silken tofu which usually comes in a square box and in different consistencies such as soft, firm, and extra firm. Sundubu only comes in extra soft consistency. 

Whenever I make a sundubu jjigae, I remember my trip to Gyeongju, a historic city in the southeast coast of Korea, a few years ago. It was our first meal after a long train ride from Seoul. Recommended by the hotel staff, we ate at a restaurant well-known for its freshly made sundubu which is tofu with a high water content. The bustling restaurant, which had been converted from an old traditional house, had a homey feel. They make their tofu the old-fashioned way, using maetdol (grinding stone) and seawater. Needless to say, it was unbelievably fresh and delicious – the best sundubu I’ve ever had!

sundubu (Korean silken tofu)

How to make sundubu jjigae

I like to use anchovy broth, which is typical, but beef or vegetable broth will also work well. If you have a commercially prepared anchovy packet, making anchovy broth is as easy as making a tea.

While you can always use chili oil, I simply saute some gochugaru in sesame oil to create the chili oil effect. You can then sauté whatever ingredients you are using with the chili infused oil. Using the same basic technique, you can make different variations of sundubu jjigae.

Whatever you do, let the soft tofu be the star of the dish and do not overcrowd it with a lot of other ingredients. The delicate soft tofu nicely contrasts with the spicy broth and bold flavors of chili infused oil and seafood, making a delicious stew. Who can resist this bubbling pot of hearty stew on a cold day? Or, any day?

More sundubu jjigae variations

Kimchi sundubu jjigae
Deulkkae sundubu jjigae

 
Have you tried this recipe?  Please rate the recipe below by either clicking the stars or leaving a comment! And make sure to share your creations by tagging me on Instagram! Stay in touch by following me on Pinterest, Twitter, Facebook, and Instagram.
 
Korean stew made with silken tofu
 

Haemul Sundubu Jjigae (Seafood Soft Tofu Stew)

This bubbling hot, hearty stew is made with extra soft tofu (sundubu or soondubu) and seafood. It cooks up so fast, making it perfect for a weeknight meal!

  • 1 package (11 ounces sundubu (extra soft/silken tofu))
  • 2 ounces beef or pork (rib eye, sirloin, pork loin or pork belly)
  • 7 – 8 pieces of seafood assortment (shrimp, mussels, clams, and/or oysters)
  • 1/2 small zucchini (2 – 3 ounces)
  • 1/4 onion (2 – 3 ounces)
  • 1 scallion
  • 1 tablespoon red chili pepper flakes (gochugaru- adjust to taste.)
  • 1 teaspoon sesame oil (use a little more if using more gochugaru)
  • 1 teaspoon garlic
  • 1 teaspoon soy sauce
  • salt to taste (about 1/2 teaspoon)
  • pinch pepper
  • 1 cup anchovy broth (or other broth or water)
  • 1 egg (optional)
  1. Cut the meat into small (about 1-inch long) thin strips. Clean the seafood. Cut the the zucchini into about 1-inch pieces. Dice the onion and scallion.

  2. Add the red chili pepper flakes and sesame oil to a small pot, and place it over medium heat. Stir until the pepper flakes become a bit pasty in the heating pot. (The red chili pepper flakes burn easily, so do not preheat the pot.) 

  3. Add the meat, onion, garlic, and soy sauce. Stir fry until the pork and onion are almost cooked, 2 – 3 minutes.

  4. Pour in the broth (or water). Bring it to a boil and continue to boil for 3 – 4 minutes.

  5. Add the soft tofu in big chunks along with the zucchini. Bring to a boil again. Gently stir at the bottom of the pot once or twice so the tofu does not stick to the bottom. Cook for 3 – 4 minutes.

  6. Add the seafood and boil until the clams and mussels open, 2 – 3 minutes. Salt and pepper to taste. Add the chopped scallion right before turning the heat off. If desired, crack an egg into the stew right before serving while it’s still boiling hot.

The post Haemul Sundubu Jjigae (Seafood Soft Tofu Stew) appeared first on Korean Bapsang.

Menus for Korean Dinner Parties

$
0
0

4 Korean Dinner Party Menu Ideas

The holiday season is upon us! I’m sure many of you are planning holiday gatherings with family and friends. For your convenience, I put together some menu ideas for a Korean dinner party. This is an updated post of my December 2016 dinner party menus. I’ve updated the menus with new photos and added a Korean street food party menu.

The recipes included are some of my personal favorites to serve at dinner parties. In this post, you will find four different menus — a casual dinner for a few people, a more elaborate dinner for a larger group, a vegan dinner, and a Korean street food menu. 

You can adjust the number of dishes you make from the menu depending on the number of your guests, and double or triple the recipes as necessary. The number of servings is provided in each recipe. These dinner menus can be served family style or buffet style.

For cold days, you can also add a simple soup such as kongnamul guk and mu guk to any of these menus, especially if you have elderly guests. Rice and kimchi are the basics for a Korean table, so I did not add them to the menus here.

A lot can be prepared ahead of time. You can certainly marinate your meat or make namul dishes a day in advance. With some planning and preparation ahead, you too can serve up a Korean feast everyone will be rave about!

For a small group:

Korean dinner menu for a few people
Kimchijeon (Kimchi pancake)
Doenjang jjigae
Kongnamul muchim
Samgyupsal gui (Grilled pork belly): Or BulgogiJeyuk bokkeum, or Salmon bulgogi if preferred. 
Pa muchim (Scallion salad)
Mu saengchae (Spicy radish salad)

For a large group:


Haemul pajeon (seafood scallion pancake)
Kkanpung saewu (Sweet and spicy shrimp)
Japchae (Stir-fried starch noodles with beef and vegetables)
Gujeolpan (platter of nine delicacies)
Samsaek namul
Samgyupsal (pork belly): This can be done in the slow cooker or over the stove top.
Slow cooker dak jjim (braised chicken)
LA galbi (Beef short ribs): Outside grilling season, you can broil the ribs in the oven.

Vegan dinner:

Korean dinner party vegan menu

Hobak jeon  (zucchini pancake)
Hobak mandu (Zucchini dumplings): Make this in advance and freeze until ready to use.
Eggplant rolls (Gaji mari)
Kongnamul japchae
Dubu jorim (braised tofu)
Bibimbap – or Tofu bibimbap

Korean street food party

Korean street food party

Mandu (dumplings)
Eomuk guk (fish cake soup)
Dak gangjeong (sweet crispy chicken)
Kimbap (gimbap)
Tteokbokki (spicy stir-fried rice cake)
Hobak hotteok (sweet stuffed pumpkin pancake)

For different meat options: 10 Korean BBQ Recipes
For different vegetable side dish options: 15 Vegetable side dishes
To add a soup to your dinner: 15 Korean soup recipes
For kimchi recipes: 15 Easy kimchi recipes

The post Menus for Korean Dinner Parties appeared first on Korean Bapsang.

Ojingeo Bokkeum (Korean Spicy Stir-fried Squid)

$
0
0
Ojingeo bokkeum is a spicy stir-fried squid dish. Ojingeo is squid, and bokkeum refers to the dishes that are stir-fried. If you love squid and spicy food, this flavor packed dish is easy to make with a few staple Korean ingredients.

Korean spicy stir-fried squid

Ojingeo bokkeum (오징어 볶음) is a spicy stir-fried squid dish. Ojingeo is squid, and bokkeum refers to the dishes that are stir-fried. Koreans love squid, and this spicy dish is highly popular at home and restaurants. For this dish, the squid is cut into bite-sized pieces and stir-fried in a slightly sweet gochujang (Korean red chili pepper paste) based sauce along with some vegetables. The red spicy sauce adds a burst of spicy flavor to the crisp vegetables and tender squid!

In this post, I’ve updated my squid recipe that was originally posted in April 2010 with more information, new photos and an improved recipe.

Once you clean the squid, the dish cooks up very quickly.

Korean spicy stir-fried squid

How to prepare squid

Grab the body in one hand and the head in the other. Firmly pull apart with a slight twisting motion. The head and innards should easily slip out of the body. Then, cut the tentacles from the head just below the eyes.

Remove the skin from the flesh and the beak from the center of the tentacles. However, Korean cooks commonly leave the squid skin on. It’s a matter of preference and depends on the squid. 

Finally, some people lightly score the squid in a small diamond pattern (about 1/4-inch squares). It helps the squid pieces hold more sauce and gives them an interesting look. I skipped scoring in this updated post. Instead, I left the squid body whole and cut into rings. You can also cut the squid body open and then into about 3/4-inch wide and 3-inch long bite size pieces.

How to clean squid

Seasoning mix

The seasoning mix is made with staple Korean ingredients, such as gochugaru (red chili pepper flakes), gochujang (red chili pepper paste), garlic, ginger, etc. This recipe is certainly hot, but not fiery hot. If necessary, you can adjust the heat level to your taste by using more or less gochugaru.

Vegetable options

I used onion, carrot, zucchini, and scallions in this recipe. Green cabbage and bell peppers are also common. Fresh hot chili peppers are also commonly used in this dish, but the heat can be quite intense with certain varieties.

More squid recipe

Ojingeo Muchim (Spicy Squid Salad)

Ojingeochae Muchim (Spicy Dried Squid Strips)

Have you tried this recipe?  Please rate the recipe below by either clicking the stars or leaving a comment! And make sure to share your creations by tagging me on Instagram! Stay in touch by following me on Pinterest, Twitter, Facebook, and Instagram.

Korean spicy stir-fried squid

Ojingeo bokkeum (spicy stir-fried squid)

Ojingeo bokkeum is a spicy stir-fried squid. If you love squid and spicy food, this flavor packed dish is easy to make with a few Korean staple ingredients.

  • 1 medium size squid (about 14 ounces)
  • 1/2 medium carrot
  • 1/2 medium onion
  • 1/2 medium zucchini
  • 2 scallions
  • 1 tablespoon vegetable oil
  • 1 tablespoon sesame oil

Sauce:

  • 2 tablespoons Korean chili pepper paste (gochujang)
  • 1 tablespoon Korean chili pepper flakes (gochugaru – 1 or 2 teaspoons more for a spicier dish)
  • 1-1/2 tablespoons soy sauce
  • 1 tablespoon sugar
  • 1/2 tablespoon corn syrup (or 1 more teaspoon sugar)
  • 1 tablespoon minced garlic
  • 1 teaspoon minced ginger
  • 1 teaspoon sesame seeds
  • pinch black pepper
  1. Combine all of the sauce ingredients in a small bowl.
  2. Clean the squid (see note). Cut the body into about 3/4-inch rings (or slit the body open and cut into 3/4-inch wide, 2-inch long bite size pieces). Do not make the pieces too small as they will shrink when cooked. Cut the tentacles into the same lengths. See note if you want to score the squid.

  3. Mix the squid with the seasoning mix and marinate while preparing vegetables.
  4. Slice the onion. Cut the zucchini and carrot into half lengthwise and thinly slice into 2-inch long pieces. Cut the scallions 2-inches long.
  5. Heat a large skillet over high heat and add the vegetable oil. Add the carrots, followed by the onions, zucchini, peppers and then the scallions. Stir fry the vegetables quickly only until they start to wilt, about 2 minutes.
  6. Push the vegetables to the sides of the skillet. Add the marinated squid and any remaining sauce to the center of the skillet. Stir fry just until the squid pieces curl up and turn opaque (about 2 minutes). 

  7. Stir to mix the vegetables and the squid well for a minute. Drizzle the sesame oil over. (Do NOT overcook the squid. The squid will get tough.) Serve warm with a bowl of rice or on top of rice. 

How to clean squid: Grab the body in one hand and the head in the other. Firmly pull apart with a slight twisting motion. The head and innards should easily slip out of the body. You can also insert a fork or spoon to loosen up the innards from the inside of the body. the tentacles from the head just below the eyes. Remove the skin from the flesh and the beak from the center of the tentacles.

How to score the squid: Slit the body open and flatten. Lightly score the inside in a small diamond pattern (about 1/4-inch squares). 

The post Ojingeo Bokkeum (Korean Spicy Stir-fried Squid) appeared first on Korean Bapsang.

Dakjuk (Korean Chicken Porridge)

$
0
0
Porridge is hugely popular in Korea as a breakfast or a light meal. This creamy porridge made with chicken is one of the best when it comes to comfort food, especially on cold winter days!
Dakjuk (Korean chicken porridge)

Are you a fan of porridge (juk, 죽, in Korean)? Porridge is hugely popular in Korea as a breakfast or a light meal. Because it’s healthy and easy to digest, porridge is also commonly served to the ill, elderly, and babies. Dakjuk (닭죽, chicken porridge) is a family favorite! This chicken-flavored creamy porridge is one of the best when it comes to comfort food, especially on cold winter days!

Made with all sorts of grains, proteins, and vegetables, there are endless variations of porridges in Korea. Along with this chicken porridge (dakjuk), red bean (patjuk,팥죽), pumpkin (hobakjuk, 호박죽), pine nuts (jatjuk, 잣죽) and abalone (jeonbokjuk, 전복죽) porridges are some of the popular varieties.

This dakjuk recipe was originally posted in March 2010 during the first year of my blogging. Here’s the much needed update with an improved recipe and new photos. 

Chicken stock and meat for porridge

Traditionally, chicken porridge is made with chicken stock and pulled chicken meat. Often, it’s made with leftover chicken soup, such as dak gomtang (닭곰탕) or baesuk (백숙).

You can simply boil a small chicken or a few bone-in chicken pieces with onion, garlic cloves, ginger and scallions until the chicken is tender. Enjoy some of the boiled chicken just with salt and pepper if you like, and use the leftover stock and meat for porridge.

Alternatively, you can simply use good quality commercial chicken stock and boil some boneless chicken pieces in the stock.

Creamy chicken porridge

Often, I also make porridge with leftover roasted chicken. If you want to roast chicken at home, this  Thomas Keller’s roast chicken recipe is really good. It’s absolutely effortless to make yet so tasty and moist. The leftovers from a store-bought rotisserie chicken work as well.

After enjoying the roast chicken, make chicken stock with the remains by boiling the bones in a pot along with some aromatic vegetables. What a great use of the remains of roast birds!

What type of rice to use  

Dakjuk can be made with either short grain rice or sweet rice (aka glutinous rice, chapssal 찹쌀 in Korean). I prefer sweet rice as it gives the porridge a creamier texture and a sweeter taste. Traditionally, the rice is stir-fried in sesame oil before the liquid is added. This adds a deep nutty flavor to the porridge and coats the rice with oil, thus yielding a better porridge texture.  

Vegetable options

Typically, dakjuk also features some chopped vegetables. In this recipe, I used carrot, celery, and mushrooms. Zucchini, green cabbage, potato, and garlic chives are all good options. You can chop them finely or roughly, depending on your preference. Adjust cooking time appropriately.

More porridge recipes

Jeonbokjuk (Abalone porridge)
Hobak juk (pumpkin porridge)
Patjuk (sweet red bean porridge)

Have you tried this porridge recipe?  Please rate the recipe below by either clicking the stars or leaving a comment! And make sure to share your creations by tagging me on Instagram! Stay in touch by following me on Pinterest, Twitter, Facebook, and Instagram.

Korean porridge made with chicken

Dakjuk (Korean chicken porridge)

Porridge is hugely popular in Korea as a breakfast or a light meal. The chicken flavored, creamy porridge is one of the best when it comes to comfort food, especially on cold winter days!

  • 1 cup short grain rice or sweet rice (glutinous rice)
  • 6 cups chicken stock (see notes)
  • 1 to 1-1/2 cups pulled chicken (seasoned with salt, garlic, sesame oil, pepper)
  • 1 medium carrot
  • 1 celery stalk
  • 3 to 4 mushroom caps
  • 2 tablespoons sesame oil
  • Optional garnishes:
  • Finely chopped scallion
  • Sesame seeds
  1. Soak the rice for about an hour, and drain.

  2. Finely chop the vegetables.
  3. Add 2 tablespoons of sesame oil to a medium size pot. Add the rice and stir-fry for a few minutes over medium heat, until the rice turns translucent.

  4. Pour the stock to the pot and bring it to a boil. Continue to cook, stirring occasionally for about 20 to 25 minutes, or until the rice is cooked and softened. Start with medium low heat, but reduce to lower heat when the stock is visibly reduced. Stir occasionally (more frequently as the stock is reduced) so the rice doesn’t stick to the bottom of the pot.

  5. Stir in the vegetables, cover, and simmer for an additional 10 to 15 minutes until the vegetables are soft. You can also adjust the consistency of the porridge to your taste by adding more stock or water.

  6. Since the chicken is already cooked, stir it in during the last few minutes of simmering, leaving some to use as a garnish, if desired. You can add salt and pepper at the end or serve on the side. Serve hot with the optional garnish on top.

3 ways to prepare chicken stock and pulled chicken for porridge:

1. Boil a small chicken or a few bone-in chicken pieces with onion, garlic cloves, ginger and scallions until the chicken is cooked through.

2. Use good quality commercial chicken stock and boil some boneless chicken pieces in the stock until the chicken is cooked through.

3. If using leftover roasted chicken, make chicken stock by boiling the remains in a pot along with some aromatic vegetables.

The post Dakjuk (Korean Chicken Porridge) appeared first on Korean Bapsang.

Kimchi Mandu (Kimchi Dumplings)

$
0
0

These Korean dumplings filled with a kimchi mixture are highly popular in Korea. If you like kimchi, you’ll love this dumpling recipe. Kimchi adds tons of spicy and savory flavors!

Kimchi mandu (Korean dumplings made with kimchi)

What’s your favorite dumpling variation? Filled with a kimchi mixture, these Korean dumplings, known as kimchi mandu (김치 만두), are highly popular in Korea. Needless to say, kimchi adds tons of spicy and savory flavors to the dumplings.

Kimchi mandu is great for making soup, such as manduguk (dumpling soup) or tteok-manduguk (tteokguk with dumplings), which is a must-eat New Year’s dish. As such, it’s a popular dumpling variation for the New Year’s feast. Kimchi mandu gives nice flavor and textural contrasts to the mildly-flavored broth and soft rice cake slices.

In Korea, steamed kimchi mandu is also popular as a street food and at restaurants.

Kimchi mandu (Korean dumplings made with kimchi)

In preparation for the upcoming New Year’s feast, I’ve updated my kimchi mandu recipe, which was originally posted in January 2012, with new photos and an improved recipe.

Kimchi dumpling filling

Typically, kimchi dumplings are filled with a mixture of kimchi, pork, tofu, bean sprouts, onions, and scallions. In this updated recipe, I also used dangmyeon (당면), sweet potato starch noodles, which is also common in mandu fillings.

The key to making good kimchi mandu is to use fully fermented kimchi. I usually add some gochugaru (Korean red chili pepper flakes) for extra spicy dumplings, but you can skip it or use less (or more) to your taste.

By now, you should probably know that kimchi and pork are a classic match in Korean cooking, but feel free to use beef or other protein if preferred. You can also replace the meat with mushrooms. Or, simply omit the meat, and increase the other ingredients such as kimchi, tofu, etc. If you start with vegan or vegetarian kimchi, you can even make the dumplings vegan.

Finally, if you have perilla seed oil, try using it instead of sesame oil. It lends a distinct nutty flavor to the kimchi filling. It’s even better if you add ground perilla seeds if available! Mix in a generous amount and enjoy the complexity of the flavors that perilla seeds add to the dumplings.

 Korean dumplings made with kimchi

How to fold dumplings

As I said in my other mandu recipe, a dumpling can be fold in many different ways. The easiest is a half-moon shape, which you can do by simply folding the dumpling wrap in half and sealing it by tightly pinching the edges together. Typically, dumplings made for soups are shaped to a round by glueing the ends of the half-moon shape together. Wet the edges of store-bought dumpling wrappers so they can be glued together. Be light on the filling for easier folding and crimping.

More dumpling recipes

Mandu (Korean dumplings)

Saewu (shrimp) mandu – with homemade wrappers

Hobak (zucchini) mandu – vegan

Have you tried this dumpling recipe?  Please rate the recipe below by either clicking the stars in the recipe card or in the comment section! And make sure to share your creations by tagging me on Instagram! Stay in touch by following me on Pinterest, Twitter, Facebook, and Instagram.

Korean dumplings with kimchi

Kimchi Mandu (Kimchi Dumplings)

These Korean dumplings filled with a kimchi mixture are highly popular in Korea. If you like kimchi, you’ll love this dumpling recipe. Kimchi adds tons of spicy and savory flavors!

  • Makes about 40 dumplings
  • 40 dumpling wrappers (slightly thick)

Filling:

  • 2 ounces dangmyeon (sweet potato starch noodles, soaked in warm water for about 30 min.)
  • 1 cup packed finely chopped kimchi
  • 8 ounces tofu
  • 10 ounces mung bean sprouts, sukju namul (숙주나물)
  • 1/2 medium onion
  • 2 to 3 scallions
  • 8 ounces ground pork or beef (or mix)
  • 1 tablespoon minced garlic
  • 1 teaspoon finely grated ginger or juiced
  • 1 tablespoon sesame oil
  • 1 tablespoon soy sauce
  • 1 tablespoon gochugaru (adjust to taste)
  • salt to taste (about 1/4 teaspoon)
  • pepper to taste (about 1/8 teaspoon)

Optional ingredients

  • 1 tablespoon Perilla seed oil (in lieu of sesame oil)
  • 2 to 4 tablespoons ground perilla seeds
  1. Finely chop the kimchi and squeeze out excess liquid by hand.
  2. Blanch the bean sprouts in boiling water, drain, chop and squeeze out water.
  3. Squeeze out water from the tofu. Using a cheesecloth will make squeezing easier. Finely chop the noodles. Finely chop the onion and squeeze out water. Finely chop the scallions.

  4. Combine all the filling ingredients in a large bowl. Mix well by hand.
  5. Place one heaping teaspoonful to a tablespoon of the filling on a wrapper. Wet the edges of the wrapper with water or egg wash and seal tightly (pushing the air out with your fingers) into a half-moon shape. (Stop here if you want a half-moon shape dumpling.) Then, bring the two ends together, apply water or egg wash to one end and press tightly to create a round shape. Repeat this process until all the filling/wrappers are used.
  6. Kimchi mandu can be steamed for about 10 minutes in a steamer (12 minutes if frozen). Make sure to line the steamer with a wet cheesecloth, paper towel, or cabbage leaves to prevent mandu from sticking.

  7. For boiling, pan-frying and deep-frying dumplings, see my other mandu recipe.

Kimchi mandu is well seasoned, but you can serve them with a dipping sauce if preferred. 

Tips for freezing: Freeze the dumplings on a tray with the pieces not touching for about an hour, and then store them in a freezer bag. Otherwise, the skins will get soggy from the moisture in the filling and stick together in the freezing process.

The post Kimchi Mandu (Kimchi Dumplings) appeared first on Korean Bapsang.

15 Korean Vegan Recipes

$
0
0

A collection of easy, delicious Korean vegan recipes!
a list of 15 Korean Vegan Recipes

Happy New Year! According to the news media, 2019 will be “the Year of the Vegan.” For those of you who are looking for Korean vegan recipes, here’s a collection of easy, delicious recipes! From kimchi to noodles, this list features a nice variety of recipes for your Korean vegan table! Even if you are not on a vegan or vegetarian diet, these recipes will help you add more plant-based foods to your diet for a healthy New Year.   

If you think Korean food is all about BBQ meat and fried chicken, think again! Traditionally, Korean cuisine relies heavily on grains, legumes, and vegetables. Meat was scarce, so our ancestors didn’t eat so much meat as we do in modern days.

Also, Korean temple cooking is entirely plant-based, using seasonal ingredients which are mostly grown in temple grounds or harvested from fields and mountains. No meat or seafood allowed! Due to the long history of Buddhism in Korea, temple cuisine (사찰음식) is deeply incorporated into traditional Korean cuisine. 

For these reasons, so many classic Korean dishes are naturally vegan (or vegetarian) or can easily be veganized!

This list doesn’t include all the vegan banchan included in my 15 Korean Vegetable Side Dishes. Check them out as well! They are very easy to make and will complement just about any main dish!

1. Hobak Buchim  (Zucchini Pancakes)

Hobak buchimgae (Korean zucchini pancake)

2. Buchujeon (Garlic Chives Pancake) 

Buchujeon (Korean garlic chive pancakes)

3. Zucchini Dumplings (Hobak Mandu) 

Zucchini dumplings

4. Eggplant Rolls (Gaji mari) 

Eggplant rolls

5. Vegan Kimchi 

Best Vegan kimchi recipe

6. Kongnamul Japchae 

Kongnamul Japchae (Japchae with soybean sprouts

7. Tofu Gimbap

tofu gimbap recipe

8. Tofu bibimbap

Korean rice bowl with tofu and vegetables

9. Deulkkae Soondubu Jjigae (Soft Tofu Stew with Perilla Seeds) 

Soft tofu stew with perilla seeds

10. Mu Doenjangguk (Soybean Paste Radish Soup)

Mu Doenjang Guk (Korean Soybean Paste Radish Soup)

11. Beoseot Jeongol (Mushroom Hotpot)

Mushroom hot pot (Beoseot jeongol)

12. Dubu Jorim (Braised Tofu)

Braised tofu on a plate

13. Gamja Jorim (Braised Potatoes)

Gamja jorim (Soy braised potatoes)

14. Kongguksu (Chilled Soy Milk Noodle Soup)

Thin wheat noodles in chilled savory soy milk

15. Hobakjuk (Pumpkin Porridge)

Korean pumpkin porridge made with kabocha pumpkin

More vegan recipes

Miyeok Muchim (Seaweed Salad)
Oi Naengguk (Chilled Cucumber Soup)
Dongchimi (Radish Water Kimchi)
Nabak Kimchi (Mild Kimchi in Broth) 
Ueong Jorim (Braised Burdock Root)
Oiji (Korean Pickcled Cucumbers)
Yeongeun Jorim (Sweet Soy Braised Lotus Roots)
Doraji Namul (Sautéed Bellflower Roots)
Chwinamul Bokkeum (Stir-fried Aster Scaber)
Danpatjuk (Sweet Red Bean Porridge)

Give these recipes a try and let me know what you think! I’d love to hear from you.

Wishing you and your family a happy and healthy 2019!

The post 15 Korean Vegan Recipes appeared first on Korean Bapsang.

Vegetable Broth for Korean Cooking

$
0
0

Learn how to make Korean vegetable broth for your Korean soups and stews! It’s super easy to make and requires very few ingredients.

Vegetable broth in a jar and a measuring cup

In my previous post, 15 Korean Vegan Recipes, I mentioned that many classic Korean dishes can easily be veganized. You can make the dishes like bibimbap or japchae vegan simply by omitting the meat and the egg. For soups and stews, you will need to substitute the meat or anchovy broth with vegetable broth. Here’s how to make Korean vegetable broth!

Making Korean broth at home is really easy! More so with vegetable broth. It doesn’t take much time and requires very few ingredients.

Ingredients for Korean vegetable broth

Called chaesu (채수) in Korean, vegetable broth can be made with a variety of ingredients. However, there are a few vegetables that are typically used to make Korean broth. They are dried dashima (다시마, aka kombu), dried shiitake mushrooms (pyeo-go beoseot, 표고버섯), Korean radish (mu, 무), large scallions (daepa, 대파), and onion.

For rich, flavorful vegetable broth, dried dashima and dried shiitake mushrooms are the two most important ingredients. They are good sources of glutamic acid, an amino acid responsible for savory taste and full of nutrients. If you make Korean food often, dried dashima and shiitake are must-haves in your pantry!

Dried kelp and shiitake mushrooms

Korean radish lends a refreshing taste to the broth, and scallions and onion add natural sweetness. You can also use vegetable scraps, such as cabbage cores, mushroom stems, onion peels, carrot peels, etc.

In this recipe, I used several of the classic Korean broth ingredients. Sometimes, I only use dashima, and other times I also use shiitake mushrooms and more. It’s that versatile! Also, the amounts of vegetables in this recipe are only guidelines. You can certainly use more or less.

How to make vegetable broth 

The simplest vegetable broth in Korean cooking is dashima broth. All it takes is a few minutes of boiling dashima pieces. To maximize the flavor, pre-soak the dashima for 30 minutes or longer before boiling it. The white powder on the surface is the natural flavor enhancer, so don’t wash it off. 

Another option is to use dried shiitake mushrooms along with dashima. The resulting broth is quite rich and flavorful! This broth is very common in Korean temple cooking. Shiitake mushrooms are full of earthy, savory flavors, which intensify when dried. The liquid from reconstituting dried shiitake mushrooms is good broth by itself. Save the liquid to use in a sauce, soup or stew. 

Sometimes, I throw in some onion to round up the earthy, savory flavors of the broth with natural sweetness of the onion.

Finally, for more depth and complexity, use Korean radish, large scallions, dried chili pepper flakes and/or vegetable scraps, such as cabbage cores, mushroom stems, onion peels, carrot peels, etc.

Korean vegetable broth through a strainer

I used this batch to make vegan doenjang jjigae and baechu doenjang guk. They were delicious! This can be a base for many other Korean recipes, in place of the meat or anchovy broth, such as manduguk, tteokguk, kongnamul guk, mu guk, kimchi jjigae, soondubu jjigae, jjambbong, gyeranjjim, and janchi guksu.

Have you tried this Korean vegetable broth recipe?  Please rate the recipe below by either clicking the stars in the recipe card or in the comment section! And make sure to share your creations by tagging me on Instagram! Stay in touch by following me on PinterestTwitterFacebook, and Instagram.

Vegetable Broth for Korean Cooking

Learn how to make Korean vegetable broth for your Korean soups and stews! It’s super easy to make and requires very few ingredients.

  • 2 pieces dashima (about 4 inch square)
  • 2 to 3 shiitake mushrooms
  • 1/2 medium onion (cut into chunks)
  • 6 ounces Korean radish (cut into chunks)
  • 2 scallions (1 if using large one, daepa or 1/2 leek)
  • 3 to 4 ounces green cabbage cores and leaves
  • 2 dried red chili peppers or 1 teaspoon peppercorns – optional
  1. Soak the dashima and shiitake mushrooms for about 30 minutes in a large pot with 10 cups of water. You can skip soaking if you don’t have time, but soaking maximizes the flavor of the broth. 

  2. Add the other vegetables you’re using to the pot. 

  3. Bring it to a boil over high heat and boil, covered, for 10 minutes. Remove the dashima. Reduce the heat to medium, and continue to boil, for about 20 minutes. Turn the heat off. Let the broth cool.
  4. Pour the broth through a strainer into a large bowl. Press the vegetables with a spoon or spatula to squeeze out any remaining broth.

  5. Store the broth in the fridge up to a week, or in the freezer up to 2 months.

The post Vegetable Broth for Korean Cooking appeared first on Korean Bapsang.


Tteok Mandu Guk (Rice Cake Soup with Dumplings)

$
0
0

Make this warm, soothing bowl of rice cake soup with dumplings for your New Year celebration! The recipe shows how to make a quick Korean beef broth.

Tteok Mandu Guk (Rice Cake Soup with Dumplings)

Happy Lunar New Year! Tomorrow is Lunar New Year (Seollal, 설날)! Although we eat tteokguk all year round, tteokguk is a traditional New Year dish. I already have two versions of tteokguk on the blog – tteokguk and gul tteokguk (oyster rice cake). This time, I’m showing you how to make a variation made with mandu (Korean dumplings), hence the name tteok mandu guk (떡만두국)!

My previous tteokguk recipe uses beef brisket which is flavorful but takes a long time to cook. In this recipe, I used a quick method to make a beef soup base. You can also use anchovy broth, vegetable broth or even store-bought chicken stock, if preferred.

For dumplings, I personally prefer kimchi mandu for the soup. The robust flavor and crunchy texture of kimchi mandu add a nice contrast to the mildly flavored broth and soft rice cake slices. You can, of course, use any dumplings, including your favorite store bought ones.

Tteok Mandu Guk (Rice Cake Soup with Dumplings)

To add mandu (dumplings), you can cook them in the broth along with the rice cake slices. Stir gently so they don’t stick to the bottom of the pot. Boil until all of them float, and continue to cook for another minute or two. But, this method will make the soup pretty thick from all the starch released from the rice cakes and dumplings.  

One way to keep the soup from becoming too thick is to cook the dumplings in boiling water separately until they float, and add to the soup after the rice cakes are softened.

My preferred way is to steam the dumplings and add to the soup when the rice cakes float and softened. This not only keeps the soup from getting too thick, but also prevents the dumpling skins from turning mushy.

Happy Lunar New Year! Hope you and your family have a delicious tteok mandu guk.

Have you tried this rice cake soup with dumplings recipe?  Please rate the recipe below by either clicking the stars in the recipe card or in the comment section! And make sure to share your creations by tagging me on Instagram! Stay in touch by following me on PinterestTwitterFacebook, and Instagram.

Tteok Mandu Guk (Rice Cake Soup with Dumplings)

Tteok Mandu Guk (Rice Cake Soup with Dumplings)

Make this warm, soothing bowl of rice cake soup with dumplings for your New Year celebration!

  • 4 ounces beef (chuck or loin)
  • 1 tablespoon soup soy sauce
  • 1 teaspoon minced garlic
  • salt and pepper to taste
  • 1 scallion
  • 2 to 3 cups sliced rice cakes (tteokguk tteok, 떡국떡) (Soak in cold water for 10 to 20 min if hardened)
  • 8 to 10 dumplings (mandu)

Optional Garnish

  • 1 egg
  • 1/2 sheet gim nori, cut into thin strips
  1. Cut the beef into thin bite size pieces (1 to 1 1/2 inch).
  2. In a medium pot, sauté the beef with 1 tablespoon of soup soy sauce until all the pieces turn brown. Pour in 5 cups of water and bring it to a boil. Skim off the foam. Reduce the heat to medium and continue to boil, covered, for 10 minutes.
  3. You can add the dumplings to the soup along with rice cakes in the next step. Another option is to cook the dumplings separately in the boiling water until the dumplings float to the top, and then add to the soup when the rice cakes are cooked. Or, line a steamer with a wet cheesecloth and then steam mandu for about 8 minutes (10 minutes if frozen).
  4. Add the garlic and the rice cake slices to the boiling broth. Boil until the rice cakes turn very soft, usually about 5 – 8 minutes. 

  5. Drop the cooked dumplings and the scallion to the soup. Let the soup come to a boil again. Season with salt and pepper to taste. Ladle the steaming soup into individual bowls and garnish with the optional egg and gim strips.

Optional garnish

  1. To make egg garnish (jidan), separate the egg white and yolk. Lightly beat the white by gently cutting it with a spoon. Stir the yolk with a spoon until smooth. Heat a lightly oiled nonstick skillet over medium low heat. Pour each egg part into a thin layer, by tilting the skillet and/or spreading with a spoon. Cook each side briefly. (Do not brown the egg.)
  2. Roll each egg crepe, and slice into short thin strips. Slice the scallion diagonally into thin strips. Roast the gim on a hot skillet. Cut into thin 1 1/2-inch strips with kitchen shears, or simply crush them with hands.

The post Tteok Mandu Guk (Rice Cake Soup with Dumplings) appeared first on Korean Bapsang.

Hotteok (Sweet Korean Pancakes)

$
0
0

You can make this popular Korean sweet street snack called hotteok at home with this easy to follow recipe! It’s delicious with lots of healthy seeds and nuts!

Hotteok (Sweet Korean Pancakes)

Who wouldn’t love biting into a golden fried dough filled with a gooey brown sugar syrup and nuts in the street corner on a cold day? Eaten hot off the griddle, hotteok (호떡, hodduk or hoddeok) is a popular street snack, especially during winter months. There are many variations, but the classic hotteok we grew up on is made with a simple yeast dough with a brown sugar and nut filling, which is pan-fried in a little bit of oil. This recipe is my modern take on the classic version.

Hotteok variations

With a relatively long history since introduced by Chinese immigrants in the 19th century, hotteok continues to evolve — thanks to street food vendors! It seems like every time I go to Korea I learn about a new type of hotteok. There are all sorts of different sweet and savory fillings such as red beans, cheese, vegetables, japchae, etc. The dough has become very complex, and many vendors now deep-fry hotteok so they are very crispy on the outside.

Hotteok (Sweet Korean Pancakes)

When my daughter and I visited Busan (a southern coastal city) a couple of years ago, we were told that we had to try ssiat hotteok. Ssiat means seeds in Korean. The hotteok with a simple brown sugar filling was first deep fried. Then, the lady cut one edge open and stuffed a couple of spoonfuls of the seeds and nuts before folding it to serve in a small paper cup. Delectable! This variation of hotteok was created in Busan has become very popular all over the country.

Hotteok filling

I’ve been meaning to share my classic hotteok recipe for a while, but having had that ssiat hotteok (씨앗호떡), I decided to tweak my classic hotteok recipe to use lots of seeds and nuts for the filling. So, there’s actually a healthy element to this sweet treat! The seeds and nuts add lots of nutty flavors and textures to the brown sugar filling. You can use any seeds and nuts you like, and adjust the amount of the seeds and nuts to your taste. I used a combination of regular sugar and dark brown sugar. You can simply use light brown sugar instead.

Hotteok (Sweet Korean Pancakes)

Hotteok dough

The dough is basically made with wheat flour, sweet rice (glutinous rice) powder, sugar, and yeast. The ratio of flour and sweet rice powder varies depending on the preference. While you can make the dough only with all purpose flour, the sweet rice powder is what makes hotteok soft and chewy. You can simply use water to make the dough, but milk is typical. I sometimes use almond milk, which is a good replacement for the milk for vegan hotteok.

Hotteok (Sweet Korean Pancakes)

Also try my Hobak Hotteok (Sweet Stuffed Pumpkin Pancakes).

Have you tried this hotteok recipe?  Please rate the recipe below by either clicking the stars in the recipe card or in the comment section! And make sure to share your creations by tagging me on Instagram! Stay in touch by following me on PinterestTwitterFacebook, and Instagram.

Hotteok (Sweet Korean Pancakes)

You can make this popular Korean sweet street snack called hotteok at home with this easy to follow recipe! It’s delicious with lots of healthy seeds and nuts!

  • 1 package Active Dry yeast 2-1/4 teaspoons
  • 1/4 cup warm water
  • 1 teaspoon sugar
  • 2 cups all purpose flour
  • 1/2 cup glutinous rice powder aka sweet rice
  • 1 teaspoon salt
  • 1 tablespoon sugar
  • 1 tablespoon cooking oil
  • 1-1/4 cups milk (or water)

Filling:

  • 1/4 cup sugar
  • 1/4 cup dark brown sugar
  • 1 teaspoon cinnamon powder
  • 10 tablespoons of assorted roasted seeds and nuts ((sunflower seeds, pumpkin seeds, peanuts, walnuts, almonds, pine nuts, almonds, etc.0)
  1. Warm a bowl or cup by rinsing it with warm water. Add 1/4 cup of warm water to the bowl.(100 to 110). Stir in the sugar and yeast. Let it sit for about 10 minutes until the yeast has bubbled up. (You can skip this step if using instant yeast).

  2. Sift the flour, sweet rice powder (if using), sugar and salt together. Add the yeast water and warm milk (or water) to the flour mix.
  3. Knead until everything is well incorporated and the dough is formed. The dough should be a bit sticky.

  4. Cover with plastic wrap. Place it in a warm place and let it rise until doubled, about an hour. (In the winter, place it in the oven with the door open at the warm setting.)

  5. Prepare the filling by chopping the nuts and mixing all the filling ingredients well.

  6. Bring the dough down by reshaping into a round. Let it sit for another 20 – 30 minutes until doubled again.

  7. Start heating a pan with a couple of tablespoons of oil over medium heat. Lightly oil your hands. Tear a big enough piece to make an about 2 to 2-1/2-inch ball. Flatten into a thick disk, creating a shallow well in the middle. Add one and a half tablespoons of the filling and lightly press it down with the spoon.

  8. Carefully gather the edges together, pinching to seal. (This might take some practice.)

  9. Put the sealed side down on the pan, flattening a little by pressing it down with your oiled hand or spatula. Cook for a minute, and then flip over. Press down for a few seconds to flatten. Cook until both sides are golden brown. Repeat the process with the remaining dough.

Hotteok freezes well. You can reheat them in a toaster or toaster oven and enjoy delicious hotteok any time.


The post Hotteok (Sweet Korean Pancakes) appeared first on Korean Bapsang.

Gyeranjjim (Korean Steamed Eggs)

$
0
0
Gyeranjjim is a Korean savory egg custard dish. It’s a popular side dish that goes well with any Korean meal. It’s quick and easy to make!  
Gyeran jjim (Korean steamed eggs) in an earthen ware

Gyeranjjim (계란찜) is a Korean savory egg custard dish. Gyeran means eggs, and jjim refers to a steamed dish. Eggs are also called dalgyal (달걀) in Korean, so this dish is also called dalgyaljjim (달걀찜). It’s a popular side dish for breakfast, lunch, and dinner both at home and restaurants. Gyeranjjim is so quick and easy to make that I often add it to a meal at the last minute. 

In this post, I’ve updated my gyeranjjim recipe that was originally posted in March 2010 with more information, new photos and an improved recipe.

You can make it simply with eggs and scallions, but other chopped vegetables such as carrot, onion, and/or zucchini are great additions as well. Growing up, we often had it with pollack roe. 

Gyeran jjim in a stone pot (Korean steamed eggs)

To thin the eggs and enhance the flavor, I usually use anchovy broth. You can certainly use water or any other broth such as dashima broth or vegetable broth. For a silky, custard-like texture, I use 1/4 cup liquid for each egg. Adjust to your taste. 

For the seasoning, salted shrimp (saeujeot, 새우젓) is the best with eggs. Saeujeot adds a unique savory flavor to the eggs. Fish sauce will be excellent as well. 

This side dish is usually cooked and served in a small earthen ware (ttukbaegi, 뚝배기) at Korean restaurants. I also like to cook it in my earthen ware directly on the stove top. But, you can use a ramekin or a heat-proof bowl and place in boiling water in a pot. You can also microwave the eggs, covered with ceramic wrap, although the result may not be as silky as the other methods. 

Have you tried this steamed egg recipe?  Please rate the recipe below by either clicking the stars or leaving a comment! And make sure to share your creations by tagging me on Instagram! Stay in touch by following me on Pinterest, Twitter, Facebook, and Instagram.

Gyeran jjim (Korean steamed eggs)

Gyeranjjim (Korean Steamed Eggs)

Gyeranjjim is a Korean savory egg custard dish. It’s a popular side dish that goes very well with any Korean meal. It’s quick and easy to make!  

  • 4 large eggs
  • 1 cup anchovy broth (or water or dashima broth)
  • 1-1/2 teaspoons salted shrimp (saeujeot) or 3/4 teaspoon salt ((or fish sauce))
  • 2 tablespoons chopped scallion
  1. Beat the eggs with a spoon.

  2. Run it through a sieve to break the egg mixture down into a smooth liquid consistency. (If you skip this process, make sure to whisk the eggs sufficiently.)
  3. In a lightly oiled earthen ware, small stone/ceramic pot, or any heat proof bowl, mix the beaten eggs well with the anchovy broth or water and salted shrimp (saeujeot) or salt.  

Use one of the following cooking methods depending on the cookware used:

Earthen ware/ceramic pot (stove-top proof):

  1. Add the egg mixture to the pot. Cover, and simmer over medium low heat on the stove for about 7 minutes. The egg mixture should be still runny in the middle at this point. 

  2. Gently stir the eggs in a circling motion with a spoon. Reduce the heat to low. Add the scallions, cover, and simmer for 2 to 3 minutes until the mixture is set.

Stock pot:

  1. Bring water to a boil in a medium sized pot. The water should come halfway up the sides of the ramekin/bowl. (Adding a folded paper towel at the bottom will prevent the ramekin/bowl from rattling while the water is boiling.) 
  2. Carefully place the ramekin/bowl in the pot. Cover the pot and steam for 8 minutes over medium low heat. Make sure the water boils gently. 

  3. Gently stir the eggs with a spoon. Add the scallions, cover and steam for an additional 4 minutes until the mixture is set.


The post Gyeranjjim (Korean Steamed Eggs) appeared first on Korean Bapsang.

Jjimdak (Korean Braised chicken)

$
0
0

Here’s how to make a hearty, flavorful Korean braised chicken dish, jjimdak! It’s very easy to make at home with a few basic ingredients! Simply omit the chili peppers for a mild version.

Korean braised chicken

Jjimdak (찜닭) is a braised chicken dish. Jjim generally refers to the dishes that are steamed, stewed or braised in a sauce, and dak means chicken. These two syllables can be reversed, so jjimdak is also called dakjjim (닭찜). A popular spicy version is known as Andong jjimdak (안동찜닭). It’s a huge restaurant favorite that’s easy to make at home with a few basic ingredients!

This Andong-style jjimdak recipe was originally posted in February 2011. I’ve updated it here with an improved recipe, more information, and new photos.

What is Andong jjimdak?

Andong jjimdak, which originated from the city of Andong, is a spicy version of braised chicken that has become enormously popular since late 1990’s. Braised in a sweet and savory braising liquid, the nicely clean spicy kick comes from dried whole red chili peppers and fresh hot chili peppers. Unlike dakbokkeumtang (also called dakdoritang), no gochujang (Korean red chili pepper paste) or gochugaru (Korean red chili flakes) is used!

Making Andong jjimdak is relatively simple. The dish uses small sized chicken pieces and is cooked over high heat. As such, it cooks up pretty quickly. In Korea, braised chicken dishes are usually made a whole chicken cut up, but you can use pre-cut pieces if you want. However, for this dish, you’ll still need to cut the chicken parts into smaller pieces.

Korean braised chicken

Jjimdak variations

You can reduce the amount of the peppers or omit them entirely to make a mild version. This reminds me of the braised chicken dish I grew up eating.

When I was a small child, my parents raised a few chickens in our backyard. I remember feeding baby chicks and watching them grow. I remember how fascinated I was to see a mother hen lay her eggs. They were great company and provided us with warm fresh eggs every day. Occasionally, some of their lives were cut short by my father who had to do the unpleasant job to feed his family. These events apparently stirred strong emotions in one of my brothers. To this day, he does not eat chicken. As for me, I loved a sweet and savory braised chicken dish my mother used to make.

For vegetables, I used potatoes, carrot, onion, mushrooms, and scallions. Green cabbage is also a common ingredient for this dish. Some people also add a little bit of green leafy vegetables such as spinach and bok choy.

If you care about the color of the dish to be dark as a restaurant’s version you might have had in Korea, you can add a tablespoon of instant coffee powder or some caramel sauce.

Have you tried this dakjjim recipe?  Please rate the recipe below by either clicking the stars or leaving a comment! And make sure to share your creations by tagging me on Instagram! Stay in touch by following me on Pinterest, Twitter, Facebook, and Instagram.

Jjimdak (Soy braised chicken)

Jjimdak (Korean Braised Chicken)

Here’s how to make a hearty, flavorful Korean braised chicken dish, jjimdak! It’s very easy to make at home with a few basic ingredients! Simply omit the chili peppers for a mild version.

  • 1 medium size chicken cut up (2.5 to 3 pounds of cut pieces)
  • 3 ounces sweet potato starch noodles (dangmyeon, 당면)
  • 2 medium white or yukon gold potatoes (about 10 ounces)
  • 1 medium carrot
  • 1/2 medium onion
  • 3 – 4 mushroom caps (shiitake, white, or baby bella)
  • 2 scallions
  • 2 – 3 dried whole red chili peppers (4 to 5 small ones)
  • 1 – 2 fresh chili peppers or jalapenos – optional
  • 2 tablespoons minced garlic
  • 1 teaspoon grated ginger

Braising liquid:

  • 1/2 cup soy sauce
  • 2 tablespoons oyster sauce (or use more soy sauce)
  • 2 tablespoons rice wine (or mirin)
  • 2 tablespoons dark brown sugar
  • 4 tablespoons corn syrup (or 3 tablespoons honey)
  • 1/4 teaspoon black pepper
  • 1 tablespoon sesame oil
  • 1 teaspoon sesame seeds
  1. Soak the starch noodles in warm water while preparing the other ingredients for about 30 minutes. Drain well before using.
  2. Clean the chicken and cut into small pieces. Trim off excess fat.
  3. Cut the potatoes in chunks (about 1-1/2 inch) and soak in water while preparing other vegetables. Cut the carrot, mushrooms, and onion into bite size pieces.
  4. Add the chicken pieces to a large pot. Pour 3 cups of water over the chicken. (You should reduce the amount of water if not using the noodles.) Add the sauce ingredients except sesame oil and seeds. Bring it to a boil over high heat, uncovered, and continue to boil for about 10 minutes, skimming off the foam.

  5. Add the potatoes, carrot, mushrooms, onion, and dried whole red chili peppers if using. Cover, and cook for 8 to 10 minutes. There still is a lot of liquid, but the potatoes and starch noodles will soak up a lot of the liquid.
  6. Gently mix in the green chili peppers (or jalapenos), scallions and starch noodles, and continue to cook, uncovered this time, for an additional 3 minutes. Stir in the sesame oil. Garnish with the sesame seeds to serve.

You can prepare ahead of time up to step 5. When ready to serve, bring it to a boil and do the final step. 

The post Jjimdak (Korean Braised chicken) appeared first on Korean Bapsang.

Myulchi Bokkeum (Stir-fried Anchovies)

$
0
0

Myulchi bokkeum (or myeolchi bokkeum) is a popular side dish (banchan) in Korea. The stir-fried anchovies are sweet, savory, sticky and crunchy! This easy recipe also shows how to make it a bit spicy.

Spicy Stir-fried Dried Anchovies

Myulchi bokkeum (멸치볶음), stir-fried dried anchovies, is a staple side dish in Korea. It’s one of the most common basic side dishes, called mitbanchan (밑반찬). Basic side dishes are made to last long and served with every meal, including home-packed school lunch boxes. Korean stir-fried anchovies are sweet, savory, sticky and crunchy! This recipe shows two ways to prepare myulchi bokkeum – mild and spicy.

Korean dried anchovies

As explained in my Anchovy Stock for Korean Cooking post, dried anchovies (myulchi or myeolchi, 멸치) come in a wide range of qualities and sizes. If you visit traditional markets in Korea, you can easily find big piles of different sizes of dried anchovies on display everywhere. Buy the best quality anchovies you can find. These anchovies are a staple in my freezer. Dried anchovies are best kept in the freezer. 

Medium to large anchovies are primarily used to make broth, gukmul yong (국물용). Smaller ones are used for various stir-fried or braised side dishes and usually labeled bokkeum yong (볶음용). The smallest, tiny anchovies are called jiri myulchi (지리멸치). You can use any small dried anchovies for this recipe.

Anchovies are high in nutrition, so Korean moms encourage their kids to eat more anchovies. They are an excellent source of calcium, protein, Omega 3 fat, etc. My kids didn’t favor them when they were little, but they both eventually acquired the taste. Now, these stir-fried anchovies are among the regular side dishes I prepare to bring with me when I visit them.

How to make myulchi bokkeum

You don’t need to remove the guts and/or the heads from small anchovies before using them. They are all edible. If you are sensitive to a fishy taste, you can pan-fry the anchovies for a couple of minutes in a heated dry pan before using them. This will remove some of the fishy taste.

Stir-fried Dried Anchovies

To make myulchi bokkeum, stir-fry the dried anchovies in a little bit of oil, and then mix them in a thickened sweet and savory sauce. You can give them a spicy kick by using some gochujang (Korean red chili pepper paste). Dried anchovies are naturally salty, so don’t over season them.

This myulchi bokkeum recipe was originally posted in September 2011. I’ve updated it here with an improved recipe, more information, and new photos.

More banchan dishes

Kongjang (Soy Braised Black Soybeans)

Ojingeochae Muchim (Spicy Dried Squid Strips)

Yeonguen Jorim (Soy Braised Lotus Roots)

Ueong Jorim (Braised Burdock Root)

Have you tried this Korean stir-fried anchovies recipe?  Please rate the recipe below by either clicking the stars or leaving a comment! And make sure to share your creations by tagging me on Instagram! Stay in touch by following me on Pinterest, Twitter, Facebook, and Instagram.

Spicy Stir-fried Dried Anchovies

Myulchi bokkeum (Stir-fried Dried Anchovies)

Myulchi bokkeum, stir-fried dried anchovies, is a popular side dish (banchan) in Korea. The stir-fried anchovies are sweet, savory, sticky and crunchy! This easy recipe also shows how to make it a bit spicy.

  • 1 cup small size mulchi (멸치, (dried anchovies))
  • 2 teaspoons cooking oil
  • 2 – 3 green chili peppers (cut into small pieces (optional))

Sweet and Savory:

  • 2 teaspoons soy sauce
  • 3 tablespoons rice wine (or mirin)
  • 3 tablespoons water
  • 2 teaspoons sugar
  • 2 teaspoons corn syrup or honey
  • 2 – 3 garlic cloves (thinly sliced)
  • 1 teaspoon sesame oil
  • 1 teaspoon sesame seeds

Sweet and Spicy:

  • 1 tablespoon gochujang (Korean red chili pepper paste)
  • 3 tablespoons rice wine (or mirin)
  • 3 tablespoons water
  • 2 teaspoons sugar
  • 2 teaspoons corn syrup or honey
  • 2 – 3 garlic cloves (thinly sliced)
  • 1 teaspoon sesame oil
  • 1 teaspoon sesame seeds
  1. Heat a pan with the oil over medium heat. Add the anchovies and stir fry for 2 – 3 minutes. Turn off the heat. Transfer to a plate.
  2. Add the seasoning ingredients, except sesame oil and seeds, to the pan. If using the spicy version, stir the sauce well to dissolve the gochujang. Turn the heat back on. Boil the sauce over medium heat until it bubbles up and slightly thickens, about 2 – 3 minutes.
  3. Add the anchovies and the optional chili peppers to the pan. Stir well until the anchovies are coated well with the sauce. Stir in the sesame oil and sesame seeds at the end.

Myulchi bokkeum can keep well up to a week in the fridge. 

The post Myulchi Bokkeum (Stir-fried Anchovies) appeared first on Korean Bapsang.

Bulgogi (Korean BBQ Beef)

$
0
0

Korean BBQ beef, bulgogi, is very easy to make at home with a few basic ingredients, and the thinly sliced beef doesn’t take long to marinate. Here’s everything you need to know about how to make the best bulgogi! This recipe also shows how to enjoy it Seoul style.

Char grilled Korean BBQ beef in a grill pan

Bulgogi (불고기), also known as Korean BBQ beef, is marinated thinly sliced beef. While it can be made with other meats such as chicken (dak bulgogi) and pork (dweji bulgogi), the term “bulgogi” generally refers to beef bulgogi. 

While this Korean marinated beef is most commonly char grilled at restaurants and homes, especially outside Korea, there are many regional variations of how this dish is prepared. 

This Korean BBQ beef recipe was originally posted in May 2010. In this updated post, I’ve made minor tweaks to the recipe and introduced Seoul-style bulgogi (서울식 불고기), which is how I used to eat bulgogi growing up. Over the last decade or so, it has made a remarkable comeback and become very popular throughout the country. My family loves it! So, I decided to share it with you too.

Korean Bulgogi cooked in a pan with broth and noodles

Cut of meat for beef bulgogi

The best cut of meat for this dish is rib eye. Any tender, flavorful cut of beef, such as sirloin and tenderloin, works well too. I sometimes use tenderloin when I cook for the elderly members of my family and friends. You can find pre-cut bulgogi meat at Korean markets. It usually comes in different grades. Spend a little more for good quality meat if you can. You can also ask your butcher to thinly slice the meat or slice it yourself after freezing the meat for a couple of hours.

How to make bulgogi marinade

The classic marinade or sauce is made with a few basic ingredients such as soy sauce, rice wine, sugar, sesame oil, garlic, etc. The important thing is to find the right balance between saltiness and sweetness. Using generous amounts of garlic and sesame oil is necessary to create an authentic taste.

To enhance the flavor and tenderize the meat, Koreans traditionally add a grated Korean pear to the marinade. If you cannot find a Korean/Asian pear, you can omit it or use an apple instead. Thinly-sliced good quality meat doesn’t need much tenderizing. If desired, you may also use kiwi or pineapple, but be sure to use only a small amount so you don’t over-marinate the meat. They are very strong tenderizing agents and can break down the meat too much.

This marinade can also be used for other meats such as chicken or pork.

The thinly sliced meat doesn’t take hours to marinate. All you need is about 30 minutes to an hour, although you can marinate it up to overnight.

Korean bulgogi beef being cooked in a grill pan with a pair of chopsticks

How to cook the meat

Grilling: You can grill the meat over charcoal or wood charcoal (sootbul, 숯불), but a gas grill or a grill pan over the stove top works well too. If you are pan-frying your bulgogi and want nicely caramelized meat, preheat the pan nice and hot and don’t crowd the pan.

Stir-frying: Koreans also cook bulgogi in its own juice in a pan over the stove top for softer meat and some delicious sauce. Use all the marinade if you want more sauce at the end. 

Seoul-style bulgogi

As I mentioned earlier, this is how I grew up eating bulgogi, which has revived and become very popular. This style of bulgogi is also known as yetnal bulgogi (옛날불고기), meaning old-fashioned or old-school bulgogi. The meat is cooked on a special dome shaped pan with holes and a flat bottom that holds water or broth. The dome shape allows bulgogi drippings to flow down to the water or broth, which thickens as the meat cooks.

Starch noodles and/or vegetables such as mushrooms are delicious cooked in the slightly sweet and savory sauce. Try mixing the sauce with your rice. Incredibly tasty! 

The liquid can be simply water or broth. I use dashima broth that’s mildly seasoned with some soy sauce.

I found my dome-shaped grill pan at a local Korean market, but I also saw it online if you’d like to buy one. Otherwise, simply use a large skillet instead.

Marinated bulgogi arranged on a dome shaped pan along with thinly sliced scallions and enoki mushrooms

What to serve Korean BBQ beef with

Pa muchim (scallion salad) is excellent to accompany this dish along with lettuce wraps and ssamjang. For other vegetable side dishes, see my 15 Korean vegetable side dishes. Doenjang jjigae (soybean paste stew) pairs very well with bulgogi too.

What to do with leftover bulgogi

Leftover bulgogi is excellent in bibimbap, gimbap (also spelled kimbap), bulgogi doepbap or bulgogi jeongol.

More variations

Flank steak bulgogi
Slow cooker bulgogi
Dak bulgogi
Dweji bulgogi

Have you tried this Korean BBQ beef recipe?  Please rate the recipe below by either clicking the stars or leaving a comment! And make sure to share your creations by tagging me on Instagram! Stay in touch by following me on Pinterest, Twitter, Facebook, and Instagram.

Bulgogi (Korean BBQ Beef)

This Korean BBQ beef is very easy to make at home. The marinade is made with a few basic ingredients, and the thinly sliced beef doesn’t take long to marinate and cook. 

  • 2 pounds thinly-sliced beef (rib eye or top sirloin) – see note
  • 3 scallions, (cut into 2-inch pieces)
  • 1 small onion, (thinly sliced)
  • 1 small carrot, (thinly sliced – optional)

Marinade

  • 6 tablespoons soy sauce
  • 3 tablespoons water
  • 4 tablespoons sugar ( or you can use 2 T sugar 2 T honey) (Use more if not using Korean pear or apple)
  • 2 tablespoons rice wine or mirin
  • 2 tablespoons minced garlic
  • 2 tablespoons sesame oil
  • 2 teaspoons sesame seeds
  • 4 tablespoons grated Korean/Asian pear
  • 1/8 teaspoon pepper

For Seoul-style

  • 3 ounces potato starch noodles (soaked in hot water for 20 minutes and drained)
  • 3 scallions
  • 1 pack enoki mushrooms (stems removed)
  • 2 cups water, dashima broth, or beef broth
  • 1 teaspoon soy sauce
  1. If using packaged pre-sliced meat, separate the slices. Remove any excess blood from the pre-sliced meat using paper towels.

  2. Mix all the marinade ingredients in a bowl.

  3. Place the meat and vegetables in a large bowl. Add the marinade and toss gently to combine everything well. Marinate the meat for 30 minutes to an hour, up to overnight. 

  4. Grilling: Grill the meat on a charcoal or gas grill or pan fry in a skillet over high heat until slightly caramelized. If pan searing, preheat the pan nice and hot and cook the meat until slightly caramelized. Do not crowd the skillet.

  5. OR Stir-frying: Preheat the pan, and add the meat over high meat. You can crowd the pan to generate some liquid and let the meat cook in its own juice. Cook until the meat is no longer pink. Use all the marinade if you want some sauce at the end. 

For Seoul-style

  1. Thinly slice the scallions. Season 2 cups of water or broth with 1 teaspoon of soy sauce.

  2. Heat the pan, and add the bulgogi and top it with the scallions and mushrooms. Add about half of the broth around the edges of the pan. Add more when the liquid level goes down as you cook.

*Pre-sliced bulgogi meat is sold at any Korean market. Pay a little more to get good quality meat. If cutting the beef at home, partially freeze for about an hour to firm it up for easier slicing. Cut across the grain into about 1/8-inch thick slices.

The post Bulgogi (Korean BBQ Beef) appeared first on Korean Bapsang.

Kongjang (Soy Braised Soybeans)

$
0
0
Kongjang is a classic side dish that’s made by braising soybeans in a sweet and savory liquid. It’s a popular banchan that’s easy to make with a few ingredients. 
Soy braised soybean side dish garnished with optional sesame seeds


Kongjang (콩장), also called kongjaban (콩자반), is a sweet and savory braised soybean dish. It’s a staple side dish in Korean homes. 

On weekends, I try to make a few side dishes, banchan (반찬), to help make my weeknight meal preparations easier. During the week, I make a quick soup, stew, or meat dish and serve it with the pre-made side dishes.

I mentioned in the previous posts, that those side dishes that are made to last relatively long and served with meals over several days (or weeks) are called mit-banchan (밑반찬), meaning basic side dishes. There are a number of them, ranging from stir-fried dried anchovies to pickled perilla leaves. We grew up on these mitbanchan dishes. They were a big part of every meal, including home-packed school lunch boxes. 

Soy braised black soybeans served in a small plate as a side dish

What kind of beans to use

Kongjang is typically made with dried black soybeans, but you can also make it with yellow soybeans. Black soybeans are called geomjeongkong (검정콩)  or seoritae (서리태) in Korean and available at Korean or Asian grocery stores. Be sure to pick out rotten/broken beans before soaking. 

Showing Dried Black Soybeans before soaked

The soaked beans should be cooked in water first before you add the sugar and soy sauce for slow braising. This will keep the beans from getting hard. Cooking in an open pot helps reduce the liquid and gives the kongjang beans their unique shiny and wrinkled look.

The result is sweet and savory beans that are a tad chewy, which is a nice contrast to steamed rice they accompany!

This kongjang recipe was originally posted in March 2013. I’ve updated it here with new photos and minor changes to the recipe. 

Soy braised soybean side dish garnished with optional sesame seeds

Have you tried this braised soybean recipe?  Please rate the recipe below by either clicking the stars or leaving a comment! And make sure to share your creations by tagging me on Instagram! Stay in touch by following me on Pinterest, Twitter, Facebook, and Instagram.

Kongjang (Soy Braised Soybeans)

Kongjang is a classic side dish that’s made by braising soybeans in a sweet and savory liquid. It’s a popular banchan that’s easy to make with a few ingredients.

  • 1 cup dried black soybeans (seoritae, 서리태) (or yellow soybeans)
  • 4 tablespoons soy sauce
  • 2 tablespoons rice wine (or mirin/mirim)
  • 2 tablespoons sugar
  • 2 tablespoons oligodang (올리고당), or rice syrup (조청) (or corn syrup)
  • 1/2 teaspoon roasted sesame seeds – optional
  1. Rinse the dried soybeans a couple of times. Drain. Soak the beans in 2 cups of water for 2 – 3 hours or until the beans are softened. (The time required may vary depending on the beans.)

  2. Pour the beans and soaking water in to a medium size pot. Bring it to a boil. Continue to cook, uncovered, over medium high heat for about 10 minutes. Stir a couple of times so the beans don't stick to the bottom of the pot.

  3. Add the soy sauce, rice wine, and sugar. Reduce the heat to medium. Boil, uncovered, until the sauce is mostly evaporated and reduced to a couple of tablespoons, about 20 minutes, stirring occasionally. (Keep your eyes on the pot during the last few minutes to avoid burning the beans.)

  4. Add the syrup, stirring well to coat for a minute or two before turning the heat off. Sprinkle with the optional sesame seeds. The beans will be soft at first, but they will get a bit chewier in the fridge.

Kongjang will keep well in the fridge for up to 2 weeks.


The post Kongjang (Soy Braised Soybeans) appeared first on Korean Bapsang.


Stir-fried Garlic Scapes (Maneuljjong Bokkeum)

$
0
0
A simple Korean banchan made with spring garlic scapes! This delicious side dish takes less than 20 minutes to whip up. 
Fresh garlic chives shown with a bowl of stir-fried garlic chives
 

Garlic scapes (maneuljjong – 마늘쫑 ) are in season. I got a bunch from a Korean market for the first time this season. They are available in the late spring and early summer, when scapes are most tender and sweet. 

What are garlic scapes? 

Garlic scapes are the curly flowering shoots/stalks of garlic plants that are snipped off to allow the bulbs to grow bigger. They have a milder flavor than garlic cloves but are still quite garlicky. When cooked, the scapes become sweeter with a subtle garlic undertone and have a texture similar to that of thin asparagus.

In Korea, garlic scapes are commonly used as a vegetable for various side dishes. I sometimes pickle garlic scapes in a soy brine. I also blend scapes into a paste and add it to the grated potatoes to make potato pancakes.

For this recipe, I stir-fried the scapes with walnuts in a soy sauce-based sauce. You can omit the walnuts if  you want. Stir-fried garlic scapes are a simple and delicious spring side dish!

Fresh garlic chives shown with a bowl of stir-fried garlic chives

This recipe was originally posted in May 2013. I’ve updated it here with new photos and minor changes to the recipe.

If you haven’t cooked with garlic scapes, make that a goal this spring. You’re missing out on a wonderful vegetable! The scapes only appear in markets for a short period time, so grab them while you can.

Have you tried this stir-fried garlic scape recipe?  Please rate the recipe below by either clicking the stars or leaving a comment! And make sure to share your creations by tagging me on Instagram! Stay in touch by following me on Pinterest, Twitter, Facebook, and Instagram.

A bowl of stir-fried garlic chives with walnuts

Maneuljjong Bokkeum (Stir-fried Garlic Scapes)

A quick and easy Korean banchan (side dish) made with spring garlic scapes!

  • 10 ounces garlic scapes (maneuljjong)
  • 1/2 cup shelled walnuts (broken into quarters — optional)
  • 1 tablespoon cooking oil

For the sauce:

  • 2 tablespoons soy sauce
  • 1 tablespoon rice wine
  • 1 tablespoon water
  • 1 teaspoon sugar
  • 1 tablespoon oligodang or corn syrup (or more sugar)
  • 1 teaspoon sesame oil
  • 1/2 teaspoon sesame seeds
  1. Rinse and cut the garlic scapes into 2-inch lengths. Mix the first four sauce ingredients well together, and set aside.
  2. In a heated pan over medium low heat, roast the optional walnuts for 2 to 3 minutes. Remove from the pan.
  3. Add a tablespoon of oil to the pan, and increase the heat to medium high. Sauté the scapes for 2 to 3 minutes, stirring constantly.
  4. Reduce the heat to medium low. Return the walnuts to the pan, and pour the sauce into the pan. Cook until the garlic scapes are tender and the sauce is almost gone, about 2 – 3 minutes.

  5. Add the oligodang (or corn syrup), and stir well. Finish with the sesame oil and sesame seeds.

The post Stir-fried Garlic Scapes (Maneuljjong Bokkeum) appeared first on Korean Bapsang.

Spicy Grilled Shrimp Skewers (Gochujang Saewu Gui)

$
0
0

Easy spicy grilled shrimp flavored with a deeply savory gochujang sauce! The marinade is so easy to prepare, and the shrimp cook up very quickly. It’ll be perfect as a weeknight meal or a simple addition to your summer BBQ!

Red spicy shrimp skewers in a grill pan

Sometimes it only takes one special ingredient to give a dish a total makeover. In this recipe, that one ingredient is gochujang (고추장)! I simply added a couple spoonfuls of it to my usual marinade for grilling shrimp. That’s it! 

Gochujang sauce

If you think about it, how can you go wrong with gochujang? It’s deeply savory, peppery, pungent, slightly sweet and spicy – all at once. No wonder everything tastes better with gochujang!

Gochujang is commonly used in Korean spicy marinades, as used in such dishes as spicy grilled chicken, spicy grilled squid, and spicy pork BBQ. If you want to add more spiciness without altering the saltiness, add some gochugaru.

Adjust the amount of sugar or honey in the recipe to your liking, but don’t leave it out. The sugar or honey in the recipe helps balance out the saltiness of the gochujang, and also helps caramelize the shrimp faster.  

I used garlic in this recipe, but ginger will be a nice addition to the marinade as well.

gochujang saewu gui recipe 1

How to prepare and grill the shrimp 

For grilling, jumbo shrimp work best. I use 16 to 20 count shrimp, but 21 to 25 count shrimp are okay too. Be sure to adjust the cooking time depending on the size of the shrimp. If you bought shell-on shrimp, peel and devein them. Obviously peeled shrimp marinates better, while shell-on shrimp get extra flavor from the shell. I like to keep the tails on as the cooked shrimp look more attractive with the tails on, and the tail works as a built-in handle. 

Be sure to soak wood/bamboo skewers in water for about 30 minutes, so they don’t burn on the grill. If you don’t have skewers, you can grill the shrimp individually.

Once skewered, lightly sprinkle the shrimp with salt and pepper while preparing the marinade. Let the shrimp marinate for about 30 minutes up to overnight. 

Grill the shrimp over open flame or in a grill pan. You can also cook them under the broiler or in a skillet. The shrimp cook up very fast, but the amount of time required will vary depending on the heat source. Do not overcook. Nothing worse than overcooked dry and rubbery shrimp! The shrimp are cooked when they curl up and turn opaque. Don’t forget that they’ll continue to cook with remaining heat.

Serve the shrimp with grilled vegetables or a summer salad.

Step photos showing how to make spicy grilled shrimp

This Korean spicy shrimp recipe was originally posted in June 2013. I’ve updated it here with new photos, recipe card, and minor changes to the recipe.

More Summer BBQ Recipes:

10 Korean BBQ Recipes: a collection of readers’ favorite Korean BBQ recipes.

Have you tried this grilled spicy shrimp recipe?  Please rate the recipe below by either clicking the stars or leaving a comment! And make sure to share your creations by tagging me on Instagram! Stay in touch by following me on Pinterest, Twitter, Facebook, and Instagram.

Spicy Grilled Shrimp (Gochujang Saewu Gui)

Easy spicy grilled shrimp flavored with a gochujang sauce!

  • 1 pound large or jumbo shrimp (peeled, tail on, and deveined)
  • salt and pepper
  • For the marinade:
  • 2 tablespoons extra virgin olive oil
  • 1 teaspoon minced garlic (or more to taste)
  • juice of 1/2 of a fresh lemon (about 2 tablespoons)
  • 2 tablespoons gochujang
  • 1 tablespoon sugar or honey
  • For the garnish:
  • finely chopped scallions or chives for garnish (optional)
  • Bamboo/wood skewers
  1. Soak the wooden skewers in water while preparing the shrimp. Peel and devein the shrimp if they are shell-on. Rinse the shrimp and drain well (or pat dry). Thread 3 or 4 shrimps on to the skewers. Lightly sprinkle them with salt and pepper.

  2. Mix all the marinade ingredients well in a bowl.
  3. Spoon (or brush) the marinade all over the shrimp to coat evenly. Let stand for about 30 minutes.

  4. Preheat a lightly oiled grill. Grill the shrimp over moderate heat until they turn opaque and curled up, a minute or two each side, depending on the heat source. Do not overcook. Baste the shrimp with the remaining sauce while grilling and before serving. You can also cook the shrimp in a grill pan over medium high heat. Garnish with the optional scallions or chives.

The post Spicy Grilled Shrimp Skewers (Gochujang Saewu Gui) appeared first on Korean Bapsang.

Korean Chicken Salad with Pine Nut Dressing

$
0
0

This simple chicken salad recipe is made with shredded breast meat and a Korean pine nut dressing! It’s a healthy dish you can easily make for a quick lunch. Or, double/triple the recipe for a potluck or Korean BBQ party.

Korean chicken salad on a bed of spring mix with a fork

This Korean chicken salad is made with a traditional pine nut dressing. No mayonnaise! The pine nut dressing is light, creamy, nutty, and tangy! It certainly is a healthier option for you.  Chicken salad is called dak naengchae (닭냉채) in Korean. Dak means chicken, and naengchae refers to a cold salad type that’s typically served with some sort of protein and a traditional dressing such as this pine nut dressing and hot mustard dressing.

How to cook chicken for the chicken salad

I usually use a poached chicken breast(s) for this salad for a nice clean taste. Boneless, skinless breast meat cooks up really fast. First, boil some water with aromatic vegetables such as onion, garlic, etc. And then add the chicken breast and simmer over medium low heat for about 8 -10 minutes. Remove the chicken and allow it to cool. When the chicken is cool enough to handle, shred and lightly season it with salt.

To make this chicken salad recipe even faster and easier, you can use store-bought rotisserie chicken.

Korean Chicken Salad on a bed of spring mix with red radish slices

How to make Korean pine nut dressing

Pine nuts have a rich nutty flavor and give the dressing a creamy texture. Always toast the nuts lightly to bring out the flavor, and then either finely chop or ground it in a blender. The garlic and hot mustard (called gyeoja in Korean) add robust flavors to the dressing. The acidity from the vinegar and lemon juice ties everything together, brightening the taste of the dressing.

If pine nuts are not available, you can use other nuts such as peanuts or walnuts or sesame seeds. You can also make chicken salad with a mustard dressing (gyeoja sauce).

How to serve chicken salad

I often serve this salad over a bed of lettuce or spring mix. You can use any salad vegetables. Red radishes add some crunch and color. Cucumbers and carrots are good additions as well.

Another option is to toss the salad, before serving, with crunchy vegetables such as cucumbers and colorful bell peppers.

Korean Chicken Salad Mixed with Pine Nut Dressing, cucumber and bell pepper slices

Thinly slice the vegetables and mix well with the chicken salad before serving. 

A collage of step photos for Korean chicken salad

I love having this salad in my fridge for a quick lunch for week days. It’ll keep well up to 4 days in the fridge. Also, if you double or triple the recipe, it’s a great dish for a potluck or Korean BBQ party!  

This Korean chicken salad recipe was originally posted in October 2010. I’ve updated it here with new photos, recipe card, and minor changes to the recipe.

More Korean Cold Salad Recipes

Shrimp Salad with Hot Mustard Dressing
Tofu Salad

Have you tried this Korean chicken salad recipe?  Please rate the recipe below by either clicking the stars or leaving a comment! And make sure to share your creations by tagging me on Instagram! Stay in touch by following me on Pinterest, Twitter, Facebook, and Instagram.

Korean Chicken Salad with Pine Nut Dressing

This simple chicken salad recipe is made with breast meat and a Korean pine nut dressing! It’s a healthy dish you can easily make and grab for a quick lunch.

Pine nut dressing:

  • 4 tablespoons pine nuts
  • 1 tablespoon rice wine vinegar (or any clear vinegar)
  • 1 tablespoon lemon juice
  • 2 tablespoons water
  • 1 teaspoon hot mustard paste – gyeoja, 겨 (or dijon or yellow mustard if desired)
  • 1 tablespoon sugar
  • 1/2 teaspoon minced garlic
  • salt to taste (about 1/2 teaspoon)

Poached chicken:

  • 1 chicken breast (8 to 10 ounces)
  • 1/4 medium onion
  • 1/2 stalk celery
  • 1/2 carrot
  • 3 garlic cloves
  • 1 bay leaf – optional

To serve on a bed of salad vegetables:

  • a handful spring mix or other salad vegetables of choice
  • 2 to 3 red radishes (thinly sliced)

Or to toss with salad:

  • 1/4 red bell pepper (julienned)
  • 1/4 yellow bell pepper (julienned)
  • 1 small Kirby cucumber (cut lengthwise and then thinly sliced diagonally)
  1. To make the dressing, toast the pine nuts in a pan over medium heat for 2-3 minutes. This will enhance the flavor. Grind the pine nuts in a blender or food processor (or finely mince them with a knife). Add the remaining dressing ingredients and blend well. Refrigerate while preparing the chicken and vegetables.
  2. In a medium size pot, bring 5 cups of water and the aromatic vegetables to a simmer over medium heat. Add the chicken breast and simmer over medium low heat for about 8 -10 minutes (increase the time if cooking more than 1 chicken breast). Remove the chicken and allow it to cool.

  3. When cool enough to handle, shred and lightly season with salt. Refrigerate while preparing vegetables. Wash salad vegetables in ice water and drain well. Cut them into desired sizes if needed.

  4. Combine the shredded chicken with the dressing, leaving a couple of tablespoons of dressing.
  5. Line the platter with the salad vegetables. Place the chicken salad in the middle. Drizzle with the remaining dressing, and garnish with a few pine nuts if available.

  6. OR thinly slice the optional vegetables and mix well with the chicken salad before serving.

This chicken salad can be stored in the fridge up to 4 days. 


The post Korean Chicken Salad with Pine Nut Dressing appeared first on Korean Bapsang.

Shrimp Salad with Hot Mustard Dressing (Saewu Naengchae)

$
0
0

This simple and refreshing Korean shrimp salad is packed with flavors and heat! It’s an easy recipe that’s perfect as an elegant starter, side dish or light meal!

Shrimp salad stacked up on a plate with mustard dressing

Here’s another great Korean-style salad recipe! It’s a shrimp salad with a hot mustard (gyeoja) dressing (겨자소스), which is a classic Korean sauce. As mentioned in the chicken salad post, this type of cold salad dish is called naengchae in Korean, so the Korean name of this dish is saewu naengchae (새우냉채) or saewu gyeoja naengchae (새우겨자냉채). The simple and refreshing dish is perfect as an elegant starter, side dish or light meal!

Which shrimp to use for shrimp salad

For this salad, any size of shrimp works. I typically use 21 to 25 count, but smaller ones are fine too. To stack the ingredients up as seen in the first photo, I cut the shrimp in half lengthwise by cutting along the back all the way through. It’s up to you whether to leave the tails on. 

I poached the shrimp in a simple salt and lemon water. You can, of course, use your favorite way to poach them for cocktail shrimp. If you want, buy good quality peeled and deveined cooked shrimp to make it even quicker and easier. 

Vegetables for shrimp salad

I typically pair the shrimp with cucumber and Korean pear slices for this salad. Korean pears are sweet, juicy and crunchy, making it perfect for salads. You can use apple slices instead if Korean/Asian pears are unavailable. Colorful bell peppers are also great additions. 

For the presentation, I sometimes stack the thinly sliced salad ingredients, especially for individual or small servings, but you can arrange them on a plate anyway you want. When I use bell peppers, I julienne the fruit and vegetables and arrange them by color with the shrimp on top.

Here, I’m showing you two different ways to serve this Korean shrimp salad. However, feel free to use your creativity to make your own beautiful plate. You can easily double this recipe for a potluck or dinner party.

Shrimp salad on a bed of vegetables and lemon

How to make hot mustard dressing (gyeoja sauce)

The hot mustard (gyeoja), also known as spicy yellow mustard, adds flavorful heat to this salad. When first mixed, the heat can be intense, but it gradually dissipates over time. You can use a powder version (gyeojabun, 겨자분, or gyeoja garu, 겨자가루) or a paste version (called yeongyeoja, 연겨자) sold in a tube for this recipe. Although not traditional, you can use yellow or dijon mustard if you like.  

Making the dressing is simple! Combine the ingredients and whisk together until smooth. You can serve the dressing drizzled over the salad or on the side.

Mustard dressing drizzled over the shrimp salad

This Korean shrimp salad recipe was originally posted in October 2010. I’ve updated it here with new photos, recipe card, and minor changes to the recipe.

More Korean cold salad recipe

Chicken salad (dak naengchae)
Tofu salad 

Have you tried this shrimp salad recipe?  Please rate the recipe below by either clicking the stars or leaving a comment! And make sure to share your creations by tagging me on Instagram! Stay in touch by following me onPinterest, Twitter, Facebook, and Instagram.

Korean Shrimp Salad with Hot Mustard Dressing

This simple and refreshing salad is packed with flavors and heat! Perfect as an elegant starter, side dish or light meal!

Hot mustard dressing:

  • 2 teaspoons hot mustard powder (gyeoja, 겨자) (If using prepared paste, use 1 tablespoon and add 1 tablespoon water to thin it.)
  • 1 tablespoon vinegar
  • 1 teaspoon soy sauce
  • 2 teaspoons sugar
  • 1/2 teaspoon minced garlic
  • 1/8 teaspoon salt

Vegetables:

  • <strong>2 </strong> <strong>Kirby (pickling) cucumbers (or 1 Korean cucumber)</strong>
  • 1/2 Korean pear
  • radish sprouts for garnish (optional)
  • 1/4 lemon
  • Optional vegetables:
  • 1/4 red bell pepper
  • 1/4 orange bell pepper

Shrimp

  • 10 large shrimp (21-25 counts, shelled and deveined (more if using smaller shrimp))
  • 1/4 lemon
  • 1 teaspoon salt
  1. Mix the mustard with 1 tablespoon of warm water. Set it aside for 5 to 10 minutes. Add the remaining dressing ingredients and mix well. Refrigerate while preparing the other ingredients.

  2. Cut the cucumbers and pear into thin slices

  3. OR if using optional bell peppers, julienne the fruit and vegetables.

  4. Have a bowl of ice water ready near the stove top. Bring a small pot of water (4 cupto a gentle boil over medium heat. Add salt, lemon and shrimp and simmer uncovered until the shrimp turn opaque and curl, about 40 seconds. Remove immediately and plunge them into the ice water to stop cooking and chill. Drain.

  5. Remove immediately and plunge them into the ice water to stop cooking and chill. Drain. Cut each shrimp in half lengthwise, if desired.

  6. Nicely arrange the cucumber, pear and shrimp (or optional julienned vegetables and pear) on a plate. Spoon the dressing over, or serve it on the side. Garnish with optional radish sprouts and/or lemon.


The post Shrimp Salad with Hot Mustard Dressing (Saewu Naengchae) appeared first on Korean Bapsang.

Kimchi Bibim Guksu (Spicy Cold Noodles with Kimchi)

$
0
0
Got kimchi in the fridge! Try making this spicy, slightly sweet, savory and tangy cold noodle dish. It’s simply made with kimchi and a few staple seasoning ingredients! 

Red spicy cold noodles with kimchi
What do you make for lunch, or dinner for that matter, when there seems to be nothing in your fridge? For Koreans, it’s usually a dish made with kimchi because there is almost always some kimchi in our fridges. So, when your fridge has nothing substantial but has kimchi, make this kimchi bibim guksu (김치비빔국수) for a quick lunch or a light meal any time of the day. It’s deliciously spicy, sweet and tangy with a kimchi crunch!

How to make kimchi bibim guksu

Unlike my other bibim guksu recipe which uses a few different vegetables, kimchi is truly all you need for this humble dish. But, you can add other vegetables such as cucumbers or lettuce, if you want. I also like to use some perilla leaves (kkaennip) for a wonderful aroma and flavor it adds to the dish. Thinly sliced gim (dried seaweed sheet) is also an excellent addition.  

Red spicy cold noodles with kimchi

For the seasoning, I mix kimchi and some juice from kimchi with a few staple ingredients such as soy sauce, vinegar, sesame oil, gochujang (Korean red chili pepper paste), and some gochugaru (Korean red chili pepper flakes). You can leave out gochugaru if you like the noodles to be less spicy. For the sweetener, I use a combination of corn syrup (or oligo syrup) and sugar. The syrup gives a nice sheen to the dish, but you can simply use more sugar if you want. 

What noodles to use

Typically, kimchi bibim guksu is made with thin wheat noodles, which come in two slightly different thickness — somyeon (소면), very thin noodles, and joongmyeon (중면), slightly thicker noodles. You can use either one for this recipe, depending on your preference. 

red spicy noodles with Kimchi, cucumbers and egg

This kimchi bibim guksu recipe was originally posted in July 2011. I’ve updated it here with new photos and minor changes to the recipe.

More similar cold noodle dishes

Bibim guksu (spicy cold noodles)
Jjolmyeon (spicy chewy noodles)
Jaengban guksu (cold noodles and vegetables platter)

Have you tried this kimchi bibim guksu recipe?  Please rate the recipe below by either clicking the stars or leaving a comment! And make sure to share your creations by tagging me on Instagram! Stay in touch by following me onPinterest, Twitter, Facebook, and Instagram.

Kimchi Bibim Guksu (Spicy Cold Noodles with Kimchi)

A simple cold noodle dish made with kimchi and a few seasoning ingredients! Spicy, slightly sweet and tangy!

  • 8 – 10 ounce somyeon, 소면, (thin wheat noodles)
  • 1 cup thinly sliced kimchi (preferably fully fermented)
  • 1/4 cup juice from kimchi (use a little more soy sauce and vinegar if unavailable)
  • 1 tablespoon gochujang (Korean red chili pepper paste)
  • 1 tablespoon soy sauce
  • 2 tablespoons rice vinegar or any other clear vinegar
  • 1 tablespoon sugar
  • 1 tablespoon corn syrup (or oligo syrup, 올리고당) (use more sugar if unavailable)
  • 1 tablespoon sesame oil
  • 2 teaspoons sesame seeds

Optional Garnish

  • 4 perilla leaves (kkaennip) (thinly sliced)
  • or cucumber (thinly sliced)
  • 1 hard boiled egg
  1. Bring a medium pot of water to a boil while preparing the kimchi sauce.
  2. Thinly slice the kimchi and place it in a medium size bowl. Add the juice from the kimchi and remaining sauce ingredients, and mix everything well.

  3. Add the noodles to the pot of boiling water. Cook the noodles according to the package instructions (3 – 4 minutes). Drain quickly and shock in icy cold water to stop cooking. Drain and rinse in cold water again. Repeat until the noodles become cold. Drain well.

  4. Combine the noodles with the kimchi sauce, and toss everything until the noodles are evenly coated with the sauce. Taste and adjust the seasoning to taste by adding more soy sauce, sugar and/or vinegar, if necessary. Garnish with your choice of the optional vegetables and/or the boiled egg and serve cold.

The post Kimchi Bibim Guksu (Spicy Cold Noodles with Kimchi) appeared first on Korean Bapsang.

Viewing all 1019 articles
Browse latest View live