Quantcast
Channel: Korean Bapsang
Viewing all 1019 articles
Browse latest View live

Oi Naengguk (Chilled Cucumber Soup)

$
0
0

Oi naengguk is a classic chilled soup made with cucumber and seaweed (miyeok). It’s a refreshingly tangy soup that’s perfect for hot summer days!

Korean cold cucumber soup in a glass bowl

Oi naengguk (오이냉국) is a classic Korean chilled soup. Oi means cucumber, and naengguk means chilled soup. It’s one of those dishes that remind me of my childhood summertime meals! My mother made this chilled cucumber soup quite often for us. It’s a refreshingly tangy soup that’s perfect on a hot summer day! 

Cucumber and miyeok (seaweed)

I use Korean cucumbers which I can easily find around here in summer. You can also use any crunchy cucumbers, such as Kirby, English, Persian, and Japanese varieties. 

It’s typical to add miyeok to this soup, which is a sea vegetable (edible seaweed). Dried miyeok is a pantry staple for making soups and side dishes. Once soaked, miyeok turns green, plump, and ready to be eaten. However, blanching it briefly in boiling hot water softens the texture and brightens the green color. The crunchy cucumber together with slightly chewy and slippery seaweed creates interesting textural contrasts and a flavor combination, making the dish far more interesting than the cucumber alone!

Cucumber and seaweed cold soup in a glass bowl

Depending on which ingredient is used more, the soup can also be called miyeok naengguk (미역냉국). Some people call it oi miyeok naengguk (오이미역냉국), recognizing both ingredients.

Simply use more cucumber if you are not adding miyeok. 

How to make Korean chilled cucumber soup

To make the soup, I season the cucumber and seaweed first with the seasoning ingredients. The soup soy sauce (guk ganjang) and vinegar are important for flavoring this soup. You can make ahead up to this point, and then add cold water and season with salt when ready to use. Don’t forget to drop a couple of ice cubes in right before serving. 

Korean chilled cucumber soup with seaweed

This oi naengguk recipe was originally posted in July 2011. I’ve updated it here with new photos and an improved recipe. 

More chilled soup recipes

Kongguksu (Chilled Soy Milk Noodle Soup)
Chogyetang (Chilled Chicken Soup)
Naengmyeon (Cold Noodles)

Have you tried this chilled cucumber soup recipe?  Please rate the recipe below by either clicking the stars or leaving a comment! And make sure to share your creations by tagging me on Instagram! Stay in touch by following me onPinterest, Twitter, Facebook, and Instagram.

Oi Naengguk (Chilled Cucumber Soup)

Oi naengguk is a classic chilled soup made with cucumber and seaweed (miyeok). It’s a refreshing, tangy soup that’s perfect for hot summer days!

  • 1 Korean cucumber or 2 Kirby (pickling) cucumbers ((5 – 6 ounces))
  • 1 cup soaked miyeok, 미역 (seaweed – about 1/2 ounce dried miyeok)
  • 1 Korean green or red chili pepper or scallion

Seasonings

  • 1/2 teaspoon minced garlic
  • 2 tablespoons soup soy sauce ((guk ganjang, 국간장))
  • 3 to 4 tablespoons vinegar
  • 1 teaspoon Korean red chili pepper flakes
  • 1 teaspoon sugar
  • 2 teaspoons sesame seeds
  • 4 cups of water
  • salt to taste (about ½ teaspoon)
  1. Cut the cucumber into matchsticks. Finely chop the chili pepper (or scallion).

  2. Prepare the dried seaweed by soaking for 10 to 20 minutes and rinsing well. (See my miyeok guk recipe for more.) Boil water in a small pot, and add 1 teaspoon of salt. Blanch the soaked seaweed briefly, 20 to 30 seconds. Drain and rinse with cold water. Drain again, squeeze out excess water, and cut into bite size pieces.

  3. In a medium size bowl, gently toss the vegetables with the seasoning ingredients. Set aside for about 10 minutes. You can make ahead up to this point several hours or a day before, if desired.

  4. Mix in 4 cups of cold water and season with salt. Start with a half teaspoon of salt, taste and add more if necessary. Refrigerate to chill. Serve in chilled bowls with some ice cubes.


The post Oi Naengguk (Chilled Cucumber Soup) appeared first on Korean Bapsang.


Oiji Muchim (Spicy Seasoned Cucumber Pickles)

$
0
0

Oiji muchim is a simple side dish made with Korean pickled cucumbers, oiji! It’s crunchy, chewy, spicy and deliciously salty.

Red spicy seasoned Korean pickle slices

Oiji muchim (오이지 무침) is a simple side dish made with oiji, Korean cucumber pickles! Fermented simply in salt water, oiji is a traditional way to preserve cucumbers beyond their growing season. During fermentation, a deep tangy flavor develops, the color turns golden yellow, and the texture becomes crunchy and slightly chewy. Oiji is a staple in Korean cuisine.

As I mentioned in my oiji post, these Korean pickles are not meant to be eaten right out of the jar because they are quite salty. The pickles are soaked in fresh water to reduce the salt content before being served. Often, oiji is simply served in the water used to soak the pickles to be eaten like cold soup. Oiji muchim is another common way to serve the cucumber pickles.

Red spicy seasoned Korean pickle slices

For this recipe, you can use commercially prepared oiji sold in the deli section of Korean markets. 

To make this oiji muchim, you’ll need to thinly slice the pickles, and then soak them in water until the desired salt level is achieved, about 10 minutes depending on your pickles. The best way to know when it’s soaked enough is to try a piece and see if it’s not too salty to eat as is. Once you’ve achieved the desired level of saltiness, squeeze the pickle slices as tightly as you can to remove the water content. The rest is easy! Season with some gochugaru and other basic ingredients. 

I find 1/2 tablespoon of gochugaru to be a good amount for 1 pickle that’s made with a long Korean cucumber (2 pickles if they are Kirby cucumbers). You can, of course, use more or less gochugaru to adjust the heat level to your taste. 

The key to good oiji muchim is to squeeze out the water content as much as possible for a crunchy and chewy texture Koreans describe as odeul odeul (오들오들). 

Red spicy seasoned Korean pickle slices

More cucumber recipes

Oiji (Korean Pickled Cucumbers)
Oi Muchim (Spicy Cucumber Side Dish)
Oi Kimchi (Cucumber Kimchi)
Oi Sobagi (Stuffed Cucumber Kimchi)
Oi Bokkeum (Stir-fried Cucumber Side Dish)

Have you tried this oiji muchim recipe?  Please rate the recipe below by either clicking the stars or leaving a comment! And make sure to share your creations by tagging me on Instagram! Stay in touch by following me on Pinterest, Twitter, Facebook, and Instagram.

Oiji Muchim (Spicy Seasoned Cucumber Pickles)

A simple side dish made with Korean cucumber pickles, oiji!

  • 3 oiji (Korean pickled cucumber- 6 if using short kirby pickled cucumbers
  • 1-1/2 tablespoons gochugaru (고추가루, Korean red chili pepper flakes)
  • 1/2 teaspoon minced garlic
  • 1/2 tablespoon sugar
  • 1 tablespoon oligodang (올리고당 or corn syrup (or more sugar))
  • 1 small fresh chili pepper (red or green, finely chopped – optional)
  • 1 tablespoon sesame oil
  • 1 tablespoon chopped scallion
  • 1 teaspoon roasted sesame seeds
  1. Thinly slice the cucumber pickles.
  2. Soak the pickle slices in water until not too salty to eat as is, about 10 minutes depending on your pickles.
  3. Drain and tightly squeeze the pickles between your palms to remove as much liquid as possible. You may have to squeeze them several times.
  4. Add the remaining ingredients, except the scallion and sesame seeds, and mix everything very well until the pickles are evenly coated with gochugaru. Finish with tossing in the scallion and sesame seeds.

Oiji muchim can be kept well in the fridge for 4 to 5 days. If you want to keep it longer, don’t add sesame oil until serving.

The post Oiji Muchim (Spicy Seasoned Cucumber Pickles) appeared first on Korean Bapsang.

Galbijjim (Korean Braised Beef Short Ribs)

$
0
0

Galbijjim (kalbijjim) is a Korean traditional braised beef short ribs dish in a rich sauce. You can make these tender, succulent short ribs at home with this easy, authentic recipe! 

Korean braised beef short ribs in a bowl

Galbijjim (or kalbijjim, kalbi jjim) is braised beef short ribs, which is typically served on traditional holidays and special occasions in Korea. I make these ribs for my family quite often, especially for my elderly parents. It’s a definite favorite! I sometimes cook them in my slow cooker or Instant Pot. Here, I’m showing you how to make this dish over stove top. 

Look for short ribs with the most meat and less fat. Traditionally, this dish calls for bone-in short ribs. Regardless, meat cooked on the bone tastes better. However, use boneless meat if that’s all you can find. Even high quality short ribs will have some fat, which is expected for short ribs. Trim off any thick layers of fat from the short rib, but do not remove the thin, tough skin that holds the ribs together.

Cooking times can vary depending on the size and thickness of the ribs.

Korean braised beef short ribs


How to make Korean braised short ribs

In contrast to the braising method typical of Western cooking, Koreans traditionally do not sear the meat before braising them. The ribs are first parboiled in water with some aromatic vegetables before being braised in sweet and savory braising liquid. Parboiling is a technique used to remove excess fat and blood from the ribs. I boil the ribs in a small amount of water and use the resulting stock in the braising liquid after removing the fat. 

In modern Korean cooking, searing is commonly done. If preferred, feel free to sear the ribs to add that rich browned meat flavor. I do it sometimes as well. The results are equally delicious in slightly different ways.

Korean braised beef short ribs in a bowl

I braise the ribs first in the braising liquid, and then add the vegetables later about halfway through to prevent them from turning too soggy. 

Chestnuts, dates, pine nuts, and gingko nuts are customary garnishes that make this dish look very elegant, but the ribs will still be delicious without them.

These succulent ribs, in a rich sauce, will be perfect for any of your special occasions! Then again, why wait for a special occasion to make this tasty comfort food?

This galbijjim recipe was originally posted in October 2011. I’ve updated it here with new photos and minor changes to the recipe.

Have you tried this galibijjim recipe?  Please rate the recipe below by either clicking the stars or leaving a comment! And make sure to share your creations by tagging me on Instagram! Stay in touch by following me on Pinterest, Twitter, Facebook, and Instagram.

Korean braised beef short ribs over rice

Galbijjim (Korean braised beef short ribs)

Galbijjim is a braised beef short ribs dish in a rich sauce. You can make these tender, succulent short ribs at home with this easy, authentic recipe! 

  • 3 pounds meaty beef short ribs
  • 1/2 onion
  • 3 – 4 thin ginger slices (about 1-inch rounds)
  • 5 garlic cloves
  • 2 white parts of scallions

Braising Liquid:

  • 1/2 cup soy sauce
  • 3 tablespoons sugar (2 for less sweet ribs)
  • 2 tablespoons honey
  • 1/4 cup rice wine (or mirin)
  • 1/2 medium Asian pear (grated (about 1/2 cup))
  • 1/2 small onion grated
  • 1 tablespoon minced garlic
  • 1 teaspoon grated (or juiced ginger)
  • 1/2 teaspoon black pepper
  • 2 tablespoons sesame oil

Vegetables:

  • 10 ounces Korean radish (cut into large chunks (about 1-1/2-inch cubes))
  • 3 – 4 dried shiitake mushrooms (soaked and quartered)
  • 1 large carrot (cut into large chunks (about 1 inch long))
  • 2 green parts of scallion

Optional garnish:

  • 6 – 8 peeled fresh chestnuts
  • 6 dried Korean dates/jujube
  • 10 – 12 gingko nuts (or 1 tablespoon pine nuts)
  1. Trim off any excess fat. Rinse the ribs and let them sit in cold water for about 30 minutes to draw out excess blood. Drain.

  2. In a large pot, bring 5 cups of water to a boil over high heat along with the onion, ginger, garlic and scallion white parts. Add the short ribs, and bring it to a boil, uncovered, skimming off the foam. Reduce the heat to medium high and cook for about 10 minutes. Remove the ribs to a plate, reserving the stock.

  3. Strain the stock, and skim off the fat. (Refrigerating the stock will help the fat solidify for easier removal. If you have room in the freezer, the process will go faster.) 

  4. Mix together all the braising liquid ingredients, except the sesame oil. Return the ribs to the pot. Pour the braising liquid over the meat and stir. (You can prepare the ribs up to this point the day before, and finish braising when you need to serve.)

  5. Meanwhile, prepare the vegetables.

  6. Add 2-1/2 cups of the reserved stock to the ribs. Cover and bring it to a boil over medium heat. Continue to boil for 20 to 30 minutes, depending on the thickness of the ribs. Stir in the radish, mushrooms, and carrots. Continue to boil, covered, for about 20 minutes.

  7. Stir in the optional garnish ingredients. Return to boil, uncovered this time, for an additional 10 minutes, or until the sauce is thicker and the meat is tender but not falling apart. Add the green parts of scallions and the sesame oil and stir gently before turning the heat off.

During the braising, adjust the heat level and cooking time, depending on how tender you want your ribs to be and how much sauce you like to have. Use medium low heat and additional time for more tender meat with more sauce. Likewise, you can increase the heat to medium to reduce the sauce quicker. Also, leaving the pot uncovered during the last 10 gives the ribs a nice shiny look.


Galbijim recipe - learn how to make Korean braised beef short ribs

The post Galbijjim (Korean Braised Beef Short Ribs) appeared first on Korean Bapsang.

Songpyeon (Half-moon Shaped Rice Cake)

$
0
0

Songpyeon is a must-have Chuseok delicacy. These little rice cakes are stuffed with sweet fillings. Learn how to make songpyeon with natural food coloring options!

Korean half-moon shape rice cakes in yellow, green and white colors 

What is Chuseok

Chuseok (추석) is coming up! It’s one of the two most celebrated traditional holidays together with the lunar New Year Day (Seollal, 설날). Also referred to as Hangawi (한가위), it falls on the 15th day of the 8th lunar month – the same day many Asian countries celebrate a Mid-Autumn Festival. Families gather and celebrate the year’s harvest, giving thanks to their ancestors. Women of the house work hard for days leading up to this day to prepare a sumptuous holiday feast. See my 15 Chuseok recipes. In Korea, Chuseok is celebrated over 3 days. 

What is songpyeon

Songpyeon (송편) is a must-have Chuseok delicacy. These small half-moon shaped rice cakes (tteok, 떡) are stuffed with sweet fillings such as sweetened sesame seeds and traditionally steamed on a bed of pine needles. The name songpyeon stems from the use of pine needles, because “song” in “songpyeon” means pine tree. 

Songpyeon recipe (how to make Korean half-moon shaped rice cake)

These little rice cakes are near and dear to my heart, bringing back so many fond memories of this special holiday. A couple of days in advance, we would go to the nearby woods to pick pine needles. Making songpyeon was so much fun!

I remember the excitement I had sitting in front of several colorful huge heaps of dough – as if I was like a child sitting in front of big piles of play dough. But, shaping and stuffing these little guys was also a serious business. There was always a little unannounced competition among us – whose songpyeon looked the best.

My mother used to say I would have a pretty daughter because my songpyeon was pretty. She was right! I developed this recipe, so you can start making these at home, creating a new family tradition and build special memories.

Songpyeon in three colors

How to make songpyeon

Songpyeon dough: Songpyeon is made with short grain rice powder (쌀가루), NOT glutenous (sweet rice) powder (찹쌀가루). Traditionally, Korean home cooks soak short grain rice overnight, drain, and then take to a gristmill to get it ground into fine powder.

While that’s clearly not an option around here, there are bags of frozen wet rice powder for making rice cake (tteok) sold in the freezer section in Korean grocery stores.

I use boiling hot water to make the dough, and then knead until the dough is nice and soft. The longer you knead, the chewier the texture of the rice cake will be.

Natural food coloring: Songpyeon dough is typically flavored and colored with natural ingredients such as mugwort, kabocha, and dried fruit powders.  This recipe shows how to use mugwort powder and kabocha, I also played around with different natural food coloring and came up with a couple of other colors. You can choose any number of options I’ve given here, or use your own food coloring options. Also see my Beet songpyeon recipe for vibrant red color. 

Songpyeon filling: The most common filling is made with sweetened sesame seeds. Black soybeans and mung beans are also traditional. This recipe shows how to make it with sesame seeds.  

How to shape songpyeon

1. Tear off a small piece of the dough enough to make roughly 1-inch ball. Roll tightly between your palms to shape a ball. 2. Make a well in the ball by pressing into it with your thumb, and press outwards, with both of your thumbs, on the inside walls of the well to slightly expand the opening. 3. Place 1/2 teaspoon of the filling in the well. 4. Seal tightly by squeezing the edges together. 5. Squeeze the whole rice cake lightly in your palm to firm it up. 6. Gently roll between your palms to smooth out the surface. 7. Shape it into a nice crescent shape by pinching the long ends with your thumb and index finger. 8. Pinch along the side to create a wing. 

the steps to shape and fill songpyeon

This recipe was originally posted in September 2012. I’ve updated it here with new photos, created a recipe card with minor changes to the recipe. 

More Chuseok holiday recipes:

Modeumjeon (Fish, Shrimp and Zucchini Pan-fried in Egg Batter)
Galbijjim (Braised Short Ribs)
Japchae (Stir-Fried Starch Noodles with Vegetables)
Nokdujeon (Savory Mung Bean Pancakes)
Sanjeok (Skewered Rice Cake with Beef and Vegetables)
Radish Soup (Mu Guk/Moo Guk)
15 Chuseok Recipes for more.

Korean Bapsang is now on YouTube!

Please watch the videos and subscribe so you’ll never miss a recipe. Thank you!

Have you tried this songpyeon recipe?  Please rate the recipe below by either clicking the stars or leaving a comment! And make sure to share your creations by tagging me on Instagram! Stay in touch by following me on PinterestTwitterFacebook, and Instagram.

Songpyeon recipe (how to make Korean half-moon shaped rice cake)

Songpyeon (half-moon shaped rice cakes)

Songpyeon is a must-have Chuseok delicacy. These little rice cakes are stuffed with sweet fillings. Learn how to make songpyeon with natural food coloring options!

Rice Powder (ssalgaru)

  • 2 cups wet rice powder per batch (about 16 songpyeon) (쌀가루 or 쌀떡가루 – a 2 pound-bag yields a little more than 6 cups (3 batches) – note)
  • 4 to 5 ounces pine needles (rinsed 2 – 3 times and air or pat dry (optional))
  • 1 teaspoon sesame oil

Natural color option (pick any for each batch):

Basic (white dough)

  • 2 cups wet rice powder (thawed to room temperature if frozen)
  • 4 tablespoons plus 1 or 2 teaspoons boiling hot water

Green dough

  • 2 cups frozen rice powder (thawed to room temperature if frozen)
  • 1-1/2 to 2 tablespoons mugwort (ssuk garu, 쑥가루) (or matcha/green tea powder)
  • 5 tablespoons plus 1 or 2 teaspoons boiling hot water

Yellow dough

  • 2 cups frozen rice powder (thawed to room temperature if frozen)
  • 1/3 cup cooked steaming hot kabocha, (danhobak, 단호박) (1/4 small kabocha steamed in microwave for about 5 minutes)
  • 1 tablespoon plus 1 or 2 teaspoons boiling hot water

Purple dough

  • 2 cups frozen rice powder (thawed to room temperature if frozen)
  • 4 tablespoons plus 1 or 2 teaspoons boiling hot blueberry juice (1/2 cup fresh or frozen blueberries finely pureed with 1/2 cup water, strained and boiled)

Pink dough

  • 2 cups frozen rice powder (thawed to room temperature if frozen)
  • 4 tablespoons raspberry juice (1/2 cup fresh or frozen raspberries finely pureed with 1/2 cup water, strained, and boiled)

Filling: fills about 16 (one batch)

  • 1/3 cup roasted sesame seeds
  • 1-1/2 tablespoons sugar
  • 1 tablespoon honey
  • pinch salt

Dough:

  1. For each type of dough, sift the rice powder into a bowl. Prepare the flavoring and liquid ingredients (water/juice/mugwort powder/kabocha) for each selected color of dough. Add the specified amount of the solid and/or liquid (making sure it’s boiling hot) to the rice powder, quickly stirring them in with a spoon. (Tip: Hold a teaspoon or two of the liquid and make sure more liquid is needed before adding it.)

  2. Knead, pressing and stretching with the heel of the hand. Fold and rotate the dough. Repeat the kneading process for 4 to 5 minutes. (If the dough sticks to your hands or the bowl after some kneading, it’s too wet. Add more rice powder in 1 tablespoon increments. If the dough breaks easily or is too stiff, it’s too dry. Add more boiling hot water in 1 teaspoon increments.)

  3. Cover the dough with plastic wrap or a damp towel. Let it rest for 20 to 30 minutes.

Filling:

  1. Roughly grind the sesame seeds in a grinder or blender. Add the sugar, honey and pinch of salt. Mix everything well together until the sugar and honey are evenly distributed.

Assemble:

  1. To assemble, tear off a small piece of the dough enough to make roughly 1-inch ball. Roll tightly between your palms to shape a ball.
  2. Make a well in the ball by pressing into it with your thumb, and press outwards, with both of your thumbs, on the inside walls of the well to slightly expand the opening.
  3. Place 1/2 teaspoon of the filling in the well. Seal tightly by squeezing the edges together. Squeeze the whole rice cake lightly in your palm to firm it up, and then gently roll between your palms to smooth out the surface. Shape it into a nice crescent shape. Pinch along to create a wing. Repeat until all the dough/filling is used.

Steam and finish:

  1. Boil water in a steamer. Place a thin layer of pine needles or a damp kitchen cloth on the steamer insert. Boil the water over high heat. When it starts to steam, place the rice cakes on the steamer insert without the pieces touching one another. Cover with a thin layer of pine needles, if available. Cover and steam for about 20 minutes.
  2. Prepare a big bowl of cold water. Using a long-handed spoon or tong, remove the rice cakes from the steamer. Drop them in the cold water for a quick rinse, removing all the pine needles. Transfer the rice cakes to a colander to drain. Lightly coat your hands with the sesame oil and rub the oil on the rice cakes in batches. Serve warm or at room temperature

Wet rice powder/flour is usually sold in the frozen section of Korean markets. 

The post Songpyeon (Half-moon Shaped Rice Cake) appeared first on Korean Bapsang.

Sigeumchi Namul (Korean Spinach Side Dish)

$
0
0
Sigeumchi namul is an easy Korean side dish (banchan) made with spinach. Simply blanch the spinach and season it. This recipe shows different ways to season the spinach.
Sigeumchi namul (Spinach side dish)
 
Sigeumchi namul (시금치나물) is a simple Korean side dish (banchan, 반찬) made with spinach. Namul is the general term that refers to a seasoned vegetable dish, and sigeumchi means spinach in Korean. 
 
There are an infinite number of vegetables that are made into nauml dishes in Korea. Spinach is one of the most common ones. It typically is served as part of the three color vegetable dishes (samsaek namul) served on traditional holidays. Sigeumchi namul is also highly common in bibimbap.

Although the cooking time and seasonings vary, making namul dishes with green leafy vegetables usually involves blanching the vegetables and squeezing out the water content, followed by seasoning with a few basic ingredients. If you have these simple techniques down, you can make namul dishes with many different vegetables!  Try it with baby kale, watercress, snow pea tips, etc. 
 
Spinach seasoned with gochujang is in a small dish
 
As I usually do for my bibimbap recipe, you can simply season the spinach with salt along with some minced garlic, sesame oil and sesame seeds. 
 
You can also season the spinach with guk ganjang, 국간장 (Korean soup soy sauce) instead of salt. Guk ganjang is a byproduct of making doenjang, 된장 (Korean fermented soybean paste). While it’s better known as soy sauce for soups, it’s also commonly used in namul dishes, especially in country cooking. It adds a little umami boost to the vegetables!
 
Another ingredient that’s great for sigeumchi namul is gochujang (Korean red chili pepper paste). Gochujang gives so much flavor and a little spicy kick!
 
Try all these different options and let me know which one is your favorite. 
  
Korean spinach side dish

More vegetable side dishes:

Watercress Namul
Putbaechu (Young Cabbage) Doenjang Muchim
Sesame Broccoli 
15 Korean Vegetable Side Dishes

If you tried this recipe, please rate the recipe below by either clicking the stars or leaving a comment! And make sure to share your creations by tagging me on Instagram! Stay in touch by following me on PinterestTwitterFacebook, and Instagram.


Sigeumchi Namul (Korean Spinach Side Dish)

Sigeumchi namul is a simple Korean side dish (banchan) made with spinach. Simply blanch the spinach and season it. This recipe shows different ways to season the spinach.

Mild

  • 1 bunch spinach (about 10 ounces)
  • 1 scallion (chopped)
  • 2 teaspoons guk ganjang, 국간장 (soup soy sauce) (or use salt to taste)
  • 1 teaspoon minced garlic
  • 1/2 teaspoon sugar
  • 1 teaspoon sesame oil
  • 1 teaspoon sesame seeds
  • salt and pepper to taste

Spicy

  • 1 bunch spinach (about 10 ounces)
  • 1 scallion (chopped)
  • 1 tablespoon gochujang 고추장 (Korean red chili pepper paste)
  • 2 teaspoons soy sauce
  • 1 teaspoon minced garlic
  • 1/2 teaspoon sugar
  • 1 teaspoon sesame oil
  • 1 teaspoon sesame seeds
  1. Trim off the roots from the spinach. Wash thoroughly until there is no sand in the water. Blanch the spinach in salted boiling water until wilted, 30 – 40 seconds.
  2. Quickly remove the spinach from the pot and shock in icy cold water to stop the cooking.

  3. Drain and gently squeeze out excess water. Cut into 3-inch lengths.
  4. Add the remaining ingredients and mix everything well by hand, loosening/separating the spinach pieces that have been clumped up together. It will take about 10 minutes for the flavor of the seasonings to seep into the spinach.

Have a bowl of ice water ready before blanching the spinach. 

This recipe was originally posted in February 2011. It’s been updated with new photos and more information. 

The post Sigeumchi Namul (Korean Spinach Side Dish) appeared first on Korean Bapsang.

Seolleongtang (Ox Bone Soup)

$
0
0
This post demystifies seolleongtang so you can make this restaurant favorite at home. A few dollars’ worth of beef bones make lots of rich and nourishing soup.

Boiling hot ox bone soup in an earthen ware

What is Seolleongtang 

Seolleongtang is a milky beef bone soup that’s made by boiling down ox leg bones for several hours until the broth becomes rich and creamy white. This broth is a staple in Korean households, especially during cold winter months. 

Legend has it that this soup was created because King Seonjong of the Joseon Dynasty wanted to feed a large number of people after an ancestral worship ritual involving a sacrificial cow. Let me tell you — the King had the right idea!

You can feed your whole family with a few dollars’ worth of beef bones and still have some leftover to freeze for later use. The broth is also great as a soup base for many other Korean soups such as tteokguk, mandugukdoenjangguk, and miyeokguk.

In this post, I’m going to demystify seolleongtang to convince you to make this restaurant favorite at home. Yes, it takes time, but most of it is stove time. You can do other things around the house while this is boiling away in the kitchen. The result is totally rewarding! 

Which ox bones to use

Beef marrow bones, called sagol (사골) , is most typically used to make this milky bone soup, but other parts such as knuckle bones (dogani, 도가니) and ox feet (ujok, 우족). I usually use a combination of two or three different parts of bones for a rich flavor.

Boiling hot ox bone soup in an earthen ware

How to make seolleongtang

There are no hard and fast rules about how much bones or water you need to use or how long you should boil. A few pounds of bones go a long way, and you can use as much water as your pot can hold.

In making a Western-style beef stock or Vietnamese pho broth, the cooks aim for a clear, brown broth by simmering beef bones for many hours. In contrast, the goal of making Korean ox bone broth is to achieve a milky white broth.

What’s done differently? It’s the heat level! For a clear broth, the bones are gently simmered over low heat. Simmering, by definition, is cooking at the temperature below the boiling point with bubbles gently rising to the top. For a milky broth, you need to maintain a medium boil, not simmer, throughout the cooking time.

Tips for making Korean ox bone soup

Don’t throw the bones away after making the first batch of broth. Use them again to make another batch. The broth will be even milkier the second time around. I usually stop after the third batch.

It’s common to use aromatic vegetables, such as onion, garlic, and the white parts of large scallions. However, only using the bones will give you a stronger beefy flavor. It’s a matter of personal taste. Try both ways, and decide which way you like better.

How to serve seolleongtang

Seasoning is usually done at the table by adding sea salt. You’ll be surprised by how a little bit of salt brings out the complex flavor of the beef. The soup is also naturally nutty with a hint of sweetness. Delicious!

Korean milky bone soup with sliced beef and noodles

If you tried this recipe, please rate the recipe below by either clicking the stars or leaving a comment! Stay in touch by following me on PinterestTwitterFacebook, and Instagram.

Seolleongtang (Ox bone soup)

This post demystifies seolleongtang so you can make this restaurant favorite at home. A few dollars’ worth of beef bones makes lots of rich and nourishing soup.

  • 3 – 4 pounds beef leg (marrow and knucklbones (cut up)
  • 1 – 2 pounds of meat (beef brisket or shank)

For serving:

  • cooked rice
  • cooked somyeon (or glasnoodles
  • thinly sliced meat (boiled in the broth)
  • lots of chopped scallions
  • salt and pepper

Preparation

  1. Soak the bones in cold water to draw out as much blood as possible, about 1 hour (or longer if you have time). Rinse well and drain.
  2. Soak the meat in another bowl to draw out as much blood as possible, about 1 hour. Drain. Keep it in the fridge until ready to use.

Parboiling

  1. Add the bones to a large stockpot (preferably 8 quarts or largewith enough cold water to cover. Bring it to a boil over high heat. Reduce the heat to medium, and boil for 5 minutes.
  2. Drain. Rinse the bones, and clean out the pot to remove any brown bits. Return the bones to the pot.

Boiling

  1. Fill up the pot with cold water, leaving a little room for boiling. Bring it to a boil over high heat, and reduce the heat to medium.
  2. Cover, and boil until the broth becomes rich and milky, about 5 hours (or longer if you have time). Adjust the heat a little, if necessary, to maintain a medium boil. (On my stove, this is somewhere between medium and medium low.) Add more water to cover the bones, once or twice while boiling. (This photo was taken at the 3-hour point.)
  3. Add the soaked meat (and more water if needed to submerge the meat). Boil until the meat is tender, for 1-1/2 to 2 hours. Remove the meat. Once cooled, thinly slice the meat to add to the soup when serving. Pour the broth through a colander into another pot or a large bowl to cool.

Optional step (highly recommended)

  1. Fill up the pot with fresh water again. Bring to a boil over high heat. Reduce the heat to medium. Cover, and boil until the broth becomes rich and milky, 3 – 5 hours. Reduce the heat a little, as necessary, to maintain a moderate boil. Add more water if the liquid reduces too quickly while boiling. Pour the milky broth through a colander into the pot or large bowl that contains the first batch. You can repeat this one more time, if desired. Just mix them all at the end to even it out.

Removing fat

  1. You can use a fat separator to remove the fat, or keep it in the fridge (or out on the deck or balcony in the winteuntil the fat solidifies to spoon off the fat.

Serving

  1. To serve, place some rice and, if desired, noodles in a serving bowl, add the meat pieces, and then ladle the hot broth on top. Typically, chopped scallions, salt and pepper are served separately so each person can season to taste. Serve piping hot with kimchi.

Freezing leftover

  1. Freeze leftover broth in freezer bags.

This recipe was originally posted in February 2013. It was updated here with new photos and more information. 

The post Seolleongtang (Ox Bone Soup) appeared first on Korean Bapsang.

Anchovy Broth for Korean Cooking

$
0
0
Anchovy broth is essential in Korean cooking. Learn the basics of making anchovy broth to enhance flavors of your stews, soups, and other dishes.
Korean anchovy broth in a measuring cup
 
Anchovy broth  (myeolchi yuksu, 멸치육수) is essential in Korean cooking. It is a traditional base for many soups, stews and other dishes. If you’ve been following this blog, you probably know anchovy broth is used in many of my recipes. And I promise there will be many more.
 
Rather than reproducing an anchovy stock recipe each time, here’s everything you need to know about how to make anchovy broth for Korean cooking! Unlike meat-based stocks or broth, making anchovy broth takes very little work and time. The resulting broth is light in body, full of savory flavor, and not all that fishy. This is why it’s so versatile!

What do you need to make anchovy broth

You can simply use dried anchovies (myeolchi, 멸치) for a quick and simple broth. Dried kelp (dashima, 다시마), aka kombu, is the most popular addition. These two ingredients together make deliciously savory broth you can use it in any dishes that require a broth. For more complex broth, we add various other aromatic vegetables and other dried seafood such as dried shrimp. Here are a list of some of the most common ingredients:

  • Dried anchovies (myeolchi, 멸치)
  • Dried kelp (dashima, 다시마)
  • Korean radish (mu, 무)
  • Onion
  • Garlic
  • Dried shiitake mushrooms (pyogo beoseot, 표고버섯)
  • Dried shrimp (mareun saewu, 마른새우)

Buying dried anchovies 

Dried anchovies (myeolchi, 멸치) come in a wide range of qualities and sizes. The selection, however, is somewhat limited outside Korea. For best results, buy the good quality anchovies. Look for the ones that have clean silvery skins with a bluish tone. Typically, medium to large (about 2 -3 inches long) anchovies are used for stock as they impart more flavor. Dried anchovies keep well in the freezer for months. These anchovies are a staple in my freezer.

Dried anchovies in a bag

Preparing anchovies

Remove the guts by opening the belly and scraping them out, but leave the heads on. The stock tends to get a little bitter with the guts, especially with large size anchovies. You don’t need to remove the guts from small to medium anchovies.

If you are sensitive to a fishy taste, you can precook the anchovies for a few minutes in a heated dry pan before using in stock. This process will get rid of some of the fishy taste.

cleaning dry anchovies

Buying and preparing dashima (kombu)

Dashima (다시마) is edible kelp – large seaweed, which is widely used in a soup base in Korean and other Asian cooking. This is NOT the same seaweed that Koreans use for miyeok guk. Dried dashima comes in slightly thick flat sheets with white powder on the surface.
 
Do not wash this white powder off, or you will lose some of the natural flavor enhancers dashima is known for. Gently wipe dashima with a lightly dampened cloth only to remove any sand or grit. Stored in a cool dry place, it will last for months.

Quick Option – Packets

If you want more convenient way to make quick anchovy broth, you can buy a bag of anchovy packets from a Korean market. Keep the bag in the freezer, and simply drop a packet into a pot of water. These packets usually have some dried anchovies along with a small piece of dried kelp. 

Packets of dried anchovies and dried kelp for a soup base

How to make anchovy broth 

Once you have all the ingredients ready, making the broth is pretty simple. The only things left to do is to add water, boil and strain the solids. Here are some tips that are helpful then making any variation of anchovy stock:

1. Soak dried anchovies and dashima in water for at least 20 minutes if you have time. 

2. Boil, uncovered, so any fishy aroma that develops can escape.

3. Do not boil anchovies and dashima too long. If boiled too long, the stock will lose the delicacy of the flavors or even develop an unpleasant taste. Also, dashima will develop a slimy substance when over boiled, making the stock cloudy.

To illustrate the basic techniques and tips, I have chosen three classic variations here. 

Anchovy Broth I – Very basic

It is very common for Korean home cooks to simply throw a few anchovies in the water to make this simplest form of anchovy stock. It’s a convenient way to add another layer of flavor to a dish. You can use this broth in any recipe that calls for anchovy broth. Try it for:

kongnamul guk,
baechu doenjang guk,
mu guk,
doenjang jjigae,
kimchi jjigae,

Anchovy Stock II – Enhanced

I probably make this one the most. It’s as easy as the first one, but dashima, a natural flavor enhancer, elevates the anchovy stock to the next level. This will add great flavors to any dish you use it for.  In addition to the list above:
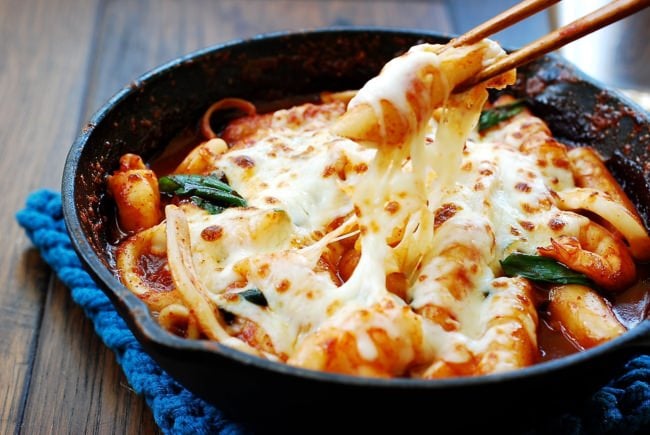
Tteokbokki
jjambbong
gyeranjjim

Anchovy Stock III – Fully flavored
 
In this version, aromatic vegetables add more depth and complexity to the flavor of the stock. You can of course use this fully flavored in any dishes that require a broth, including all of the ones list above.  I also love this stock for any noodle soup such as janchi guksu. It’s also wonderful for manduguk and tteokguk.

Often I add dried shiitake mushrooms and dried shrimp to this third version. They add strong flavors, and the resulting stock is fairly complex. These optional ingredients can be boiled with the vegetables.

Any leftover anchovy stock can be refrigerated for 3 – 4 days or frozen for later use.

If you tried this recipe, please rate the recipe and let me know how it turned out for you in the comment section below.  Stay in touch by following me on YouTubePinterestTwitterFacebook, and Instagram.

Anchovy Broth for Korean Cooking

Anchovy broth is essential in Korean cooking. Learn the basics of making anchovy broth to enhance flavors of your stews and soups.

Anchovy Broth I – Very basic:

  • 10 – 12 medium to large dried anchovies

Anchovy Broth II – Enhanced:

  • 10 – 12 medium to large dried anchovies
  • 2 pieces of dried dashima (about 3-inch squares)

Anchovy Broth III – Fully flavored:

  • 10 – 12 medium to large dried anchovies
  • 2 pieces of dried dashima (about 3-inch squares)
  • 4 ounces Korean radish (cut into big chunks)
  • 1/2 small onion whole
  • 2 – 3 garlic cloves
  • white parts of 2 scallions

Optional ingredients:

  • Dried shiitake mushrooms
  • Dried shrimp

Anchovy Broth I – Very basic:

  1. Prepare the dried anchovies, and soak in 6 – 8 cups of water for at least 20 minutes, if you have time. Then, bring it to a moderate boil, uncovered. Reduce the heat to medium high and boil for 10 minutes. Drain the liquid to remove the anchovies.

Anchovy Broth II – Enhanced:

  1. Prepare the dried anchovies and dashima (about 3-inch squares). Soak them in 6 – 8 cups of water in a medium size pot (3 Qt) for at least 20 minutes, if you have time. Then, bring it to a gentle boil, uncovered. Reduce the heat to medium high, and boil for 10 minutes. Strain the liquid to remove anchovies and dashima from the stock.

Anchovy Broth III – Fully flavored:

  1. Prepare the dried anchovies and dashima. Also prepare the aromatic vegetables

  2. Meanwhile, in a pot large enough to hold 12 – 14 cups of water (5 Qt pot), place the anchovies and vegetables with 8 cups of water. Bring it to a boil. Reduce the heat to medium high and boil for 10 minutes. Remove the dashima, and continue boil for another 10 to 15 minutes. Strain the broth, and discard the solids.

  3. Simply add the optional ingredients with the anchovies and vegetables and follow the instructions for Anchovy Broth III.

Any leftover anchovy stock can be refrigerated for 3 – 4 days or frozen for later use.

This anchovy broth recipe was originally posted in June 2011. I’ve updated here with new photos and a recipe card.  

The post Anchovy Broth for Korean Cooking appeared first on Korean Bapsang.

Gyeran Mari (Korean Egg Roll)

$
0
0

This Korean rolled egg recipe is made with chopped carrot and scallion. It’s a popular side dish, especially for a lunch box, that you can easily whip up in no time!

Korean rolled omelette with chopped carrot and scallion on a leafy shape plate

What is gyeran mari?

Gyeran mari (계란말이), literally translated to egg roll, is Korean-style rolled omelette. It’s usually served as a side dish for any meal, not just breakfast, and hugely popular as a lunch box item. Today, these Korean egg rolls have also become a popular street food by vendors who roll up giant size gyeran mari with so many eggs. It’s quite impressive to watch!

To me, this Korean egg roll recipe is another delicious side dish that I can whip up last minute before the meal. 

How to make gyeran mari (Korean rolled omelettes)

Gyeran mari is typically made with one or two types of chopped vegetables, most commonly with scallions and carrots. The filling options are endless! Try with onions, mushrooms, zucchini, bell peppers, or garlic chives (buchu). You can also add ham, bacon, or cheese, if you want. Another popular addition is gim (dried seaweed sheet). 

Gyeran Mari (Korean Rolled Eggs)

Making gyeran mari is simple once you have the basics down. Simply pour a portion of the egg mixture into a thin layer. When the egg is set but still wet, fold it with a spatula and keep rolling. Pull the rolled egg to a side, and add more egg mixture to the open space to repeat. 

For 3 eggs, you can pour the egg mixture into the pan 2 or 3 times. For 5 eggs, 3 or 4 times. These are simply guidelines. There are no hard and fast rules. The first photo is made with 5 eggs. 

Tips for making the best Korean rolled eggs

  1. Preheat the pan until it feels hot when you place your hand 2 to 3 inches above the bottom of the pan.
  2. Do not overcrowd the egg mixture with the fillings. It would be harder to roll up. 
  3. Be patient and cook the eggs over gentle heat. If the heat is too high, you’ll end up with tough eggs that will break when folded. If you don’t cook the eggs enough, the rolled egg will be runny inside.
  4. Use both hands to roll, each holding a spatula, a spoon or a pair of chopsticks.
  5. Use a small skillet if you want your rolls to be thick. 

Don’t worry, if it’s not perfect the first time, it will definitely come with practice. Once you get the basics down, try it with more eggs.

If you tried this Korean rolled egg recipe, please rate the recipe and let me know how it turned out for you in the comment section below.  Stay in touch by following me on YouTubePinterestTwitterFacebook, and Instagram.

Korean rolled omelette with chopped carrot and scallion in a tupperware

Watch How to Make It

Gyeran mari (Korean rolled omelette)

This Korean rolled egg recipe is made with chopped carrot and scallion! It’s a popular side dish, especially for a lunch box!

  • 3 large eggs (You can use 5 or more eggs for thicker rolls )
  • 1 or 1.5 tablespoons finely chopped scallion
  • 1 or 1.5 tablespoons finely chopped carrot
  • Salt to taste (about 1/8)
  • Pinch black pepper
  • vegetable oil for frying
  1. Finely chop the scallion and carrot.
  2. Crack and beat the eggs, in a bowl with a spoon, a fork, or a pair of chopsticks until the yolks and whites are blended well with no visible strings of whites. Stir in salt and pepper.
  3. Stir in the chopped vegetables.
  4. Add a teaspoon of vegetable oil to a medium size non-stick pan and distribute the oil evenly using a napkin or paper towel. Preheat over medium low heat, until it feels hot when you place your hand 2 to 3 inches above the bottom of the pan.
  5. Add 1/2 of the egg mixture to the pan. Swirl it around to cover the pan. Let it cook until the top begins to set but is still wet.
  6. Using a spatula, lift one end of the egg (about 1-1/2 inches) and fold it over to the other side. Reduce the heat or raise the pan away from the heat for a little while if the bottom is browning.
  7. Lift the folded part and fold it again. Pull the egg to the rolled side, making room on the round end for more egg mixture. Add 1/2 of the remaining egg and spread to cover the open space.

  8. When the egg addition is set, lift the folded part and fold it again. Pull the egg to the rolled side and repeat the process with the remaining egg to make an about 2-inch egg log.
  9. Remove from the pan and let cool for about 5 minutes. Slice the egg into thick, even pieces (3/4 to 1-inch thick).

If using more eggs, simply increase the amount of the other ingredients proportionately.

Gyeran mari can be stored in the fridge for 2 to 3 days. You can heat it up in the microwave or eat cold as is.

This gyeran mari recipe was originally posted in April 2012. I’ve updated it here with new photos, more information and minor changes to the recipe.  

The post Gyeran Mari (Korean Egg Roll) appeared first on Korean Bapsang.


Traditional Kimchi (Napa Cabbage Kimchi)

$
0
0

This Korean kimchi recipe shows you everything you need to know about how to make traditional cabbage kimchi. With this small batch recipe, you’ll find it not that difficult to make good authentic kimchi at home. 

napa cabbage kimchi recipe
What is kimchi?

Kimchi (김치) is a collective term for vegetable dishes that have been salted, seasoned, and fermented. The history of kimchi goes back to ancient times. Originated from pickled vegetables, there are now hundreds of kimchi varieties in Korea. You can find some of the most common kimchi recipes in my 15 easy kimchi recipes

Over the last decade or so, Korean kimchi has gained a global recognition as a healthy probiotic food. Kimchi is a good source of useful lactic acid bacteria, has excellent anti-oxidation and anti-cancer effects, and helps prevent aging. 

This kimchi recipe is made with baechu (배추), known as napa cabbage, hence the name baechu kimchi. Because the cabbage is kept intact at its head, it’s also known as pogi kimchi (포기김치). Pogi means a “head” of a vegetable. 

In late fall, Korean households make this type of kimchi in large quantity for their kimjang (or gimajang, 김장), an annual kimchi making event in preparation for cold months. I grew up watching my mother make kimchi using over 100 cabbages with her friends in the neighborhood who rotated their kimjang schedules to help each other. 

I usually make it with 5 – 10 heads (pogi) of cabbages at a time because we eat kimchi every day. Also, I provide regular supply to my grown-up children. Both my mother and mother-in-law did that for us for a long time, so I am gladly continuing the tradition. 

In Korean homes, there can never be too much kimchi. So many Korean dishes are made with well-fermented kimchi, such as kimchi jjigae, kimchi mandu, kimchi bibim guksu, kimchi fried rice, kimchijeon, tofu kimchi, and many more.

Vegan kimchi

Buying napa cabbages

For this pogi kimchi, it’s best to use a medium to large cabbage that weighs around 5 to 5-1/2 pounds with some light green outer leaves. When cut, a good cabbage has a nicely straight white part that’s not too thick as well as bright yellow inner leaves. 

Salt for making kimchi

Korean coarse sea salt (cheonilyeom, 천일염) is the best to salt the vegetables to make kimchi. It’s natural salt with a coarse texture that’s minimally processed. Commonly referred to as gulgeun-sogeum (굵은소금), meaning coarse or thick salt, this salt tastes good without bitterness, so it helps develop flavors in fermented foods.

When we first came to America, Korean sea salt wasn’t available, so we used normal salt to salt cabbages. Be sure to use less (about 1/4 less than the amount called for in the recipe) if using fine salt.

Korean coarse sea salt

Kimchi seasonings

The taste of kimchi varies widely, depending on the quality, type and ratio of the seasoning ingredients. Each Korean household has its own recipes, often driven by the regional flavors of their hometown. I find myself making it differently each time. 

In addition to gochugaru (고추가루, Korean red chili pepper flakes), garlic and ginger, kimchi recipes typically call for various jeotgal (젓갈, salted seafood) for the distinct pungency and depth of flavors and to aid the fermentation process. Saeujeot (새우젓, salted shrimp) and myulchiaekjeot (멸치액젓, fish sauce made with anchovies) are the most common ones.

Sometimes, I also use fresh shrimp which is my mother’s secret ingredient for adding extra freshness to the kimchi flavor. If you can’t find saeujeot in your area, consider using some raw shrimp instead.

If you want to make vegan kimchi, skip shrimps and swap fish sauce with soup soy sauce (국간장). Or simply head over to my post on how to make vegan kimchi

Kkakdugi (cubed radish kimchi)

How to make kimchi

To help you start making kimchi at home, I came up with this recipe using one napa cabbage. Start with one cabbage, and then move to 2 or 3 by doubling or tripling the recipe. 

Making kimchi usually starts with salting the main vegetable. For this pogi kimchi, you need to cut the whole cabbage in half lengthwise, and then into quarters. If you’re using 2 small cabbages, cutting in half should be enough. 

You then need to thoroughly bathe each cabbage half/quarter in the salt water one at a time. Using the other half cup of salt, generously sprinkle salt over the thick white part of each leaf. This process makes sure the white parts get evenly salted, 

Meanwhile, make a kimchi paste by mixing all the seasoning ingredients, and then cut the radish into thin matchsticks and mix well with the paste. The rest is easy, rub a little bit of the radish mix over each cabbage leaf, mainly the white part. 

How long does kimchi last? 

Although you can start eating your kimchi any time, it needs about two weeks in the fridge to fully develop its flavors. Your kimchi will continue to age in your refrigerator and will be delicious for a couple of months, when the healthy bacteria count is the highest. The kimchi will last much longer than that. It will turn very sour over time, and sour kimchi can be used in many delicious dishes! 

Have you tried this kimchi recipe? Please rate the recipe below and leave a comment! Stay in touch by following me on YouTube, PinterestTwitterFacebook, and Instagram.

cut traditional kimchi in a green plate

Traditional kimchi (Napa Cabbage Kimchi)

This Korean kimchi recipe shows you everything you need to know about how to make traditional cabbage kimchi. With this small batch recipe, you’ll find it not that difficult to make good authentic kimchi at home.

  • 1 large Napa cabbage (about 5 to 6 pounds, or 2 small (about 3 pounds each))
  • 1 cup Korean coarse sea salt for making kimchi
  • 5 cups water
  • 1 pound Korean radish, mu or moo (무) (mu/moo)
  • 1/4 Korean pear (배) (optional)
  • 3 – 4 scallions

Seasonings

  • 1 tablespoon glutinous rice powder* (찹쌀가루 ((*Mix it with 1/2 cup water simmer over low heat until it thickens to a thin paste and cool. Yields about 3 – 4 tablespoons.) )
  • 1/2 cup Korean red chili pepper flakes (gochugaru, 고추가루, (adjust to your taste))
  • 1/4 cup salted shrimp (saeujeot) (, 새우젓, finely minced)
  • 3 – 4 raw shrimps (about 2 ounces, finely minced or ground)
  • 3 tablespoons myulchiaekjeot (fish sauce, 멸치액젓)
  • 3 tablespoons minced garlic
  • 1 teaspoon grated ginger
  • 1 teaspoon sesame seeds (optional)
  • 1/2 cup water or dashima (dried kelp broth)

Kitchen tools

  • 2 large bowls or pots (7 – 8 quarts)
  • a large colander
  • kitchen gloves
  • 3/4 – 1 gallon airtight container or jar
  1. Cut the thick white part of the cabbage lengthwise in half. Then, slowly pull apart by hand to separate into two pieces. Do the same for each half to make quarters. Running the knife through all the way would unnecessarily cut off the cabbage leaves.

  2. In a large bowl, dissolve 1/2 cup of salt in 5 cups of water. Thoroughly bathe each cabbage quarter in the salt water one at a time, shake off excess water back into the bowl, and then transfer to another bowl.

  3. Using the other half cup of salt and starting from the outermost leaf, generously sprinkle salt over the thick white part of each leaf (similar to salting a piece of meat). Try to salt all the cabbage quarters with 1/2 cup salt, but you can use a little more if needed. Repeat with the rest of the cabbage quarters. Pour the remaining salt water from the first bowl over the cabbage. Set aside for about 6 – 8 hours, rotating the bottom ones to the top every 2 – 3 hours.

  4. The cabbages should be ready to be washed when the white parts of the leaves are easily bendable. Rinse thoroughly 3 times, especially between the white parts. Drain well, cut side down.

  5. Meanwhile, make the optional dashima broth by boiling a small piece (2 to 3 inch square) in one cup of water for 5 minutes, and cool. Mix the rice powder with 1/2 cup water (or dashima broth) and simmer over low heat, stirring occasionally, until it thickens to a thin paste, and cool.

  6. Prepare the garlic, ginger and saeujeot. Combine all the seasoning ingredients, including the rice paste and water (or dashima broth), and mix well. Set aside until the red pepper flakes to dissolve slightly and become pasty.

  7. Cut the radish and optional pear into matchsticks (use a mandoline if desired), transferring to a large bowl. Cut the scallions diagonally into about 1-inch long pieces.
    Add the prepared seasoning mix to the radish, and mix well by hand. Throw in the scallions, and mix everything lightly. Taste a little bit. It should be a little too salty to eat as is. You can add salt, more salted shrimp or fish sauce, as needed. Let it sit for about 30 minutes to allow the flavors to meld nicely.

  8. Cut off the tough stem part from each cabbage quarter, leaving enough to hold the leaves together. Place one cabbage quarter in the bowl with the radish mix. Spread the radish mix over each leaf, one to two tablespoons for large leaves. (Eyeball the stuffing into 4 parts and use one part for each cabbage quarter.)

  9. Fold the leaf part of the cabbage over toward the stem and nicely wrap it with the outermost leaf. Place it, cut side up, in a jar or airtight container. Repeat with the remaining cabbages. Once all the cabbages are in the jar or airtight container, press down hard to remove air pockets. Rinse the bowl that contained the radish mix with 1/2 cup of water and pour over the kimchi.

  10. Leave it out at room temperature for a full day or two, depending on the weather and how fast you want your kimchi to ripen. Then, store in the fridge.

Although you can start eating it any time, kimchi needs about two weeks in the fridge to fully develop the flavors. It maintains great flavor and texture for several weeks.

This recipe was originally posted in January 2012. I’ve updated it here with new photos, more information and minor changes to the recipe.  

The post Traditional Kimchi (Napa Cabbage Kimchi) appeared first on Korean Bapsang.

Chicken Stir Fry with Kale and Mushrooms

$
0
0
This chicken stir-fry with kale and mushrooms is a quick healthy one-pot meal! The stir fry sauce is so versatile that you can use it with any meat and/or vegetables in the fridge. Perfect on a busy weeknight!

Chicken stir fry with vegetables served in a brown bowl

This chicken stir fry recipe is a variation of dak yachae bokkeum (닭야채볶음). Dak (닭) is chicken, yachae is vegetable, and bokkeum (볶음) refers to dishes that are stir-fried or sautéed in a sauce. In this recipe, I stir-fried chicken with some kale and mushrooms. It’s a quick healthy one-pot meal that’s perfect for a weeknight meal!

With some steamed rice, your dinner will be ready in less than 30 minutes!  

Vegetable options for stir fry

I like to use lots of kale and mushrooms to make it a healthy one-dish meal. Some people don’t like kale because of its bitter taste. The slightly sweet and savory sauce in this recipe nicely balances out the bitterness of the kale. Remember to look for fresh deep colored kale with small to medium leaves and thinner stalks. Smaller kale is tenderer and sweeter. 

You can add some strips of carrot, red chili or bell pepper for a pop of color.

For other options, try other green leafy vegetables such as spinach, Swiss chard and bok choy. Broccoli, green beans, asparagus, or zucchinis are all great as well. Vegetable options are indeed endless! If you’re using hard vegetables like broccoli, blanch or steam them before stir-frying with the chicken. You can do this in the same skillet you’ll be using for the stir-fry. 

Stir frying chicken, kale and mushrooms in a pan

Chicken stir fry sauce

This chicken stir fry sauce recipe is made with a few basic ingredients such as soy sauce, rice wine, sesame oil, sugar and garlic and ginger. You can swap a tablespoon of soy sauce with a tablespoon of oyster sauce if you like. If you don’t have rice wine, use a little bit of fresh lemon juice. It’ll brighten up the flavor nicely. 

This recipe doesn’t yield a lot of sauce, but you can add a little bit of water to the sauce if you like the dish a bit saucier. Also, Korean stir fry sauces don’t typically call for a starch to thicken the sauce, but feel free to add it if preferred. Regardless, the sauce is so versatile! You can use it in any stir fry dish. 

Chicken stir fry sauce in a small bowl with a spoon

How to make chicken stir fry

The actual stir-frying process goes very quickly, so prepare all of the ingredients and sauce before you begin cooking. 

  • Heat a large skillet over high heat with a tablespoon of cooking oil until very hot.
  • Add the chicken pieces in a single layer. Do not touch for a minute or two until the chicken is nicely seared. Flip them over and sear the other side.
  • Add the kale, mushrooms, optional red pepper. Drizzle the remaining sauce over the vegetables, and sprinkle with crushed red pepper if using. Continue to stir-fry until the kale and mushrooms are softened.

More chicken stir fry recipes

Stir-fried chicken and baby bok choy
Stir-fried chicken and summer vegetables

Have you tried this stir fry recipe? Please rate the recipe below and leave a comment! Stay in touch by following me on YouTubePinterestTwitterFacebook, and Instagram.

Chicken stir fry with kale and mushrooms in a brown ceramic bowl

Chicken Stir Fry with Kale and Mushrooms

A quick healthy one-pot meal! The stir fry sauce is so versatile that you can use it with any meat and/or vegetables in the fridge. Perfect on a busy weeknight!

  • 1 pound skinless, boneless chicken thighs (or breast)
  • 8 ounces kale
  • 6 ounces fresh mushrooms (white, crimini, or shiitaki)
  • 1 red chili pepper or 1/4 red bell pepper – optional
  • 1/4 teaspoon crushed red pepper – optional
  • 1 teaspoon sesame seeds – optional
  • 1 tablespoon cooking oil for stir-frying

Stir Fry Sauce

  • 3 tablespoons soy sauce (See notes)
  • 1 tablespoon rice wine (or mirin) (or 1 tablespoon lemon juice)
  • 1-1/2 tablespoons sugar (or brown sugar)
  • 1 tablespoon minced garlic
  • 1 teaspoon grated ginger
  • 1 tablespoon sesame oil
  • pinch black pepper
  1. Combine the sauce ingredients, and stir well to dissolve the sugar.

  2. Cut the chicken into bite size pieces.

  3. Marinate the chicken with 3 tablespoons of the sauce while preparing the vegetables.

  4. Tear the kale off the stems into small pieces. Discard thick stems. Rinse thoroughly and drain well.

  5. Give the mushrooms a quick rinse, and cut into quarters (or halves if small).

  6. Heat a large skillet over high heat with a tablespoon of cooking oil until very hot. Add the chicken pieces to the pan in one layer. Do not touch for a minute or two until the chicken is nicely seared. Flip them over and sear the other side. The chicken does not need to be cooked through at this point.

  7. Add the kale, mushrooms, and optional red pepper. Drizzle the remaining sauce over the vegetables, and sprinkle with crushed red pepper if using. Continue to stir-fry until the kale and mushrooms are softened, about 3 minutes. Serve hot on top of rice or with a separate bowl of rice.

  1. Add 2 to 3 tablespoons of water if you like a bit more sauce.
  2. Add a couple of teaspoons of cornstarch for a thicker sauce. 

This recipe was originally posted in December 2012. I’ve updated it here with new photos, more information and minor changes to the recipe.  

The post Chicken Stir Fry with Kale and Mushrooms appeared first on Korean Bapsang.

Musaengchae (Spicy Radish Salad)

$
0
0
This Korean spicy radish salad is an easy side dish (banchan) to put together. It can be a quick substitute for kimchi and is great in bibimbap.
Korean spicy radish salad

It’s that time of year again! Korean radish, mu (or moo), is in season! I’ve posted several radish dishes before, such as kkakdugi (cubed radish kimchi), dongchimi (radish water kimchi), muguk (radish soup), and munamul (stir-fried and steamed radish). Here, I made a popular side dish called musaengchae (무생채).

In late fall, Korean radishes taste really sweet, juicy, and crunchy. Korean radish is a variety of white radish, which has firm crisp flesh and a slightly sweet and peppery taste. It’s similar to daikon, a Japanese variety, but quite different in texture and taste. However, you can use daikon if Korean radish is not available in your area. 

What is musaengchae?

Saengchae is a general term for salad-like dishes made with uncooked vegetables. Musaengchae is made with a radish. There are several variations, such as non-spicy, sweet and sour radish salad. This spicy version is a more common variation. 

This one has the flavor of fresh kimchi (not fermented), so it can also be a quick substitute for kimchi. It’s great in bibimbap as well. It’s also a classic dish that’s served with bossam (boiled pork wrapped in salted napa cabbage).       

How to make Korean spicy radish salad

Musaengchae is an easy side dish to put together. The most difficult part for some of you will be julienning the radish. You can use a mandolin if you like. For this type of musaengchae, I like to salt the radish first to draw out some water for extra crunch. 

In this recipe, I used 1 tablespoon of fish sauce (myulchi aekjeot), but sometimes I also use salted shrimp (saeujeot). You can of course omit the fish sauce and use the same amount of soup soy sauce (gukganjang) or simply a little more salt to season to make it a vegan dish. You can also use some vinegar to taste if you want to add a bit of sour taste.  

More Korean radish recipes

Musaengchi (sweet and sour radish salad)
kkakdugi (cubed radish kimchi)
Muguk (Radish Soup) 
Munamul (Stir-fried radish side dish) 

Korean spicy radish salad in a small bowl

Have you tried this Korean spicy radish salad recipe? Please rate the recipe below and leave a comment! Stay in touch by following me on YouTubePinterestTwitterFacebook, and Instagram.

Musaengchae (Korean Spicy Radish Salad)

Korean Spicy radish side dish (banchan) – great in bibimbap and as a kimchi substitute!

Ingredients

  • 1 pound mu (Korean radish)
  • 1 teaspoon salt
  • 1 or 2 scallions (finely chopped)
  • 2 tablespoons gochugaru (Korean red chili pepper flakes) (adjust to taste)
  • 2 teaspoons minced garlic
  • 1/2 teaspoon grated ginger
  • 1 tablespoon fish sauce (myulchi aekjeot)
  • 1 teaspoon sugar (adjust to taste – see note)
  • 1 teaspoon sesame seeds (optional)
  1. Clean the radish by scrubbing with a brush and/or scratching off the stubborn impurities with a small knife. Peel the  skin only if necessary. Cut into matchsticks (about 1/8 to 1/4-inch thick).

  2. Sprinkle the salt over the radish and toss well to coat evenly. Let sit for about 20 minutes until the radish has softened and released some liquid. Drain excess liquid. Do not rinse.

  3. Add all the remaining ingredients, except the scallion and sesame seeds. Mix well by hand. Taste and add more salt or fish sauce, if necessary.

  4. Throw in the scallion and sesame seeds and toss everything well. 

As a sugar substitute, you can use corn syrup, oligodang, or maesil cheong (Korean plum extract). 

This recipe was originally posted in November 2012. I’ve updated it here with new photos, more information and minor changes to the recipe.  

The post Musaengchae (Spicy Radish Salad) appeared first on Korean Bapsang.

Spicy Soup with Leftover Turkey

$
0
0

If you like spicy food, this Korean spicy soup made with leftover turkey will become your favorite recipe to use up all that leftovers from your Thanksgiving dinner! 

Red spicy Korean soup made with leftover turkey

Thanksgiving is coming up! Every year, I prepare a traditional American Thanksgiving dinner for my extended family. There isn’t much Korean flavor on our turkey day table, but my family enjoys Korean dishes made with leftover turkey, such as porridge (juk, 죽) and this spicy soup that’s similar to dakgaejang (spicy chicken soup). 

They all start with making turkey stock! The morning after Thanksgiving, it’s a tradition for me to make turkey stock with what’s left of the turkey carcass. Then, I make turkey porridge for breakfast. Within the next day or two, we love to have a spicy bowl of turkey soup, which is nothing like Western-style turkey soup. 

This soup is made similar to yukgaejang (육개장), which is a popular spicy soup made with shredded beef and lots of scallions and other vegetables. Dakgaejang (닭개장) is a variation of yukgaejang, made with chicken. 

The chicken version is traditionally made with boiled chicken. I often make it with leftover of a roasted whole chicken (store bought or homemade). Those leftover bones are perfect for making chicken stock, and the whole chicken is too much for two of us to finish. Turkey remains work equally well. 

As such, this recipe also works with chicken remains. 

pulled leftover turkey

How to make stock with turkey carcass

  • Remove as much meat as possible from the turkey carcass and save them to use in the porridge or soup. 
  • Put the turkey remains in a large stock pot filled three-quarters of the way with water. Break up the bones if they are too big to fit in the pot.
  • Bring to a boil over medium high heat and skim off any foam. Add the vegetables, reduce the heat to low and simmer, covered, for about 2 hours. Cool and pour through a strainer into a large bowl or pot.
  • You can use a fat separator to remove the fat or keep it in the fridge until the fat solidifies to spoon off the fat.

Vegetables for the soup

This type of spicy soup calls for lots of scallions. The large variety of scallions (daepa, 대파) is typically preferred for soups if you can find them. They are more flavorful! In this recipe, I also used mung bean sprouts (sukju namul, 숙주나물) and shiitake mushrooms, but you can of course omit them if you like. You can add gosari (fern braken) as we typically do for yukgaejang (beef version). Some leafy vegetables like napa cabbage or bok choy will be a good addition as well. 

Happy Thanksgiving to you and your family!

Red spicy Korean soup made with turkey leftovers

Have you tried this spicy soup with leftover turkey recipe? Please rate the recipe below and leave a comment! Stay in touch by following me on YouTubePinterestTwitterFacebook, and Instagram.

Spicy soup with leftover turkey

Korean spicy soup made with leftover roasted turkey. The recipe is also great with leftover roasted chicken.

  • 8 cups turkey/chicken stock (see below for recipe)
  • 2 cups or more cooked turkey/chicken meat, shred into bite sizes
  • 1 – 2 bunches scallions
  • 8 ounces mung bean sprouts
  • 5 fresh shiitake mushrooms (or 3 soaked dry shiitake mushrooms)

Seasonings

  • 2 tablespoons sesame oil
  • 2 tablespoons gochugaru (Korean red chili pepper flakes)
  • 1 tablespoon gochujang (Korean red chili pepper paste)
  • 3 tablespoons guk ganjang (soup soy sauce)
  • 1 tablespoon minced garlic
  • salt and pepper to taste

Turkey/Chicken Stock:

  • Remains of roasted turkey or chicken
  • 1 medium onion (halved and peeled (1/2 for chicken))
  • 1 large carrot cut into large chunks
  • 1 large celery stalk cut into large chunks
  • 5 to 7 plump garlic cloves
  • 1 to 2 bay leaves
  1. Pull the meat from the bones and shred into thin strips (or bite sizes).
  2. Blanch the bean spouts for a minute or two and drain. You can skip blanching if you want. Cut the scallions into about 4-inch lengths. Thinly slice the mushrooms.

  3. In a pan, heat the sesame oil until hot (but not smoking hot) over low heat. Add the chili pepper flakes and turn the heat off. Stir gently until the oil turns red and the chili pepper flakes become pasty. Do not burn the flakes.

  4. Add the meat, bean sprouts, mushrooms, 1 tablespoon soup soy sauce, and garlic to the sesame oil mixture and mix well. Marinate for 10 to 15 minutes.
  5. Bring the stock to a boil in a large pot. Add the marinated meat and vegetables to the stock. Stir in the gochujang and 2 tablespoons of soup soy sauce. Cook for 5 minutes over medium high heat.

  6. Throw in the scallions. Continue to boil for an additional 3 – 4 minutes. Add salt and pepper to taste. Serve with a bowl of rice.

Making the stock

  1. Remove as much meat as possible from the chicken/turkey carcass and save them to use in the soup.

  2. Put the chicken/turkey remains in a large stock pot filled three-quarters of the way with water.

  3. Break up the bones if they are too big to fit in the pot. Bring to a boil over medium high heat and skim off any foam.

  4. Add the vegetables, reduce the heat to medium low and simmer, covered, for about an hour or two.

  5. Cool and pour through a strainer into a large bowl. You can use a fat separator to remove the fat or keep it in the fridge until the fat solidifies to spoon off the fat.

This recipe was originally posted in November 2012. I’ve updated it here with new photos, more information and minor changes to the recipe.  

Korean spicy soup with leftover turkey

The post Spicy Soup with Leftover Turkey appeared first on Korean Bapsang.

Kimchi Fried Rice (Kimchi Bokkeum Bap)

$
0
0
If you have some kimchi and rice, try this easy kimchi fried rice recipe! It’s so versatile that you can add any protein you like or omit it entirely. It’ll become one of your go-to easy meals. 

Korean kimchi fried rice in a skillet

Kimchi fried rice (kimchi bokkeumbap, 김치볶음밥) is a humble Korean dish made basically with kimchi and leftover rice. Since Korean homes almost always have these two staples, kimchi fried rice is a favorite go-to meal whenever there seems to be nothing to eat at home.

It’s especially popular among young people who are living on a low budget as it is a quick-fix meal, inexpensive to prepare, yet delicious and filling. 
 
the best Korean Kimchi Fried Rice (kimchi bokkeumbap) served in a white bowl with a fried egg on top
 
All you need is well fermented kimchi and some cooked rice! We typically use baechu (napa cabbage) kimchi for fried rice, but old radish kimchi such as kkakdugi or chongak kimchi, works well too. Kimchi has plenty of flavors, but it’s common to add some gochujang, soy sauce and/or gochugaru for more robust savory flavors and spiciness. 

Popular protein additions by Koreans include processed meat, such as bacon, ham, sausage, or spam, as well as canned tuna. You can also cooked or uncooked chicken, pork, beef or shrimp, so feel free to experiment once you’ve got a hang of the basic technique.

For a vegan option, substitute the meat with tofu or omit it. Use vegan kimchi and skip the egg.

Rice for kimchi fried rice

Koreans typically use short grain white rice for everyday use. However, any other rice you’d use for fried rice, including brown rice and mixed grain rice, is fine for this recipe as well.  

As with any fried rice, day old rice is best to use, if available. The rice can get hard after being in the fridge. Heat it up in the microwave to soften it a little and break it up before stir-frying with kimchi. 

You can, of course, make fresh rice for this dish. Simply use a little less water than the usual amount to make the rice slightly drier and cool before using. 

Kimchi fried rice (Kimchi bokkeumbap) served on a plate with a runny sunny side up egg on top

How to make kimchi fried Rice

The basic technique involves stir-frying the kimchi typically with some aromatic vegetables and seasonings until the kimchi turns soft and deep in color. This step brings out rich flavors of the kimchi.

If you’re using uncooked meat, cook the meat before stir-frying with the kimchi. It doesn’t need to be completely cooked through. When I use bacon, I cook it until it turns slightly brown and crispy. 

It’s much faster if you use cooked meat or canned tuna (drained). Simply throw it in while the kimchi is being stir-fried. 

Kimchi fried rice process photos

After adding the rice to the pan, stir constantly over medium low heat, breaking up the rice clumps, until everything is well incorporated. This will keep rice from sticking to the pan too much. Once the rice is evenly coated with the seasoning, turn up the heat high and stir only occasionally so the rice can get nicely toasted.  

Tips for making good kimchi fried rice

  • Whenever you cook with kimchi, it is best to use well-fermented kimchi for the rich and robust flavor it develops. No exception here.
  • If the leftover rice is hard after being in the fridge, heat it up in the microwave to soften it a little and break it up before stir-frying with the kimchi mix. 
  • If you are using raw meat, season it with salt and pepper. A small amount of garlic and/or ginger to flavor the meat will be great too. Cook the meat before stir-frying with the kimchi. 
  • To make it spicier, add gochugaru instead of more gochujang. Too much gochujang will make the dish too salty. 
  • Use high heat to cook the kimchi, medium low heat while breaking up the rice clumps to keep the rice from sticking to the pan too much, and high heat to get the rice nicely toasted at the end. 

Kimchi fried rice with seaweed strips

Have you tried this kimchi fried recipe? Please rate the recipe below and leave a comment! Stay in touch by following me on YouTubePinterestTwitterFacebook, and Instagram.

Kimchi Fried Rice (Kimchi Bokkeum Bap)

If you have some kimchi and rice, try this easy kimchi fried rice recipe! It's so versatile that you can add any protein you like or omit it entirely. It'll become one of your go-to easy meals. 

  • 3 – 4 strips of bacon, diced (or about 4 ounces ham or spam, or 1 can of tuna, drained) (See note 1 if using uncooked meat)
  • 3/4 cup diced kimchi (See note 2)
  • 1/4 small onion, diced (diced)
  • 1 scallion, chopped (chopped)
  • 1 small carrot, finely chopped – optional
  • 3 – 4 tablespoons juice from kimchi
  • 1 tablespoon soy sauce
  • 1 tablespoon gochujang (Korean chili pepper paste) (See note 3)
  • 2-1/2 cups cooked rice (See note 4)
  • oil for stir-frying
  • 1/2 tablespoon sesame oil
  • salt and pepper to taste

Optional

  • 1 teaspoon sesame seeds
  • 2 eggs (fried)
  • 1 sheet roasted gim (dried seaweed sheet)
  1. If using bacon, heat a lightly oiled large skillet over medium heat. Add the bacon pieces. Cook until the bacon is slightly browned. If you don't want all the rendered fat, remove it from the pan and add a couple of tablespoons of cooking oil. If using ham, spam or canned tuna instead of bacon, you can simply add it while stir-frying kimchi in step 2.

  2. Add the onion and scallion and stir-fry quickly over high heat. Add the kimchi, optional carrots, juice from kimchi, soy sauce and gochujang. Stir fry until the kimchi turns soft and deep in color, 3 to 4 minutes. Take the time to do this step so the rich flavors develop.

  3. Add the rice, and reduce the heat to medium low. Stir until everything is well incorporated and the clumped up rice is broken up, 3 to 4 minutes.

  4. Once the rice is evenly coated with the seasoning, turn up the heat high and continue to fry the rice, turning occasionally. Add salt and pepper to taste. Mix in the sesame oil and the optional sesame seeds at the end.

  5. Top with the optional fried egg, and garnish with the optional sesame seeds, gim (dried seaweed) strips and/or chopped scallion and serve.

  1. If you are using raw meat, season it with salt and pepper. A small amount of garlic and/or ginger to flavor the meat will be great too. Cook the meat before stir-frying with the kimchi.
  2. Whenever you cook with kimchi, it is best to use well-fermented kimchi for the rich and robust flavor it develops. No exception here.
  3. For spicier fried rice, add gochugaru instead of more gochujang. Too much gochujang will make the dish too salty. 
  4. If the leftover rice is hard after being in the fridge, heat it up in the microwave to soften it a little and break it up before stir-frying with the kimchi mix.

This recipe was originally posted in December 2010. I’ve updated it here with new photos, more information and minor changes to the recipe.  

The post Kimchi Fried Rice (Kimchi Bokkeum Bap) appeared first on Korean Bapsang.

Haemul Pajeon (Seafood Scallion Pancake)

$
0
0

Haemul pajeon is a popular Korean savory pancake made with scallions and seafood. With this easy scallion pancake recipe, you can enjoy your restaurant favorite at home.  

Seafood scallion pancake served with a dipping sauce and Korean rice wine

Pajeon is a Korean savory pancake made with scallions. Pa means scallion, and jeon means pan-fried battered food. The most popular variation is made with seafood (haemul), hence the name haemul pajeon. Along with other savory pancakes such as kimchi jeon, buchjeon, and nokdujeon, it’s one of Korea’s favorite snacks or appetizers. 

In Korea, haemul pajeon is often paired with makgeolli (Korean milky rice wine). Koreans also say that when it rains outside, just stay home and enjoy some jeon (savory pancakes). Pajeon is a popular choice. 

How to make Korean pancake batter

Commercially available pancake mix (buchim garu, 부침가루) is a pantry staple in Korean homes. The mix is seasoned and typically includes wheat flour and other ingredients such as corn starch, rice flour and sometimes baking powder. Koreans look for a slightly chewy and crispy texture in savory pancakes. 

Sometimes, Korean home cooks combine pancake mix with frying mix (twuigim garu, 튀김가루) for extra crispy pancakes. Frying mix typically contains more rice flour and baking powder for a crispy result. Try it if you have a bag of frying mix (1:1 ratio). 

Don’t have a bag of pancake mix? Not to worry! You can simply use all purpose flour. For a chewy and crispy texture, you can basically create your own mix similar to the commercial version by adding rice flour and/or corn starch along with a little bit of baking powder. Regardless, season it with salt, and add some minced garlic (or powder).

Seafood scallion pancake served with a dipping sauce

How to make seafood scallion pancake

Look for thin scallions for making pajeon. If the white parts are thick, cut in half lengthwise. 

Usually, a combination of seafood, such as squid, shrimp, mussels, oysters and clams, is used, but you can simply use any one (or two) of them. Fresh seafoods are always good, but a bag of frozen seafood mix works well for this recipe. 

There are different ways to pan fry scallion pancakes. Sometimes, I combine everything together in the mix before pan-frying. Other times, I only mix the seafood in the batter and then later add the scallions on top when frying. Some people put the scallions first in the pan to crisp up and then spread the batter and the seafood on top. Try these different techniques and see which one you like.

Flipping the pancake is somewhat intimidating for a lot of people. The key is to wait until the bottom is nicely golden brown and flip it fast with confidence. And flip only once! You can also make the pancake smaller for easier flipping. 

Haemul Pajeon - Crispy Korean seafood scallion pancakes!

Tips for making crispy pajeon

The most frequently asked question I receive from the readers is how to make pajeon extra crispy. Here are a few things you can do for crispy pancakes. 

  • Drain the scallions and seafood well to remove excess water.  
  • Add corn starch and/or rice powder to wheat flour if making the pancake mix from scratch.
  • Try mixing pancake mix (buchim garu) with frying mix (twiguim garu) – 1:1 ratio.
  • Use icy cold water to make the batter.
  • Use a generous amount of oil. If you want it extra crispy, use more oil for a deep-frying effect.   

More Korean savory pancakes recipes

Buchujeon (garlic chives pancakes)
Kimchi jeon (kimchi pancakes)
Nokdujeon (savory mung bean pancakes)
Gamjajeon (potato pancakes)
Hobak buchim (zucchini pancakes)

Seafood scallion pancake

Have you tried this seafood pancake recipe? Please rate the recipe below and leave a comment! Stay in touch by following me on YouTubePinterestTwitterFacebook, and Instagram.

Haemul Pajeon (Seafood Scallion Pancake)

Haemul pajeon – crispy delicious Korean scallion pancakes with seafood!

  • 1-1/2 to 2 cups assortment of seafood (squid, shrimp, mussels, oysters, clams, etc., cut into bite sizes)
  • 1 tablespoon sesame oil
  • 1 or 2 bunches scallions
  • 1 red chili pepper – optional
  • 1 egg (lightly beaten – optional)

Batter – makes 2 large (about 7 to 8-inch) pancakes

  • 1 cup Korean pancake mix, buchim garu, 부침가루 (See note.)

Dipping Sauce

  • 1 tablespoon soy sauce
  • 2 to 3 teaspoons vinegar
  • 1 tablespoon water
  • pinch of black pepper
  • pinch of gochugaru (Korean red chili pepper flakes)
  • 1/2 teaspoon sugar – optional
  • 1 tablespoon chopped scallion – optional
  • 1 tablespoon Diced onion – optional
  1. Prepare the seafood, scallions and optional pepper, draining excess water. (Wet ingredients will make pajeon soggy.) Cut the scallions in half crosswise. Cut the white part of the scallions lengthwise if thick. Mix the seafood with the sesame oil.

  2. In a large bowl, mix the pancake mix with 3/4 cup icy cold water. You may need a couple more tablespoons but add one tablespoon at a time. The batter should be thinner than a Western breakfast pancake batter and thicker than a crepe batter. (For a crispy pajeon, the batter should be relatively thin.) Mix in 1/2 of the seafood.

  3. Heat 3 to 4 tablespoons of vegetable oil in a non-stick pan over medium high heat, ladle 1/2 of the mixture into the pan and spread it evenly into a thin round shape.

  4. Arrange the scallions in a single layer on top of the batter, pressing them down into the batter. Add 1/2 of the remaining seafood and a few slices of the optional pepper.

  5. Spoon one half of the optional lightly beaten egg on top. Cook until the bottom is golden brown (3 – 4 minutes). Reduce the heat to medium if the pancake is browning too fast.

  6. Turn it over, adding more oil (2 to 3 tablespoons) around the edges. Cook for another 3 – 4 minutes. Repeat the process with the remaining batter and ingredients. Serve hot off the pan with dipping sauce.

Optional method

  1. Cut the scallions shorter, 2 to 3-inch lengths. You can mix everything with the batter, except the egg. Drizzle the egg over on top, and follow the direction above for pan-frying.

Use 1/2 cup buchim garu and 1/2 cup frying mix for extra crispy pancakes.

bag of Korean pancake mix

Or, make your own pancake mix by mixing 3/4 flour, 2 tablespoons rice flour, 2 tablespoons potato or cornstarch, 1 teaspoon minced garlic (or powder) and 1/2 teaspoon salt. Also, try different ratios of the mix to find your favorite. 

This recipe was originally posted in October 2009. I’ve updated it here with new photos, more information and minor changes to the recipe.

The post Haemul Pajeon (Seafood Scallion Pancake) appeared first on Korean Bapsang.

Glazed Korean Meatballs (Wanja Jorim)

$
0
0
These Korean-style meatballs are glazed in a sweet and savory sauce. They are tender, moist and packed with lots of flavors! Great as cocktail meatballs for your holiday parities!
Korean meatballs glazed in a sweet and savory sauce

Every country has some sorts of meatballs. In Korea, meatballs are called gogi wanja (고기완자) and used in soups or hotpots, egg-battered and pan-fried (wanjajeon, 완자전), or braised in a sauce (wanja jorim, 완자조림). This recipe shows how to make wanja jorim. The meatballs are first pan-fried and then finished in a deliciously sweet and savory sauce. 

These Korean-style meatballs are tender, moist and packed with lots of flavors! They are child-friendly, great as cocktail meatballs for your holiday parties, or simply as a side or a main dish for any meal. In Korea, the meatballs are highly popular as a lunch box item. 

Cocktail meatballs served on bamboo picks

Traditionally, meatballs were an essential ingredient in Korean Royal Court dishes such as sinsello, an elaborate Royal Court hotpot. Today, wanja jeon, egg-battered and pan-fried meatballs, is highly popular for every day meals or for lunch boxes. Also known as dongeurangddeng (동그랑떙), they are commonly served on holidays and special occasions as well. These braised meatballs are enjoyed for the sweet, savory, and salty taste. 

How to make Korean meatballs 

For the meatballs, I like to use equal parts of beef and pork. Of course, you can use all beef or all pork depending on your preference or change up the ratio around to your preference. Pork will give the meatballs a softer texture, which some Koreans tend to look for in their meatballs. 

Korean meatballs garnished with chopped pine nuts and scallion

Typically, Korean meatballs also include tofu, carrots, mushrooms, onions and/or scallions. I used mushrooms, onions and scallions in this recipe. These vegetables add a lot to the flavor and texture of the meatballs. Whatever you use, take extra time to finely chop the ingredients for a smooth meatball texture. Then, your children will never know there are mushrooms and onions in the meatballs.

For a tender and moist texture, mix the meat with other ingredients by your hand. Using all your five fingers, move it around the bowl in quick circles until the mixture is well blended together. 

I pan fried my meatballs, but you can bake them if you want.

The sauce I used here is a soy based sweet and savory sauce (jorim jang, 조림장) commonly used in Korean cooking. You can add a little bit of gochujang for a little spicy kick if you want. 

The meatballs can be prepared ahead of time and pan-fried and braised on the day of serving.

Glazed meatballs served in a bowl

Have you tried this Korean meatball recipe? Please rate the recipe below and leave a comment! Stay in touch by following me on YouTubePinterestTwitterFacebook, and Instagram.

Glazed Korean Meatballs

For the meatballs:

  • 1/2 pound ground beef
  • 1/2 pound ground pork
  • 4 to 5 fresh shiitake (or any mushroom caps, finely chopped)
  • 1/4 medium onion (finely chopped)
  • 2 scallions (finely chopped)
  • 1 egg yolk
  • 1 tablespoon soy sauce
  • 2 teaspoons minced garlic
  • 1 teaspoon finely grated ginger
  • salt (about 1/4 teaspoon and pepper to taste)
  • 1/2 cup cornstarch or flour for dredging

For the sauce

  • 1 tablespoon sugar
  • 3 tablespoons soy sauce
  • 3 tablespoons rice wine (or mirin)
  • 3 tablespoons water
  • 2 tablespoons corn syrup (oligodang)
  • 2 plump garlic cloves (thinly sliced)
  • 1 inch piece ginger (thinly sliced)

Optional garnish:

  • chopped peanuts or pine nuts
  • chopped scallion
  1. Finely chop the mushrooms, onion, and scallions. Combine all the meatball ingredients well by hand until evenly blended.
  2. Shape the mixture into about 1 1/4-inch balls. Dredge the meatballs in the cornstarch or flour to lightly coat.
  3. Heat a tablespoon of oil in a pan over medium heat. Add half of the meatballs to the pan. Turning as necessary, fry until all sides are golden brown but not cooked through, about 5 minutes. The meatballs will finish cooking in the sauce. Remove from the pan and repeat with the remaining meatballs.

  4. Add all the sauce ingredients to another pan. Boil over medium heat until the sauce is slightly thickened, about 3 – 4 minutes.
  5. Add the meatballs to the sauce and simmer until the sauce becomes a thick glaze, turning to coat evenly, about 5 minutes. Sprinkle with the optional garnish. Serve warm with your choice of vegetables.

This recipe was originally posted in March 2012. I’ve updated it here with new photos, more information and minor changes to the recipe.

The post Glazed Korean Meatballs (Wanja Jorim) appeared first on Korean Bapsang.


Tteokguk (Korean Rice Cake Soup)

$
0
0
Tteokguk (or dduk guk) is Korean rice cake soup! This starchy and soothing bowl of soup is not only a New Year’s tradition but is classic comfort food any time of year!

Korean rice cake soup

Happy New Year! For Koreans, auspicious food for a prosperous New Year is definitely tteokguk (떡국) — rice cake soup! This starchy and soothing bowl of soup is not only a New Year’s tradition but is a classic comfort food any time of the year!

What is tteokguk (or ddukguk)?

Tteokguk is a soup made with sliced rice cakes, usually in beef broth. It’s a traditional must-eat New Year’s dish. The rice cake used for this soup is garaetteok, which is unsweetened and shaped like a long cylinder. For the soup, garaetteok is sliced into thin oval shapes. The white oval shape symbolizes a bright and prosperous new year.

Growing up, I always loved to eat long steaming garaetteok that my mother used to bring home from a rice cake mill to prepare for the New Year’s feast. She would wait a couple of days for the garaetteok to turn hard before slicing them into thin oval slices. These days, pre-sliced gareatteok is widely available all year around, making the soup preparation much easier.

Often, I add mandu (Korean dumplings) to tteokguk, in which case the soup is called tteok-manduguk (떡만두국). You can use any kind of mandu in the soup. My favorite is  kimchi mandu because of its pungent flavor and crunchy texture, which I think adds a nice contrast to the mildly flavored broth and soft rice cake slices.

Korean rice cake soup in a bowl

How to make beef broth for tteokguk

You can make tteokguk with any broth such as anchovy broth, vegan broth, and chicken broth. However, beef broth is classic. It’s also common to use milky beef bone broth

There are largely two ways to make beef broth for Korean soups.  For the first one, you cut the meat into small pieces, season with Korean soup soy sauce and sauté with a little bit of sesame oil before boiling in water. Since the meat is thinly sliced, it cooks up quickly, more so if you use a tender cut of meat. Use a cut of meat with some marbling that’s not too tough. Beef chuck or bulgogi meat is good for this. 

How to make Korean beef broth

Another method is to boil a large chunk of flavorful beef with some aromatic vegetables. This is what I used in this recipe. In Korea, beef brisket (yangjimeori, 양지머리) is a popular cut of meat for making soups. It’s a tough cut of meat cooked in large chunks, so it takes longer for the meat to turn tender, about an hour. The resulting broth has a deep flavor. The meat is then shredded, seasoned and used as a garnish. 

Variations and tips for making tteokguk

  1. Use soup soy sauce (guk ganjang, 국간장) to season the broth, if available. Guk ganjang is essential for authentic Korean soups such as this rice cake soup. It adds delicious savory flavor to the soup. A good substitute is a fish sauce.
  2. If you want to add some mandu (dumplings), you can drop them in along with the rice cake slices, stirring gently so they don’t stick to the bottom of the pot. Boil until all of them float, and continue to cook for another minute or two. You can also steam mandu or cook in boiling water separately, and add to the soup when the rice cake is softened. This method will keep the soup from becoming too thick from all the starch released from the rice cake and mandu.
  3. Although egg jidan (sliced egg crepe) is a classic garnish for rice cake soup, a common alternative is to drizzle a lightly beaten egg over the boiling soup (do not stir) immediately before turning the heat off.  Or you can omit the egg part entirely if you like.

Korean rice cake soup with eggs

More New Year recipes:

Gul tteokguk (Oyster Rice Cake Soup)
Tteok Mandu Guk (Rice Cake Soup with Dumplings)
Kimchi mandu (dumplings)
15 Korean New Year Recipes

Have you tried this tteokguk recipe? Please rate the recipe below and leave a comment! Stay in touch by following me on YouTubePinterestTwitterFacebook, and Instagram

Tteokguk (Korean Rice Cake Soup)

Tteokguk (or dduk guk) is Korean rice cake soup! This starchy and soothing bowl of soup is not only a New Year’s tradition but is classic comfort food any time of year!

Beef Broth (you can also use anchovy broth)

  • 1/2 pound 230 grams beef brisket (양지머리) or flank steak (Beef chuck roast is good too.)
  • 1/2 medium onion
  • 5 – 6 cloves of garlic
  • 3 scallions – white parts
  • 1 – 2 tablespoons soup soy sauce
  • Salt and pepper to taste

Garnish

  • Beef removed from the broth
  • 1/2 teaspoon minced garlic
  • 1/2 teaspoon sesame oil
  • salt and pepper
  • 1 egg
  • 1 scallion
  • 1/2 sheet gim (nori)

Rice cakes (garae tteok)

  • 4 cups sliced garae tteok (rice cake)
  • Soak in cold water for 10 to 20 minutes if hardened.
  • <img src="https://www.koreanbapsang.com/wp-content/uploads/2017/01/tteokguk-tteok-e1483307570581.jpg" alt="" width="400" height="268" class="aligncenter size-full wp-image-4858" />
  1. In a large pot, bring the meat, onion, scallions and garlic to a boil in 14 cups of water. Reduce the heat to medium low, and skim off the scum. Simmer, covered, until the meat is tender enough for shredding, 1 to 1-1/2 hours. Remove the meat and cool. Discard the vegetables. Stir in soup soy sauce, salt and pepper to taste.
    rice cake soup recipe
  2. Cut the cooled beef into 1 – 1 1/2-inch wide strips, shred, and combine well with garlic, sesame oil, and salt and pepper to taste.
    tteokguk recipe
  3. To make egg garnish (jidan), separate the egg white and yolk. Lightly beat the white by gently cutting it with a spoon. Stir the yolk with a spoon until smooth. Heat a lightly oiled nonstick skillet over medium low heat. Pour each egg part into a thin layer, tilting the skillet and/or spreading with a spoon. Cook each side briefly. (Do not brown the egg.) egg crepe
  4. Roll each egg crepe, and slice into short thin strips. Slice the scallion diagonally into thin strips. Roast the gim on a hot skillet. Cut into thin 1 1/2-inch strips with kitchen shears, or simply crush them with hands.
    Korean rice cake recipe
  5. Return the broth to a boil. Add the rice cake slices and boil until soft, usually about 5 – 8 minutes. Ladle the steaming soup into individual bowls and garnish with the shredded beef, egg, scallion and gim strips.
    rice cake soup recipe
  1. Although egg jidan is a classic garnish for tteokguk, a common alternative is to drizzle a lightly beaten egg over the boiling soup right before turning the heat off. Or you can omit the egg part entirely if you like.
  2. If you want to add some mandu (dumplings), you can drop them in along with the rice cake slices, stirring gently so they don’t stick to the bottom of the pot. Boil until all of them float, and continue to cook for another minute or two. You can also steam mandu or cook in boiling water separately, and add to the soup when the rice cake is softened. This method will keep the soup from becoming too thick from all the starch released from the rice cake slices and mandu.

This recipe was originally posted in January 2013. I’ve updated it here with new photos, more information and minor changes to the recipe.

The post Tteokguk (Korean Rice Cake Soup) appeared first on Korean Bapsang.

Nokdujeon (Mung Bean Pancakes)

$
0
0

Nokdujeon, aka nokdu bindaetteok, is a type of savory Korean pancake made with ground nokdu (mung beans). The result is crispy golden brown pancakes that are soft and nutty with some added crunch from the vegetables.

Korean mung bean pancake with rice wine

In Korea and many other Asian countries, the holiday season is not over until after the lunar New Year, which falls on January 25 this year. Called Seollal (설날) in Korea, it’s one of the most celebrated traditional holidays. Along with tteokguk (떡국, rice cake soup), nokdujeon (녹두전) is a must for the New Year’s Day feast. As for my family, these crispy golden brown savory pancakes are a favorite year round! 

What is nokdujeon (nokdu bindaetteok)?

Nokdujeon is a type of savory Korean pancake made with ground mung bean batter. It’s also called bindaetteok (빈대떡) or nokdu bindaetteok (녹두 빈대떡). While nokdujeon is a classic holiday dish, it’s highly popular also as a street food as you may have seen in the Netflix Street Food episode of Gwangjang Market in Seoul.

Are you thinking you’ve never heard of mung beans? Actually, you might know these beans better by their sprouts — those bean sprouts which are common in many Asian dishes. The most well known Korean dish made with mung bean spouts is the side dish called sukju namul (숙주나물).

Importantly, mung beans are highly nutritional and provide many health benefits. In Korea, they are well known as a detoxifying food. Hope you add more mung beans and their sprouts to your diet this new year. 

Nokdu bindaetteok (Korean savory pancakes made with mung bean batter)

How to make mung bean pancakes

To make these pancakes, you’ll need to soak the dried mung beans in water for a few hours, and then ground into a batter. I usually buy pre-hulled and split ones, so soaking and preparing the beans is fairly simple. 

Growing up, we used to have a stone mill, called maetdol (맷돌), to grind soaked beans. We now use an electric blender. Do not over blend the beans. The batter should be creamy but slightly coarse and sandlike. 

Typical additions to the batter include ground pork, bean sprouts, gosari (fern brakes), scallions, and kimchi. These add tons of flavors and textures to the pancakes. I blanch the bean sprouts before adding to the batter, but you can add fresh sprouts if you want. 

For a vegetarian or vegan bindaetteok, you can simply omit the pork and use vegetarian/vegan kimchi. 

Korean mung bean pancake served with a dipping sauce

This recipe makes quite a few pancakes, but it’s very easy to cut the recipe in half if desired. These pancakes freeze well. Simply defrost them at room temperature, and then reheat in a pan over low heat or in the microwave.

More Korean pancake recipes

Haemul pajeon (seafood pancakes)
Buchujeon (garlic chives pancakes)
Kimchi jeon (kimchi pancakes)
Gamjajeon (potato pancakes)
Hobak buchim (zucchini pancakes)

Korean pancake made with ground mung beans


Have you tried this nokdujeon recipe? Please rate the recipe below and leave a comment! Stay in touch by following me on YouTubePinterestTwitterFacebook, and Instagram

Nokdujeon or Nokdu bindaetteok (mung bean pancakes)

Nokdujeon, aka nokdu bindaetteok, is a type of savory Korean pancake made with ground nokdu (mung beans). Crispy golden brown pancakes that are soft and nutty with some added crunch from the vegetables. Makes 12 5-inch pancakes.

  • 2 cups dried peeled and split mung beans* (yields about 4 cups soaked)
  • 8 ounces 230 grams sukju namul (mung bean sprouts)
  • 8 ounces 230 grams kimchi
  • 6 – 8 scallions
  • 4 ounces 110 grams pork , ground or finely chopped
  • 2 teaspoons soy sauce
  • 1 teaspoon garlic
  • 1 tablespoon sesame oil
  • salt
  • vegetable oil for pan frying

Dipping Sauce

  • 2 tablespoons soy sauce
  • 1 tablespoon vinegar ((or to taste))
  • 2 tablespoons water
  • pinch of black pepper
  • pinch of red pepper flakes (gochugaru – optional)
  1. Rinse and soak the mung beans in water for 3 – 4 hours. Drain.
  2. Meanwhile, cook the mung bean sprouts in boiling water for about 2 minutes (you can skip this blanching if preferred). Rinse in cold water to stop cooking. Drain and gently squeeze out excess water. Thinly slice the kimchi and scallions. In a large bowl, combine the kimchi, bean sprouts, scallions, meat, soy sauce, sesame oil and garlic. Mix well.

  3. In a blender, grind 2 cups of the soaked beans in 1 cup of cold water with 1/2 teaspoon of salt until it has a coarse, sandlike consistency.
  4. Add to the vegetable and meat mixture. Repeat with the remaining beans. Gently mix the mung bean batter until the ingredients are evenly distributed.
  5. Heat 1 tablespoon or more of oil in a non-stick pan over medium to medium high heat. (See note.) Ladle the mixture into the pan and spread it evenly into a thin round shape. Cook until the bottom is golden brown (2 – 3 minutes), and turn it over, adding more oil. Press it down with a spatula, and cook for another 2- 3 minutes. Repeat the process with the rest of the mixture.

  6. Serve hot off the pan with a dipping sauce.

Use a generous amount of oil for crispy pancakes. 

This mung bean pancake recipe was originally posted in December 2011. I’ve updated it here with new photos, more information and minor changes to the recipe.

The post Nokdujeon (Mung Bean Pancakes) appeared first on Korean Bapsang.

Agujjim (Spicy Braised Monkfish)

$
0
0
This spicy braised monkfish is highly popular in Korea. The white flesh fish is tender, and the crunchy soybean sprouts nicely complement the fish with a burst of robust  flavor!
Spicy monkfish with soybean sprouts

Agu-jjim (아구찜), also called agwi-jjim (아귀찜), is a spicy fish dish made with agu (monkfish) and kongnamul (soybean sprouts). The white flesh underneath the red spicy sauce is tender and moist, and the crunchy bean sprouts nicely complement the white fish with a burst of spicy flavor!

Jjim (찜) in Korean cooking refers to the dishes that are steamed or braised. Jjim dishes involve various different cooking techniques, which includes long braising used for dishes like galbijjim (braised short ribs) and short braising used to cook vegetables and seafood.

What is agujjim?

Agujjim (or agwijjim) is monkfish braised in a red spicy sauce with kongnamul (soybean sprouts). Actually, it’s a variation of haemul jjim (spicy braised seafood). They are made similarly, but haemul jjim is made with a few different seafoods, such as crabs, shrimp, clams, fish, etc. 

The dish originated from the southern coastal city of Masan, South Gyeongsang Province. In the past, this not so good-looking fish wasn’t consumed as a food item in Korea due to its ugly appearance. However, some fishermen didn’t want to waste their catches, so they brought them to a neighborhood eatery and ask the cook to make a tasty dish. That was in the 1960’s. The dish is now enormously popular all over the country in Korea. 

Spicy braised monkfish with soybean sprouts

Monkfish is a firm, white fish with a texture similar to lobster meat. Here in America, it’s known as “poor man’s lobster”. Korean markets around here sell trimmed monkfish so I don’t have to deal with the huge, ugly head. The fishmonger will cut it into small pieces for you if you ask. 

They are usually bone-in and skin-on, which is fine for us Koreans because we usually cook fish with bones and skins intact. But, you can also use fillets for this dish. 

At restaurants, agujjim is usually sold as a large dish that’s meant to be shared. It’s also pretty pricey. I remember my first time ordering this dish at a restaurant around here, many years ago. The expensive, large dish we ordered to share was just full of soybean sprouts and not enough fish to go around. My family was disappointed, and I started to make the dish at home. 

red spicy braised monkfish with soybean sprouts

How to make spicy braised monkfish

Agujjim typically includes lots of soybean sprouts, minari (Korean watercress) and mideodeok (sea squirts). Sea squirts are hard to find and expensive, so I usually substitute it with shrimp or clams. You can use monkfish only.

First cook the fish for a few minutes, and then stir in the seasoning mix until the fish is tender.  Continue cooking for a few more minutes before adding the starch slurry and stirring well until the sauce thickens. Add the vegetables. Gently toss to evenly coat the vegetables with the sauce. Stir in the sesame oil and sesame seeds at the end. Serve with a bowl of rice.

The soybean sprouts play an important supporting role in this dish. Keeping the sprouts crunch for the final dish is the key. For that, you cook the sprouts briefly, plunge them into an ice bath immediately after, drain, and add to the dish at the end to combine with everything. 

red spicy braised monkfish with soybean sprouts

Have you tried this spicy monkfish recipe? Please rate the recipe below and leave a comment! Stay in touch by following me on YouTubePinterestTwitterFacebook, and Instagram

Aguijjim (Spicy Braised Monkfish)

This spicy braised monkfish is highly popular in Korea. The white flesh fish is tender, and the crunchy soybean sprouts nicely complement the fish with a burst of robust  flavor!

  • 1.5 pounds monkfish (agwi, 아귀 or agu 아구)
  • 2 tablespoons rice wine or dry white wine (or use dry white wine)
  • 1 teaspoon salt
  • 6 large shrimp, unpeeled (or a few little neck clams) – optional

Seasoning

  • 1 tablespoon minced garlic
  • 1 teaspoon finely grated ginger
  • 3 tablespoons gochugaru (Korean red chili pepper flakes)
  • 1 teaspoon sugar
  • 1 tablespoon soy sauce
  • pepper to taste
  • 2 tablespoons water

Vegetables

  • 8 ounces soybean sprouts
  • 2 ounces minari or watercress (cut into about 3 to 4 inch lengths)
  • 2 scallions (cut into about 2 inch lengths)

Other

  • 1 tablespoon corn or potato starch, mixed in 2 tablespoons of water
  • 2 teaspoons sesame oil
  • 1 teaspoon sesame seeds
  1. Clean and cut the fish into about 2 inch-thick pieces. Drain, and pat dry with a paper towel. Mix well with a teaspoon of salt and the wine. Let it stand while preparing the other ingredients.
  2. Combine all the seasoning ingredients.
  3. Prepare a bowl with ice water. In a medium size pot, bring 1 cup of water to a boil. Add the soybean sprouts, and cook, covered, for 2 minutes over high heat. Drain, and immediately plunge them into the ice water. Drain.
  4. Heat a heavy, deep skillet. Add 1/2 cup of water and the fish, and cook, covered, over medium heat, for 3 or 4 minutes. Flip the fish over half way through the process.

  5. Stir in the seasoning mix and the optional shrimp (or clams). Continue to cook, covered, for an additional 2 to 3 minutes, or until the fish is tender and the optional shrimp is cooked through (or the clams open).

  6. Pour in the starch slurry, and stir well until the sauce thickens. Add the vegetables. Gently toss to evenly coat the vegetables with the sauce. Stir in the sesame oil and sesame seeds at the end. Serve with a bowl of rice.

This agujjim recipe was originally posted in November 2013. I’ve updated it here with new photos, more information and minor changes to the recipe.

The post Agujjim (Spicy Braised Monkfish) appeared first on Korean Bapsang.

10 Game Day Korean Recipes

$
0
0

Here’s a collection of 10 Korean party or snack dishes for your game day. Try some of these recipes for a nice change or a great addition to your standard Super Bowl fare.10 Korean Recipes for Super Bowl Sunday

Are you looking for ideas for your game day party this year? How about some Korean dishes? Here, I put together 10 of my favorite party or snack dishes. Whether you have a few friends over or a large group, any of these recipes will be a nice change and a great addition to your standard Super Bowl fare.

Without a question, everyone’s favorite game day food is some sort of chicken wings. Who doesn’t like Korean fried chicken? I have two options for you to choose from. If you want to go with less calories, try Korean-flavored baked chicken wings. 

Other dishes such as skewered gochujang shrimp, galbi tacos, Korean flavored meatballs, mini gimbap (or kimbap) and dumplings are all big crowd pleasers. Tteokbokki and haemul pajeon are among Koreans’ all-time favorite snacks or appetizers to share when gathered around the table with friends and family. Enjoy

1. Yangnyeom Chicken (Spicy Korean Fried Chicken)Korean fried chicken smothered in a red spicy sauce

2. Dakgangjeong (Sweet Crispy Chicken)Bite sized Korean fried chicken! Sweet, sticky, crispy!

3. Korean-flavored Baked Chicken WingsKorean flavored chicken wings

4. Galbi Taco (Korean-Style Taco with Beef Short Ribs)Korean-style taco with beef short ribs and kimchi salsa

5. Seafood Cheese Tteokbokki (Spicy Rice Cakes)

Seafood cheese tteokbokki (spicy rice cake)

6. Glazed Korean Meatballs (Gogi Wanja Jorim)Korean meatballs

7. Gochujang ShrimpGochujang shrimp on skewers

8. Mini Gimbapa pile of mini kimbap on a plate

9. Haemul Pajeon (Seafood Pancake)Seafood scallion pancake

10. Mandu (Dumplings)Pan-fried Korean dumplings (mandu)

This list was originally posted in February 2016. I’ve updated the list here with new photos and new dishes. 

The post 10 Game Day Korean Recipes appeared first on Korean Bapsang.

Jjapaguri with Steak from Movie Parasite

$
0
0

This instant noodle dish, called Jjapaguri, from the movie Parasite is getting highly popular all over the world.  It’s easy to make with the two types of Korean instant noodles. 

Korean instant ramen in black bean sauce

I know I’m a little late to this Jjapaguri (or Chapaguri) party. After seeing this dish with steak in the movie Parasite (Gisaengchung, 기생충), I was curious about reactions to this steak version in Korea. Lo and behold, it took Korea by storm in 2019 because it was featured in this award winning movie. And it’s rapidly spreading to the rest of the world. So, let’s jump on the Jjapaguri bandwagon and try it!

Movie Parasite and Jjapaguri (Ram-don)

Parasite (2019) became the first Korean film to win the Cannes Palme d’Or. The film won the Golden Globe Best Foreign Language Film and became the first non-English film to win the Screen Actors Guild Award for Outstanding Performance by a Cast in a Motion Picture.

I can’t wait to find out next Sunday what happens with the film’s six nominations at the Academy Awards. Go Parasite!

The movie tells the story of two families — the rich and the poor. This cheap instant noodle dish gets upgraded with expensive beef, Hanwoo (한우), as a class subtext. Hanwoo means cows grown in Korea. Hanwoo beef is considered the highest quality beef and very expensive. The rich mom asked the housekeeper to make Jjapaguri with Hanwoo top sirloin cut for her son, although the subtitle simply called it sirloin. She ended up eating the dish alone, which was served in a high-end china (Juliska), at a big wooden dining table. 

Chapaguri from movie parasite

What is Jjapaguri 

Jjapaguri is a dish created by consumers by combining two highly popular instant noodle brands —Chapagetti (짜파게티) and Neoguri (너구리). Actually, its popularity started in 2013 when this brilliant combination of two distinct noodles was featured in a Korean TV show. 

Chapagetti is an instant noodle version of the popular Korean-Chinese noodle dish, jajangmyeon (also spelled chajangmyeon). Interestingly, while there’s nothing Italian about it, the company came up with the name “chapagetti” which is a portmanteau of the words, chajang (blackbean sauce) and spaghetti

Neoguri, on the other hand, is a spicy seafood flavored instant noodle soup with thick and chewy udon-style noodles. According to Korean news media, Neoguri is Bong Jun Ho’s favorite instant noodle brand. 

The combined dish is instant jajangmyeon with a spicy kick and extra flavor from the Neoguri soup base.  

Apparently, the translator of the movie couldn’t translate Jjapaguri into something non-Korean speaking audience could relate, so the movie called it “ram-don” in the subtitles from the words “ramen” and “udon.” 

Korean instant noodles and steak

How to make jjapaguri with steak

Here, I used the recipe on the Korean website of the company that makes these instant noodles, and simply added some beef as the movie showed. 

The beef actually adds a nice twist to the dish while making it more substantial. I tried to stay true to the movie, short of using Hanwoo quality beef, but you can, of course, add any protein you’d like.

You simply cook the noodles with the veggie flakes from the packets, drain the water off except for about a cup, then add the sauce mix and stir for a minute or two. Stir in the cooked steak and the oil from Chapagetti, and serve. 

The company website says to use the entire packet of the Chapagetti sauce and 3/5 of the Neoguri spicy sauce. Adjust to your taste. It also suggests a fried egg or cucumber slices as optional toppings.

Chapaguri (jjapaguri)

Have you tried this jjapaguri recipe? Please rate the recipe below and leave a comment! Stay in touch by following me on YouTubePinterestTwitterFacebook, and Instagram

Jjapaguri with Steak from Movie Parasite

  • 1 pack Chapagetti
  • 1 pack Neoguri
  • 8 ounces tender beef (sirloin or ribeye)
  • salt and pepper
  • 1 Tablespoon olive oil
  1. Cut the beef into bite size pieces and generously sprinkle with salt and pepper. At this point, start boiling 4 cups of water in a medium size pot.
  2. Heat a pan with a tablespoon of olive oil. Add the meat and cook all sides to the desired doneness.
  3. When water boils, add the noodles and the vegetable mix from the packets and continue boiling for about 3 minutes. The noodles should be al dente at this point because they will be cooked again.
  4. Drain the noodles reserving the water in a bowl.
  5. Place the noodles back in the pot, and add the entire packet of dry jajang sauce and 3/5 of the Neoguri sauce or to taste. Add a cup of the reserved water, and stir everything well over medium heat, for a minute. Add more water if needed. Turn the heat off.

  6. Add the steak and stir in the oil from Chapagetti. Serve with pickled radish or kimchi.

The post Jjapaguri with Steak from Movie Parasite appeared first on Korean Bapsang.

Viewing all 1019 articles
Browse latest View live