Quantcast
Channel: Korean Bapsang
Viewing all 1019 articles
Browse latest View live

Instant Pot Korean Short Ribs

$
0
0

Everything you need to know about how to best make these traditional tender, juicy and flavorful Korean short ribs in the Instant Pot! 

Instant Pot short ribs

Korean braised short ribs are called galbijjim (or kalbijjim, 갈비찜). There are 3 different galbijjim recipes on this blog – traditional, slow cooker and Instant Pot spicy versions. Now that I’ve tried many different ways to make Korean braised short ribs in the Instant Pot, I decided to do another post to share how to best make traditional galbijjim in the Instant Pot. I’ll also show you the choices available to you as you go through the process. 

The basic cooking techniques for traditional galbijjim can generally be broken down into a few simple steps: soaking the ribs in water, parboiling to remove excess blood and fat, draining off and rinsing the ribs, simmering in the flavorful liquid on top of the stove. 

Fortunately, the process is flexible and easily adaptable! I can assure you every Korean cook makes it differently. With the Instant Pot, it’s even easier and quicker to make these tender, juicy and flavorful short ribs! 

Galbijjim (Korean Beef Short Ribs)

Preparing the short ribs

Purchasing: Korean braised short ribs are typically made with bone-in short ribs. While meat cooked on the bone tastes better, you can use boneless if that’s all you can find. It will take a few minutes less to cook. Find good quality short ribs with the most meat and least fat. 

Cleaning: Trim off any thick layers of fat without removing the thin, tough skin that holds the rib together. Rinse off the surface blood and bone dust in cold water. 

Parboiling: In this Instant Pot adaptation, I didn’t soak the ribs, but you certainly can. I briefly parboiled the ribs (2 minutes on Manual) with a small amount of water. During the build-up of steam, the short ribs release blood and fat. Discard the cooking liquid (or reserve it to use as a soup base later) and rinse off the scums and fat. This step effectively removes excess blood and fat without losing much of the meaty flavor. Better yet, it doesn’t involve another pot! 

I personally like this method, but you can braise the ribs without doing this step or brown the ribs instead if you like the rich browned meat flavor. However, initial browning of the meat is not typical in Korean traditional braising as Koreans generally look for a nicely clean sweet and savory taste from the braised meat. 

Par-boiling short ribs in the Instant Pot

The braising liquid 

Aromatics: Similar to other classic Korean marinades, the braising liquid for galbijjim includes Korean pear, onion, garlic, and ginger. You can use an apple in place of pear. These aromatics are typically grated and added to the marinade or braising liquid. 

Basic seasonings: The braising liquid for this dish is a classic Korean sweet and savory marinade, including soy sauce, sugar and sesame oil. 

As a sweetener, I like to use a combination of honey and sugar for a rich flavor, but you can use all sugar (white or brown) or all honey. Be aware honey can be up to 1.5 times sweeter than sugar. Brown sugar contains molasses so it adds another layer of flavor, but it’s less sweeter than white sugar. 

Rice wine is used as a tenderizer and flavor enhancer. You can use any type of rice wine, including mirin (or mirim). White wine works well too.  

No water or broth: The most frequently asked question about the braising liquid for pressure or slow cooking is whether to add water or broth. The answer is no! The braising liquid includes a fair amount of liquid, and no significant evaporation of liquid happens during pressure or slow cooking. The addition of water or broth would unnecessarily dilute the braising liquid and flavors. With this recipe, you’ll end up with about 2 cups of sauce at the end, depending on the types and amounts of vegetables you added. 

Braising liquid for Korean short ribs

Vegetables and garnishes

The trio vegetables for Korean braised meat dishes are Korean radish (mu, 무), carrot and shiitake mushrooms. These vegetables hold up pretty well while being pressure cooked and contribute to a fullness of flavor. If you like the vegetables to have some crunch or you want to add some potatoes, you can add them after pressure cooking and cook on the Saute function in the sauce until softened. 

Chestnuts, dates, pine nuts, and gingko nuts are customary garnishes that make this dish look very elegant, but the ribs will still be delicious without them if they are unavailable. 

Braising the short ribs

Make ahead: You can do all the prep work up to adding the braising liquid to the short ribs the night before, and turn on the Instant Pot when you’re ready to cook. This, of course, marinates the ribs, which is a flavor contribution as well. You can also cook the ribs ahead of time, and simply heat up before serving. The flavor of short ribs improves over the next day or two. 

Pressure cooking: In this recipe, I pressure cooked the ribs for 35 minutes, NPR 10 minutes. Then, I removed the ribs and vegetables, and strained the braising liquid (see more below). Put everything back into the Instant Pot. This is also a good point to add fresh vegetables such as potatoes. You can also add rice cakes (tteokbokki tteok) at this point if you want. Finally, I boiled everything together on Saute for 10 to 15 minutes.  

Korean braised short ribs in Instant Pot

Alternatively, you can cook the ribs all the way on Manual High Pressure (about 40 min) with NPR 10 minutes. Increase it to 45 minutes if your meat is thick and you want extra tender meat. 

Strain the braising liquid: The decision to strain the braising liquid is a personal preference. I like to do it because the end result is more refined and cleaner. If you don’t strain it, the dish will look rustic as seen in the last photo below. If you choose to do it, use tongs or a slotted spoon to transfer the ribs to a plate or bowl. Then, pour the braising liquid through a strainer into a bowl.

Straining the braising liquid

Remove the fat:  You can skim off the fat or use a fat separator, which is my personal choice. I love my fat separator and use it all the time. If you have time, you can also let the entire dish sit in the refrigerator for a few hours for the fat to solidify so it can be removed effortlessly.

More Instant Pot Recipes:

Instant Pot Spicy Galbijjim
Instant Pot Kkorijjim (Oxtail)
Pressure Cooker Dakbokkeumtang (Spicy Chicken Stew)
Instant Pot Boiled Chicken and Rice
Instant Pot Kimchi Jjigae

Have you tried this Instant Pot Korean Short Ribs recipe? Please rate the recipe below and leave a comment! Stay in touch by following me on YouTubePinterestTwitterFacebook, and Instagram

Instant Pot short ribs
Print

Instant Pot Korean Short Ribs

Everything you need to know about how to best make these tender, juicy and flavorful Korean short ribs in the Instant Pot!
Course Main
Cuisine Asian, Korean
Keyword beef short ribs, braised, galbijjim
Prep Time 10 minutes
Cook Time 1 hour 10 minutes
Servings 4
Author Hyosun

Equipment

  • I used 6 quart Instant Pot.

Ingredients

  • 3.5 pounds beef short ribs
  • 8 ounces Korean radish mu, cut into large chunks
  • 1 medium carrot cut into large chunks
  • 3 to 4 fresh or dried shiitake mushrooms briefly soaked, halved or quartered

Braising liquid:

  • 1/2 medium Korean/Asian pear or 1 small apple grated (about 1/2 cup)
  • 1/2 medium onion grated (about 1/4 cup)
  • 2 tablespoons minced garlic
  • 1 teaspoon grated ginger
  • 1/2 cup soy sauce
  • 1/2 cup rice wine (or mirin or dry white wine)
  • 5 tablespoons sugar (or 3 TB sugar and 2 TB honey) Reduce sugar by 1 TB for less sweet ribs
  • 2 tablespoons sesame oil
  • pepper to taste 1/4 teaspoon

Other additions and garnishes:

  • 5 to 6 chestnuts peeled - optional
  • 2 scallions roughly chopped

Instructions

  • Trim off any thick layer of surface fat. In the pot, rinse the ribs with cold water a couple of times to remove surface blood and bone dust.
    Cleaning beef short ribs
  • Drain, and fill the pot with 4 cups of water to cover the ribs. Close the lid tightly. Press the “Manual” function and High Pressure, and using the “-” button, adjust the time to 2 minutes. Make sure the pressure switch is turned to “sealing”. When finished, carefully released the pressure.
    Cooking short ribs in Instant Pot
  • Discard the cooking liquid (or save to use it as a soup base later), and rinse the ribs and the pot. Return the ribs to the pot.
    Korean short ribs
  • In a small blender, blend together the pear, onion, garlic, and ginger. You can separately grate them if you want. Transfer to a bowl. Mix well with the remaining braising liquid ingredients.
    Braising liquid for galbijjim
  • Add the vegetables to the pot. Pour the braising liquid over to the ribs. Toss everything well to coat the ribs evenly. (You can prepare up to this point ahead of time.) Close the lid tightly. Pressure cook the ribs for 35 minutes, NPR 10 minutes. (See the quicker alternative method below.) Then, remove the ribs and vegetables to a large bowl or plate.
    Pressure cooker galbijjim
  • Strain the braising liquid. You can skim off the fat or use a fat separator.
    Straining the braising liquid
  • Put everything back to the Instant Pot. This will be a good point to add fresh vegetables such as potatoes or even rice cake (tteokbokki tteok) if you want. Boil everything together on Saute for 10 to 15 minutes.
    Korean braised short ribs
  • Alternatively: Press the “Manual” function, 40 minutes (45 minutes if your meat is thick and you want extra tender meat), NPR 10 minutes. Strain the braising liquid if you want. You can skim off the fat or use a fat separator.
  • Garnish with the optional scallions and sesame seeds.

The post Instant Pot Korean Short Ribs appeared first on Korean Bapsang.


Janchi Guksu (Warm Noodle Soup)

$
0
0
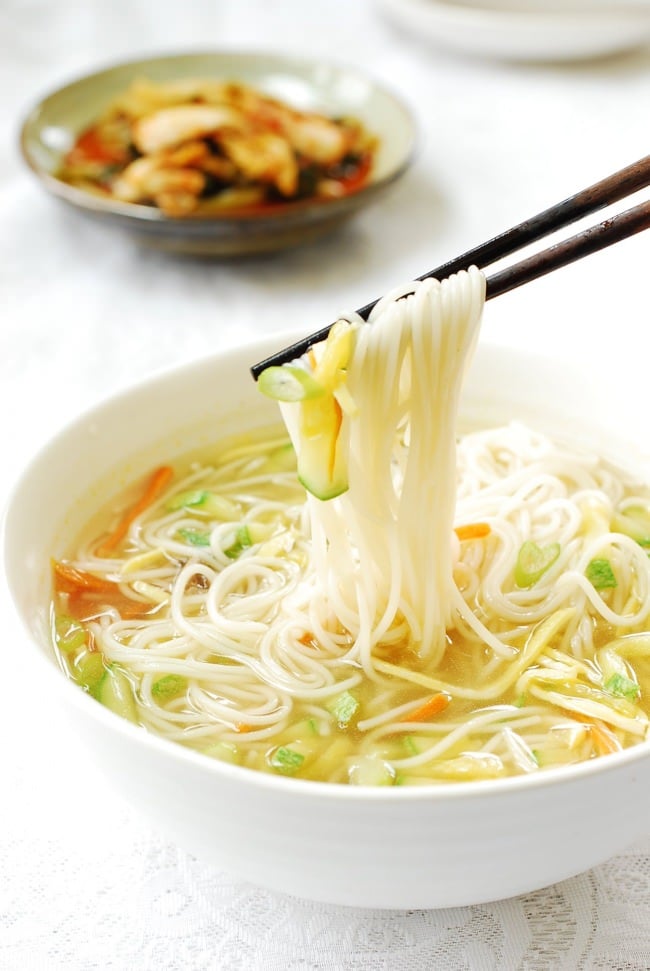
Janchi guksu is a simple warm noodle dish made with thin wheat noodles (somyeon) that are usually in a clear anchovy or beef broth! It’s an easy comfort food that’s very popular in Korea. 
Korean warm noodle soup

What is janchi guksu?

Janchi guksu (잔치국수) translated into “banquet or feast noodles,” is a simple warm noodle dish made with thin wheat noodles (소면, somyeon or somen) that are usually served in a clear anchovy or beef broth. Because noodles symbolize long and happy lives in Korean culture, this noodle dish is traditionally served alongside other special occasion foods at large feasts such as weddings. The name of the dish comes from that tradition.

In my family, this is another easy go-to meal when we crave something warm and light. It is one of the most frequently requested meals by my daughter when she comes home. 
 
Somen noodle soup

Broth for janchi guksu

The most important part of this humble noodle dish to me is the broth. You can of course use any broth, but anchovy broth is typical. Anchovy broth can be made simply with dried anchovies and kelp. Some vegetables, such as Korean radish, onion, and or dried shiitake mushrooms, will add more depth to the flavor of the broth. See my Anchovy Broth for Korean Cooking for options.  
 
You can use beef broth, vegetable broth, or chicken broth instead if preferred. Refrigerate or freeze any leftover broth to use at another time for making jjigae or gyeranjjim.
 
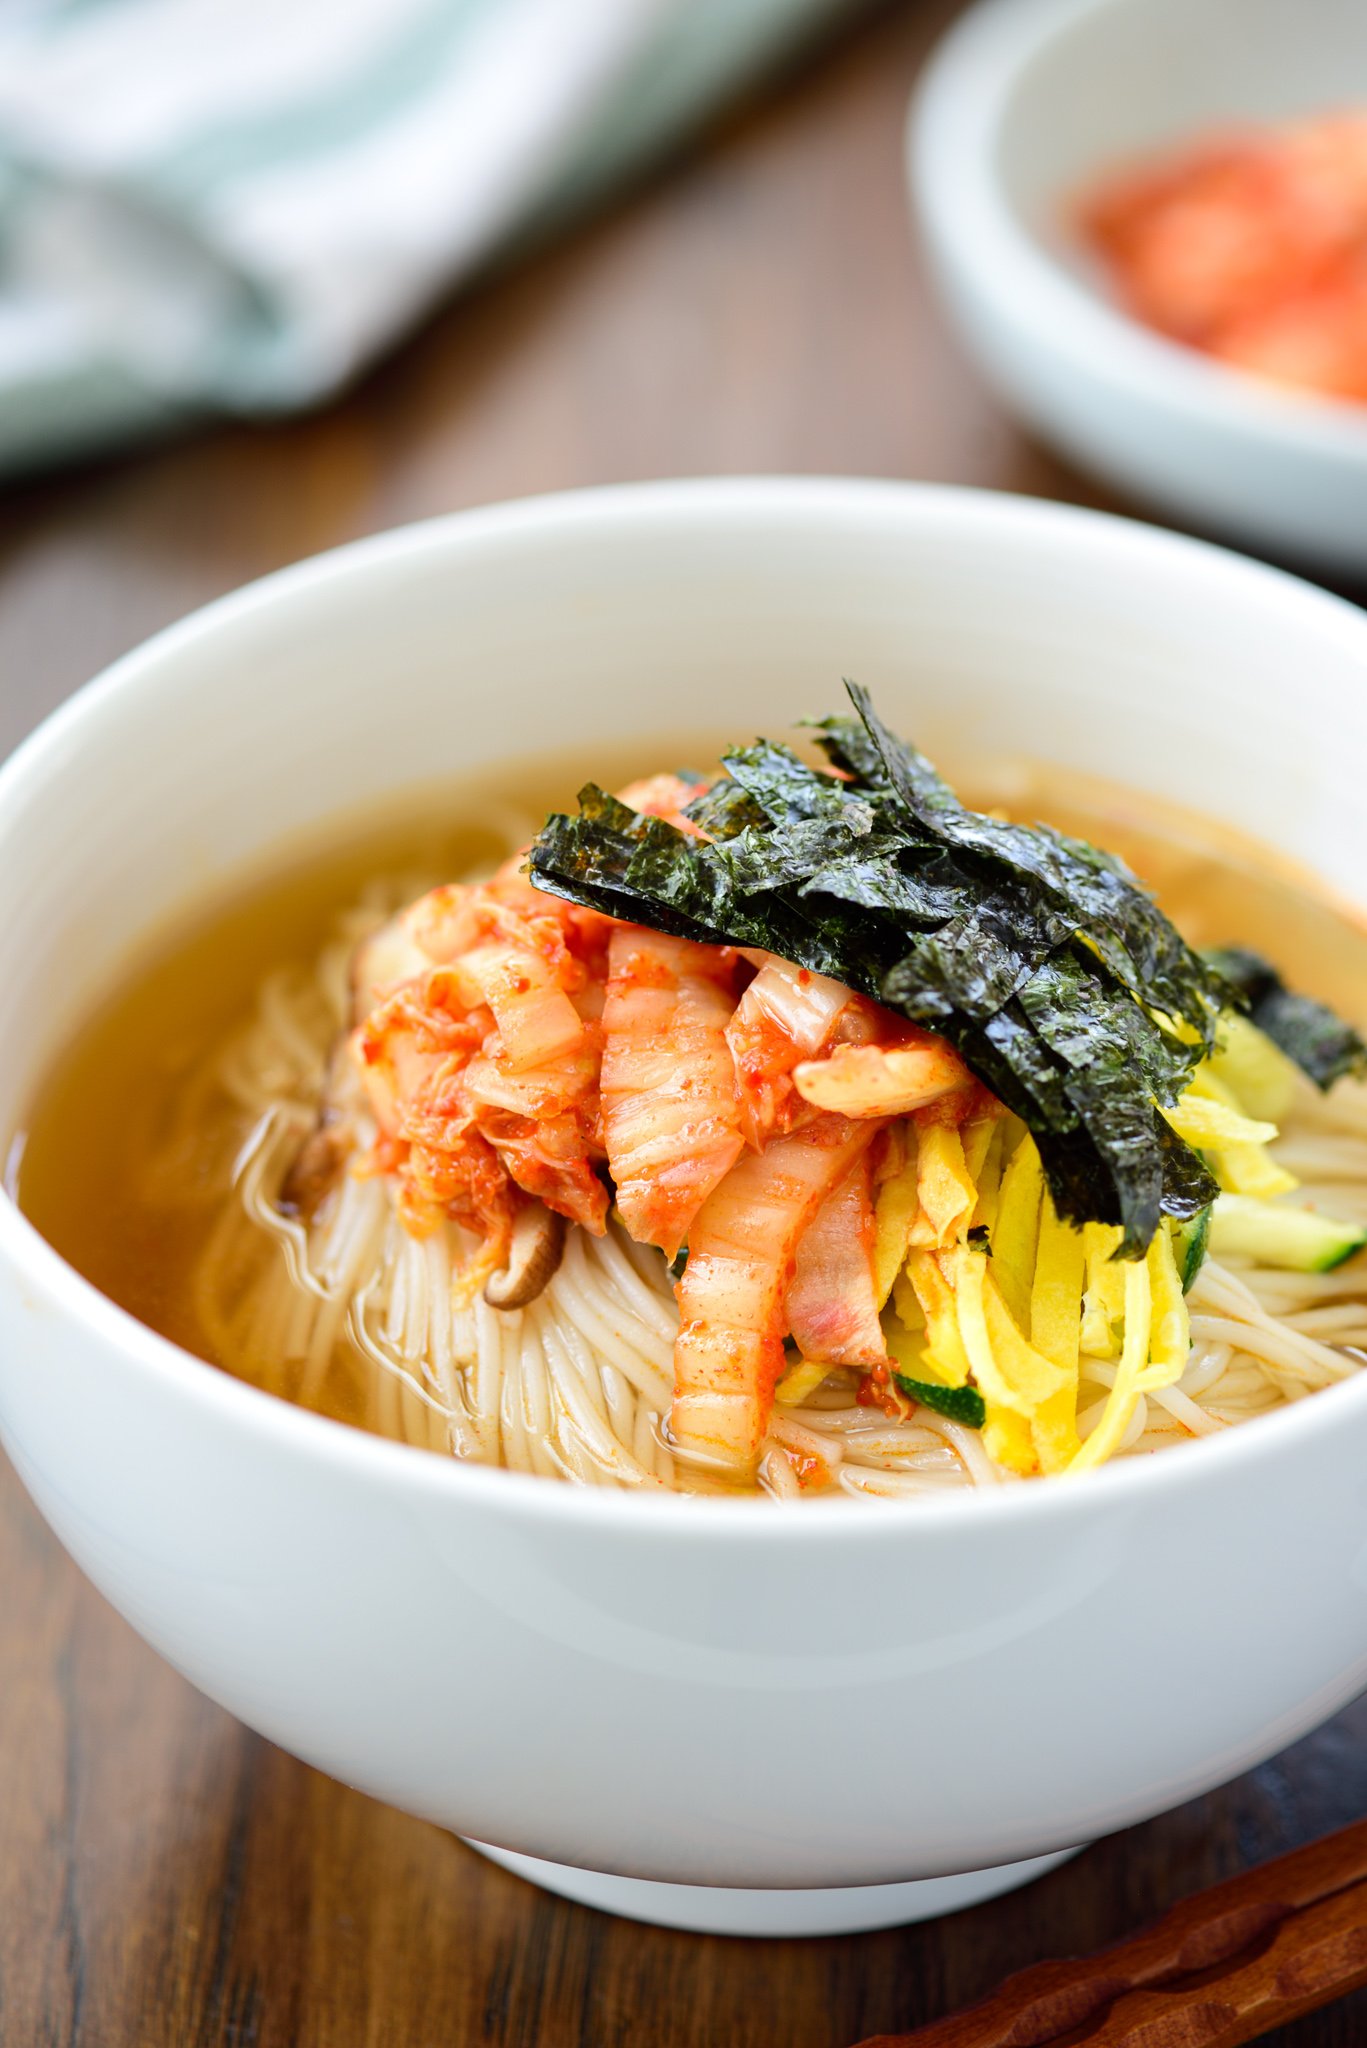
Warm noodle soup with thin wheat noodles and kimchi

Toppings for janchi guksu

You can practically use any number and combination of vegetable or other toppings for this soup, making it as fancy or minimal as you want. Common toppings for this noodle soup include vegetables such as zucchini, carrot, and/or kimchi.  Thin strips of tender beef, eomuk (fish cake) and roasted gim (dried seaweed) are also popular additions. 
 
Recently, this noodle soup appeared in the popular Korean drama, Crash Landing on You (사랑의 불시착). I loved everything about this drama! Due to a paragliding accident, a South Korean woman CEO makes an emergency landing in North Korea, where she meets a North Korean army officer. The story line is unique with a nice balance of romance, comedy, and action. It was fascinating to see every day life in North Korea and hear their dialect.
 
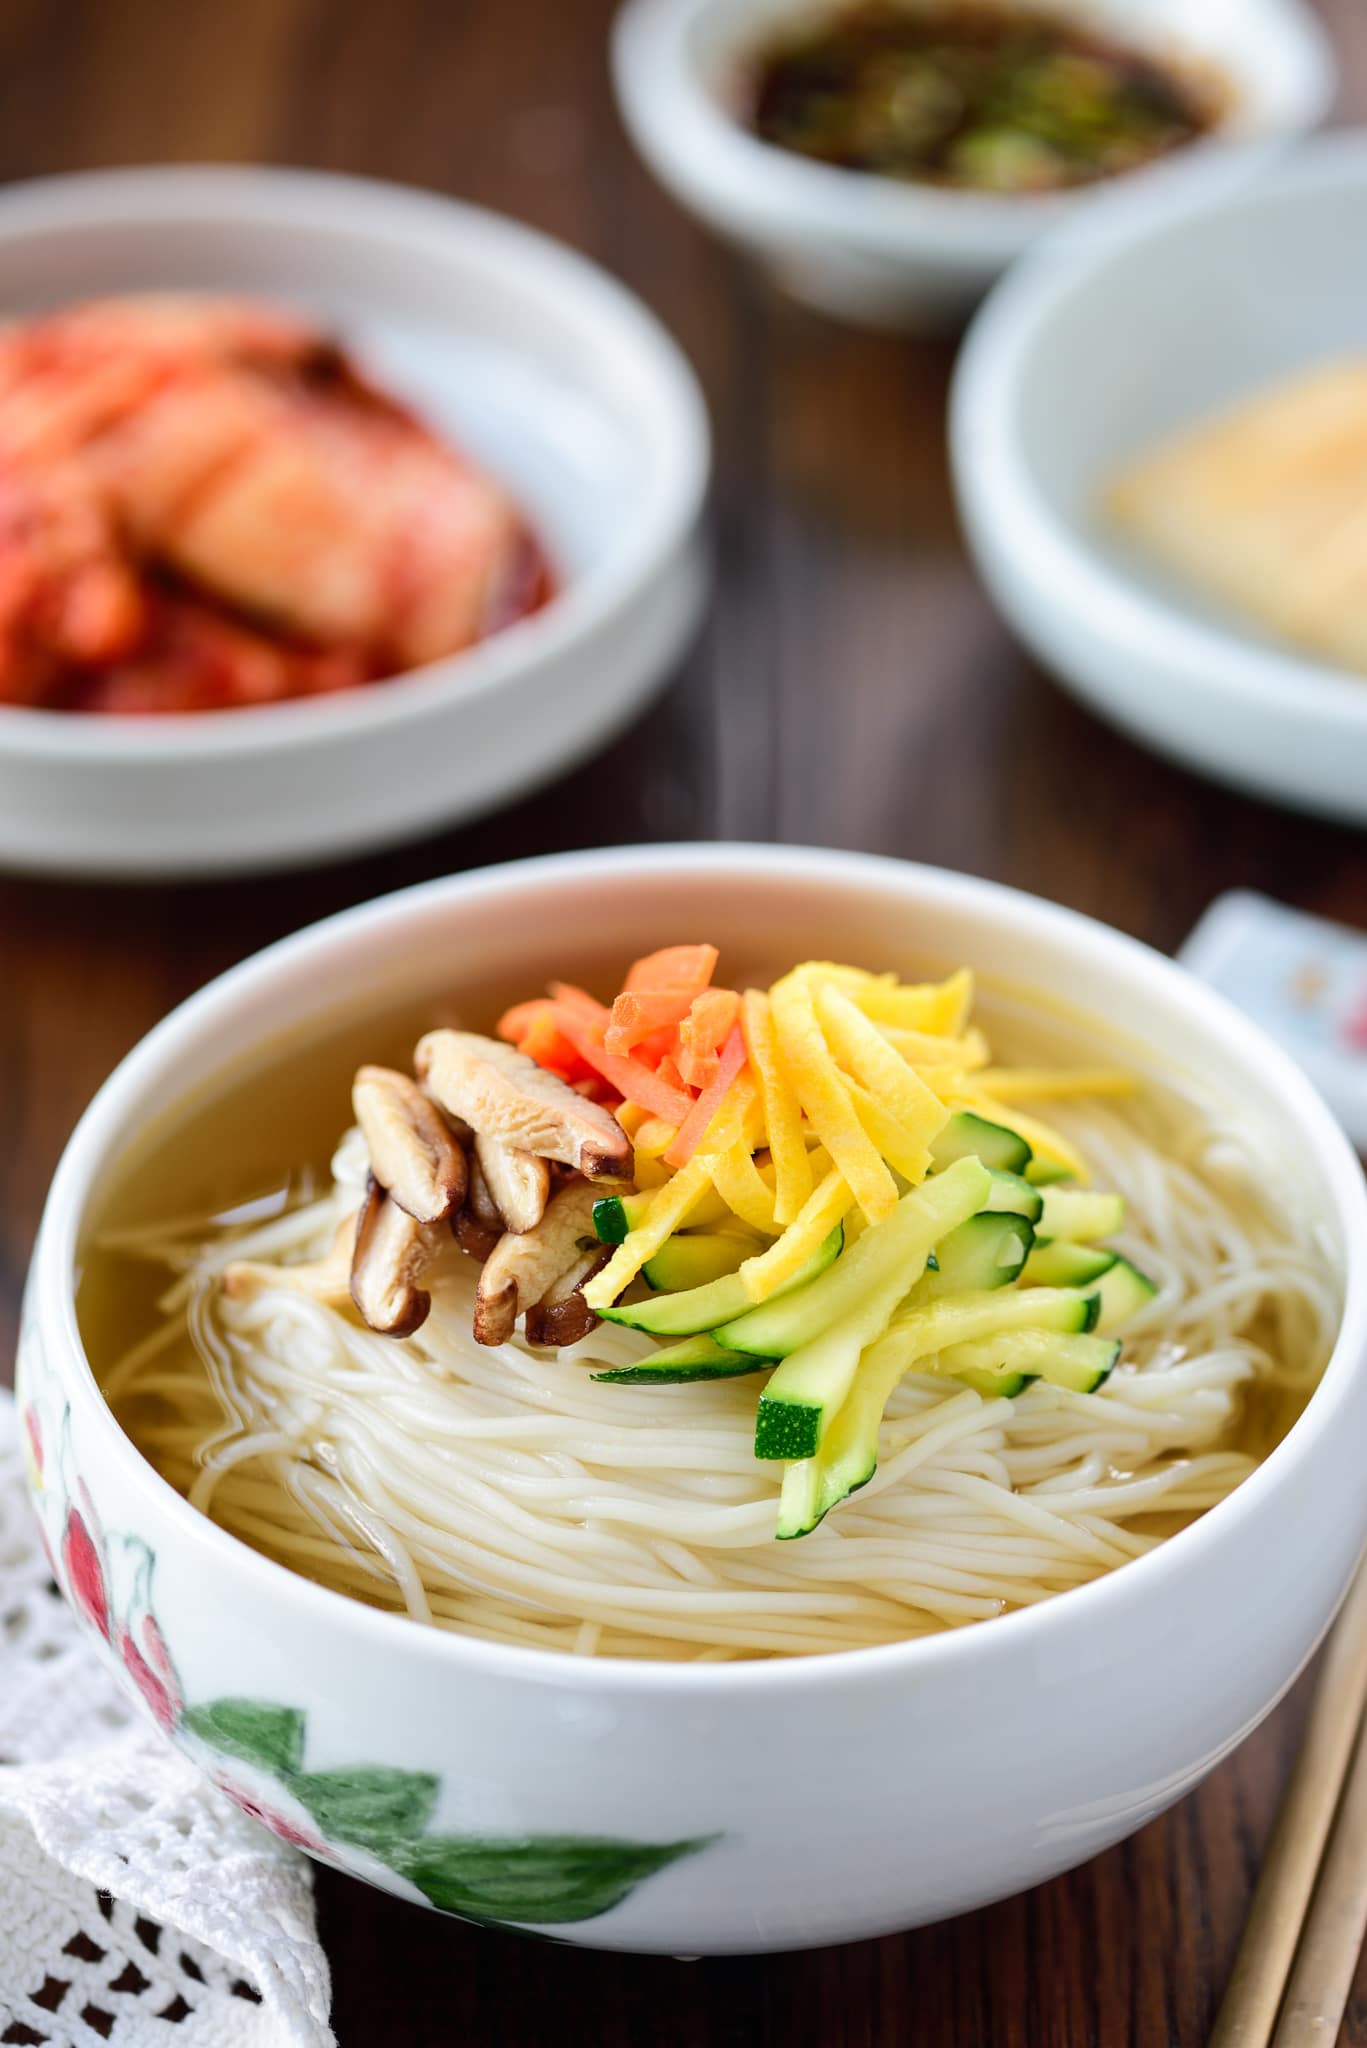
As for this dish, the mother of the North Korean officer served the young woman from the South with a simple yet elegantly prepared noodle soup. It was a small serving of this noodle soup with minimal toppings, simply with strips of mushrooms, carrot, zucchini and egg garnish (jidan). I tried to recreate it in the first photo. 
 
This recipe shows 4 toppings and other optional topping possibilities. Feel free to pick and choose any number or combination of them. 
 
You can serve this noodle soup with a spicy soy sauce based sauce (yangnyeomjang). However, you don’t absolutely need it. I like it without the sauce because I enjoy the clear and refreshing broth. 

More noodle soups

Dak kalguksu (Chicken Noodle Soup)
Jjambbong (Spicy Seafood Noodle Soup)

Janchi guksu (warm noodle soup)

Have you tried this janchi guksu recipe? Please rate the recipe below and leave a comment! Stay in touch by following me on YouTubePinterestTwitterFacebook, and Instagram

Warm noodle soup with thin wheat noodles
Print

Janchi Guksu (Korean Warm Noodle Soup)

Janchi guksu is a simple warm noodle dish made with thin wheat flour noodles (somyeon) that are usually in a clear anchovy or beef broth! It's an easy comfort food that's very popular in Korea.
Course Main
Cuisine Korean
Keyword banguet noodles, beef, egg, Korean, noodles, soup, vegetables
Prep Time 10 minutes
Cook Time 30 minutes
Total Time 40 minutes
Servings 2
Author Hyosun

Ingredients

  • 8 ounces somyeon somen noodles

Toppings (see note):

  • 1/2 zucchini (about 3 ounces, julienned)
  • 1 small carrot (3 ounces, julienned)
  • 3 Mushroom caps
  • 1 egg

Optional toppings

  • 3 ounces tender beef, cut into thin strips, seasoned with 1 teaspoon soy sauce, 1/2 teaspoon sesame oil, 1/2 teaspoon sugar, 1/2 teaspoon minced garlic, and pinch black pepper
  • 3 ounces kimchi, thinly sliced, mixed with 1/2 teaspoon sesame oil, and 1/4 teaspoon sugar
  • 1/4 sheet gim (roasted dried seaweed sheet), cut into short strips or crushed
  • 1/2 scallion - green part, chopped

Yangnyeomjang (sauce) - Optional:

  • 2 tablespoons soy sauce
  • 1 teaspoon Korean chili pepper flakes gochugaru
  • 1/2 teaspoon sesame oil
  • 1/2 teaspoon sesame seeds
  • 1/2 teaspoon garlic
  • 1 scallion finely chopped
  • Mix all sauce ingredients well and set aside.

Instructions

Broth

  • Prepare your choice of broth, and keep it hot over low heat while preparing the toppings and noodles

Toppings

  • Lightly sprinkle salt over julienned zucchini and set aside for 5 - 10 minutes. Squeeze out excess liquid from salted zucchini by hand. Sauté in a lightly oiled skillet over medium high heat (1 - 2 minutes). Push the zucchini to a side and sauté the julienned carrots and mushrooms over medium high heat (1- 2 minutes), sprinkling salt and pepper to taste.
    vegetable toppings for noodle soup
  • Beat the egg well, and fry into a thin sheet (jidan). Roll it up and thinly slice. Alternatively, you can drizzle the beaten egg in to the hot broth before ladling it over the noodles.
    Korean egg garnish

Optional toppings

  • Beef: Sauté the beef for 2 - 3 minutes over medium high heat.
    stir fried beef stips
  • Kimchi: Thinly slice with the kimchi, and mix with 1/2 teaspoon of sesame oil, and 1/4 teaspoon of sugar.
    kimchi topping for noodle soup

Noodles

  • Bring a medium pot of water to a boil. Cook somyeon noodles according to the package instructions (about 3 minutes). Drain quickly and shock in cold water to stop cooking. Continue to drain and rinse in cold water. Make two one-serving size mounds as you remove from the water. Place the mounds in a colander to drain.
    Cooked thin wheat noodles
  • Place the noodles in serving bowls. Ladle the hot broth over the noodles to cover all the noodles, and pour it back to the pot by holding the noodles with the ladle. This will warm the noodles. Ladle the hot broth over the noodles again. Nicely arrange a small amount of each topping on top of the noodles. Finish the dish off with a sprinkle of the optional chopped scallions. Serve warm with the optional sauce on the side.
    Korean noodle soup with toppings

Notes

This recipe shows 4 toppings and other optional topping possibilities. Feel free to pick and choose any number or combination of them. 

This janchi guksu recipe was originally posted in June 201o. I’ve updated it here with new photos, more information and minor changes to the recipe.

The post Janchi Guksu (Warm Noodle Soup) appeared first on Korean Bapsang.

Dak Gomtang (Korean Chicken Soup)

$
0
0
You can make this soothing, comforting Korean chicken soup recipe without a trip to a Korean market! It’s made with a whole chicken and a few aromatic vegetables. Use chicken parts if that’s all you have. 
Korean chicken soup over rice

Here’s a Korean chicken soup recipe you can make without a trip to a Korean market! It’s called dak gomtang (닭곰탕), and in my house this soothing, comforting soup is a go-to soup, especially when one of us feels under the weather. It’s also a good alternative to samgyetang (삼계탕, ginseng chicken soup), if you don’t have ginseng.

Gomtang generally refers to a soup made by simmering beef bones and meat for several hours. The result is a comforting milky broth with tender meat. 

Dak gomtang is a variation made with chicken, but the chicken does not take as much time to cook. It’s simple to make and typically served with cooked rice in the soup with shredded chicken meat on top along with lots of chopped scallion.

However, you can serve the rice separately so the diner can enjoy it any way he/she prefers. 

Korean chicken soup

The chicken 

In Korea, this dish is traditionally made with a whole chicken. It’s the cheapest way to feed the whole family, and the resulting stock is rich and flavorful with all the bones, cartilage and skins. You can cut up a whole chicken before boiling if you want to cook it a little faster. Simply boil the chicken, with some aromatic vegetables and shred the meat to use as a topping. The key is to use a lot of garlic! 

Bone-in chicken parts such as thighs or legs are also great for making this soup.

For a short cut,  you can use a good quality commercially made chicken stock and boneless breast or thigh pieces. The chicken cooks faster, but the broth is still flavorful with the help from the quality chicken stock.

If you want to add some vegetables, try napa cabbage (baechu, 배추) or Korean radish (mu, 무). 

Korean chicken soup over rice

Instant Pot or Slow Cooker Cooking

You can make this recipe in your Instant Pot. My 6-quart Instant Pot is big enough for 3 to 4 pounds chicken. Use 8 cups of water since the water will not evaporate as it will over stovetop. It will take about 35 minutes for the pressure to build up. Pressure cook on Manual for 25 minutes at high pressure. Then, release after 15 minutes. 

For a slow cooker, add enough water to cover most of the chicken. Cover, and cook for 4 to 5 hours on high or 6 to 8 hours on low. Also see my Slow Cooker Chicken Soup with Napa Cabbage made with chicken parts.

More chicken soup recipes:

Samgyetang (ginseng chicken soup)
Dak Kalguksu (Korean chicken noodle soup)
Slow cooker chicken soup with napa cabbage
Dakgaejang (spicy chicken soup with scallions)

Korean chicken soup with rice

Have you tried this Korean chicken soup recipe? Please rate the recipe below and leave a comment! Stay in touch by following me on YouTubePinterestTwitterFacebook, and Instagram

Korean chicken soup with rice
Print

Dak Gomtang (Korean Chicken Soup)

A flavorful chicken soup made with a whole chicken!
Prep Time 10 minutes
Cook Time 50 minutes
Servings 4
Author Hyosun

Ingredients

  • 1 whole chicken (3 to 4 pounds)
  • 10 - 12 plump garlic cloves
  • 1 1-inch piece ginger, sliced
  • 1/2 medium onion
  • 2 - 3 scallion white parts
  • 1/2 teaspoon whole black peppercorns (if available)
  • 3 scallions, finely chopped to garnish
  • salt and pepper to taste

Instructions

  • Place the cleaned chicken in a stock pot large enough to hold the chicken and 10 cups of water (6 - 8 quarts pot). Add the garlic, ginger, onion, scallions, optional peppers and 10 cups of water (or enough to cover the chicken).
    Dak Gomtang (Korean Chicken Soup)
  • Bring it to a boil over high heat. Skim off any foam on top. Reduce the heat to medium and boil, covered, for about 40 - 50 minutes, depending on the size of the chicken. Cut through the thickest part of the breast, with a knife, to see if the chicken is cooked and tender.
    Dak Gomtang (Korean Chicken Soup)
  • Turn the heat off and carefully remove the chicken. When the chicken is cool enough to handle, remove the meat off the bones. Shred the meat into small bite size pieces. You can strain the broth, remove the excess fat and serve at this point. But, I put the bones back in the soup and boil again for more flavorful broth.
    Dak Gomtang (Korean Chicken Soup)
  • Optional Step: Put the bones back in the broth and simmer over medium low heat for an additional 30 minutes to an hour depending on how much time you have.
    Dak Gomtang (Korean Chicken Soup)
  • Strain the broth and remove the excess fat. You can spoon off the fat, refrigerate the broth until the fat solidifies, or use a fat separator.
    Dak Gomtang (Korean Chicken Soup)
  • To serve, place some rice in a serving bowl, add chicken pieces, and then ladle the hot broth on top. Typically, chopped scallions, salt and pepper are served separately so each person can season to taste. Serve piping hot with kimchi.

This dak gomtang recipe was originally posted in August 2011. I’ve updated it here with new photos, more information and minor changes to the recipe.

The post Dak Gomtang (Korean Chicken Soup) appeared first on Korean Bapsang.

Gamjajeon (Potato Pancakes)

$
0
0

If you have potatoes, you can make this crispy, chewy Korean potato pancake. Other vegetables are nice to have but not necessary. Enjoy gamjajeon as a delicious appetizer or snack.

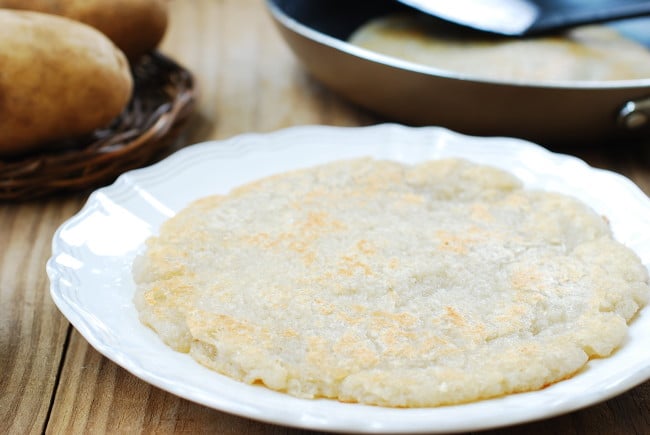
Korean potato pancakes with garlic chives

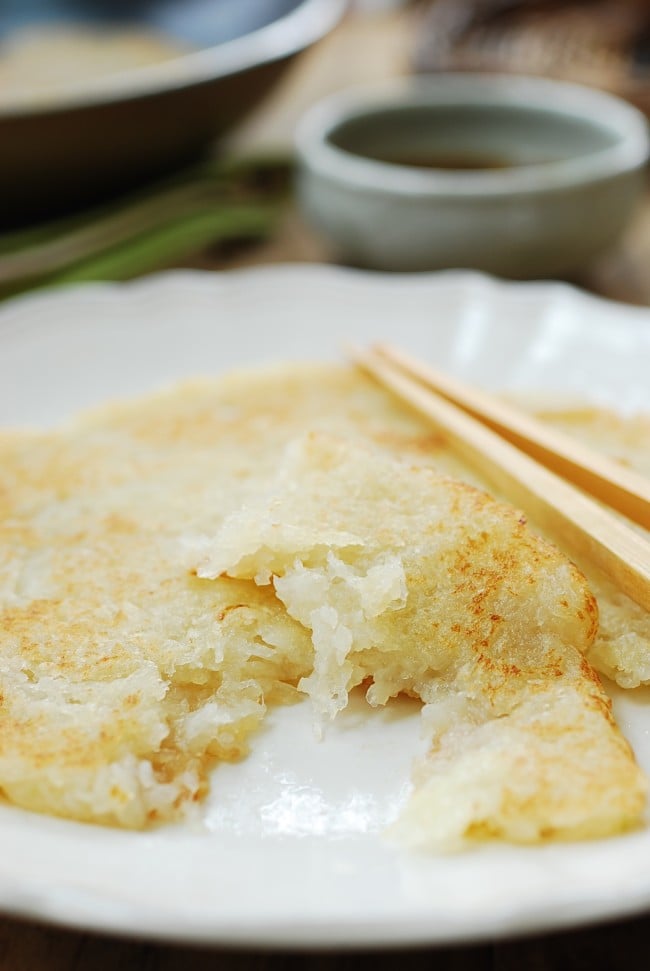
Gamjajeon or gamja jeon (감자전) is a variety of Korean savory pancake (jeon) made with grated or ground potatoes (감자). It’s a humble dish that can simply be made with potatoes or sometimes with other vegetable additions. These crispy, chewy potato pancakes are great as a snack or an appetizer. 

This recipe is inspired by a simple potato pancake I had as an appetizer, at a restaurant specializing in noodle soup, in Samcheong-dong neighborhood of Seoul. They serve one large pancake as an appetizer, which is made simply with potatoes, nothing else! It reminded me of the potato pancakes I enjoyed during our high school field trip to Seorak Mountain, Gangwon-do, the province that is known for their delicious potatoes.

Korean potato pancake

How to make Korean potato pancakes

You can grate the potatoes on a grater or grind them in a blender or a food processor. I like to grate them on a grater for a coarse texture.

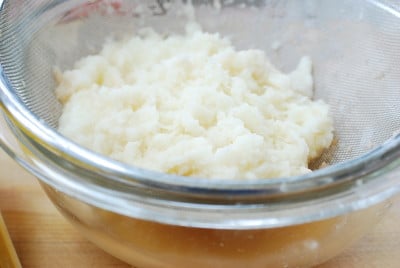
Whichever method you use, you need to remove some water content from the grated potatoes, or it will be too watery for a pancake batter. Do not throw away the drained water since it contains valuable starch. Let the starch water sit for a while until the starch sinks to the bottom and forms a dense, white layer. Carefully pour out the water, and use the starch in the batter. This is the traditional way to make a potato pancake batter without adding flour or powder starch.

Korean potato pancake

Gamjajeon variations

It’s very common to add other vegetables such as garlic chives, scallions, chili peppers, zucchinis, etc. Whichever other vegetable(s) you choose to add, use a small amount, allowing the potatoes to be the star of the dish.

My favorite addition for gamjajeon is garlic chives. I like a delicate garlic flavor garlic chives give the mildly flavored potato. I grow garlic chives in my backyard, but they are also available at Korean/Asian markets.

When grated, potatoes turn brown quickly. It still is fine to cook with and eat. You can use a little bit of onion to prevent discoloring of the potatoes without overpowering the flavor of the pancake. Make sure to grate the onion first so you can mix with the potato as soon as it’s grated. If using a blender, blend it with the potatoes.  

You can make 2 large pancakes with this recipe. Or, make a few smaller pieces instead.

More Korean savory pancakes recipes

Nokdujeon (savory mung bean pancakes)
Kimchi jeon (kimchi pancakes)
Hobak buchim (zucchini pancakes)
Haemul Pajeon (Scallion seafood pancakes)
Buchujeon (garlic chives pancakes)

Korean potato pancakes

Have you tried this Korean potato pancake recipe? Please rate the recipe below and leave a comment! Stay in touch by following me on YouTubePinterestTwitterFacebook, and Instagram

Korean potato pancakes
Print

Gamjajeon (Potato Pancake)

a simple Korean potato pancake
Course Appetizer
Cuisine Asian, Korean
Keyword gamjajeon, pancakes, potatoes
Prep Time 10 minutes
Cook Time 10 minutes
Servings 2
Author Hyosun

Ingredients

  • 1/4 medium onion - optional
  • 1-1/2 pounds potatoes 2 large or 3 medium
  • 1/4 teaspoon salt
  • 2 ounces garlic chives (buchu, 부추) - Optional
  • oil for pan frying

Diping Sauce

  • 1 tablespoon soy sauce
  • 1 teaspoon vinegar
  • 1 tablespoon water
  • 1/2 teaspoon sugar
  • pinch of black pepper

Instructions

  • Peel and grate the optional onion (about 2 to 3 tablespoons). Place in a large bowl. Peel and grate the potatoes, capturing the liquid. If using a blender or food processor, grind the onion and potatoes together.
  • Drain the grated potato in a bowl lined with a strainer, reserving the liquid. Immediately transfer to the bowl with the grated onion, and mix well with the onion to prevent discoloring of the potato.
    Korean potato pancake
  • Let the reserved liquid sit for about 10 minutes. The starch in the liquid will sink to the bottom. Carefully pour out the water, saving the starch. Add the starch and salt to the grated potato along with the optional garlic chives. Mix well.
  • Heat a skillet with two tablespoons of oil over medium heat. Add 1/2 of the batter, and spread it evenly into a round shape. You can make smaller pancakes if you like. Reduce the heat to medium to medium low, and cook until the bottom is light golden brown, about 2 to 3 minutes on each side. Repeat the process with the remaining batter. Serve hot with a dipping sauce.

This gamjajeon recipe was originally posted in April 2015. I’ve updated it here with new photos, more information and minor changes to the recipe.

The post Gamjajeon (Potato Pancakes) appeared first on Korean Bapsang.

Gyeran Mari (Rolled Omelette) with Seaweed

$
0
0

Easy Korean rolled omelette made simply with seaweed (gim), which adds a distinct flavor and a beautiful contrast of color. 

Korean rolled omelette with seaweed sheet

What is gyeran mari?

Gyeran mari (계란말이), literally translated to egg roll or rolled eggs, is Korean rolled omelette. It’s usually served as a side dish and highly popular as a lunch box item. Gyeran mari is typically made with one or two types of chopped vegetables commonly with scallions and carrot, but there are many variations.  

Here, it’s made with gim (dried seaweed sheet – aka nori). The gim adds a distinct seaweed flavor to the rolled egg and a beautiful contrast of color. 

It’s not that hard to make gyeran mari. You just need to know the basics. Simply pour a portion of the egg mixture into a thin layer. When the egg is set but still wet, fold it with a spatula and keep rolling. Pull the rolled egg to a side, and add more egg mixture to the open space to repeat.

I made this one a little simpler by skipping the steps used to create more layers. You can use this quicker method to make gyeran mari with other ingredients as well. 

However, if you want to try more layers, pour the egg mixture into the pan in 2 batches with 1-1/2 sheets of seaweed. First add 2/3 of the egg mix, use 1 sheet, spread some egg mix over the seaweed, roll, move it to one side. Pour the remaining egg on the other side, and add 1/2 sheet of gim. Watch the technique here.

Korean rolled omelette with seaweed sheet

Tips for making rolled omelette

  1. Preheat the pan until it feels hot when you place your hand 2 to 3 inches above the bottom of the pan.
  2. Leave a little bit of egg  mixture to spread over the seaweed sheet as glue. 
  3. Be patient! Cook the eggs over gentle heat. If the heat is too high, you’ll end up with tough eggs that will break when folded. If you don’t cook the eggs enough, the rolled egg will be runny inside.
  4. Use both hands to roll, each holding a spatula, a spoon or a pair of chopsticks.
  5. Use a small skillet if you want your rolls to be thick. 

Practice makes it better! Don’t give up even if it doesn’t turn out perfect. 

 More gyeran mari recipes

Gyeran mari (rolled omelette)
Gyeran mari (rolled omelette) with bell peppers

Korean rolled eggs with seaweed (gim)

If you tried this Korean rolled omelette with seaweed recipe, please rate the recipe and let me know how it turned out for you in the comment section below.  Stay in touch by following me on YouTubePinterestTwitterFacebook, and Instagram.

Korean rolled eggs with seaweed (gim)
Print

Gyeran mari (rolled omelette) with seaweed

Course Side Dish
Cuisine Asian, Korean
Keyword eggs, gyeran mari, Korean rolled omelette, Seaweed
Author Hyosun

Equipment

  • medium size non-stick pan (9 to 10-inch)

Ingredients

  • 3 eggs (see note 1)
  • 1 sheet gim (김) - dried seaweed (aka nori) See note 1
  • pinch salt
  • oil for the pan

Instructions

  • Crack and beat the eggs, in a bowl with a spoon or a fork, until the yolks and whites are blended well with no visible strings of whites. Stir in a pinch of salt. (If using, stir in chopped vegetables.)
    Beaten eggs for Korean rolled omelette
  • Add a teaspoon of vegetable oil to a medium size non-stick pan and distribute the oil evenly using a napkin or paper towel. Preheat over medium low heat, until it feels hot when you place your hand 2 to 3 inches above the bottom of the pan.
    Preparing a pan for eggs
  • Add 2/3 of the eggs to the pan. Swirl it around to cover the pan. (Reduce the heat or raise the pan away from the heat, for a little while, if the egg is cooking too fast.) See note 2.
    Egg omelette
  • When the egg is set but the surface is still wet, add a sheet of gim. Pour the remaining egg over the gim and swirl the pan around to spread the egg mixture evenly.
    Korean rolled omelette with seaweed sheet
  • When the egg surface is set again, using a spatula, lift one end of the egg (about 1-1/2 inch) and fold it over to the other side. Quickly lift the folded part and fold it again. (The egg should be slightly wet while being folded, or the roll will become loose when sliced.)
    Korean rolled eggs with seaweed
  • Repeat the process until an egg log is created.
    Korean rolled eggs with seaweed
  • Remove from the pan and let cool for about 5 minutes. Slice the egg into thick, even pieces (3/4 to 1-inch thick).
    Korean rolled eggs with seaweed

Notes

  1. You can use 4 eggs with 1-1/2 sheets of gim to make a thicker roll, using the technique below.
  2. If you want to try more layers, pour the egg mixture into the pan in 2 batches with 1-1/2 sheets of seaweed. First add 2/3 of the egg mix, use 1 sheet, spread some egg mix over the seaweed, roll, move it to one side. Pour the remaining egg on the other side, and add 1/2 sheet of gim. Watch the technique here.

This gyeran mari with seaweed recipe was originally posted in April 2012. I’ve updated it here with new photos, more information and minor changes to the recipe.  

The post Gyeran Mari (Rolled Omelette) with Seaweed appeared first on Korean Bapsang.

Dalgona (Spongy Candy)

$
0
0

A nostalgic Korean spongy sugar candy which is simply made with sugar and baking soda!

Korean spongy toffee candy

Everyone is talking about dalgona coffee these days, and you probably know it’s named after a popular Korean spongy candy called dalgona (달고나). More than anything, the latest coffee craze has brought back my childhood memories of having these sweet treats from street vendors, and I’ve been having lots of fun making them! Making these will be a fun activity for you and kids while staying at home.

What is dalgona candy?

Dalgona is a sponge toffee-like candy we grew up having from street vendors everywhere, especially around the schools. The word dalgona came from the casual Korean word “dalguna (달구나)” meaning “it’s sweet.” It’s also called ppopgi, 뽑기, which means to pick or select, referring to the game and reward aspect of this candy offered by the vendors. 

Similar to honeycomb toffee candy, dalgona is basically made by melting sugar and stirring in a little bit of baking soda. The sugar mixture then foams up and turns into something that looks like light caramel-colored whipped cream. This is the part that resembles the whipped coffee.

Korean dalgona candy

You can simply pour it out, cool it and enjoy it as is. However, the dalgona that’s nostalgic to every Korean is flattened to a thin round disk and imprinted with a mold before it hardens and becomes brittle.

This is where fun really begins. You’re supposed to carefully eat around the pattern, without breaking it. It’s not easy! For us children, this always was a highly intense, competitive activity. People often use a pin or a toothpick as a tool. I remember we even used our saliva to smooth out the edges. Some vendors reward you with another one if you successfully break off the outer part, saving the shape, and some others have other rewards such as small toys. 

Korean dalgona candy

All you need is sugar and baking soda! Any sugar works, but baking power is not a substitute for baking soda.

Do you need special tools?

No. You can find commercially available dalgona making kits on-line, but I use what I can find in my kitchen.

  • stainless steel ladle
  • chopstick to stir the sugar
  • non-stick baking sheet or pan to use as a base (or use parchment paper)
  • rubber spatula – optional but I find it helpful
  • hotteok/dalgona press (or a bowl/small sauce pan with a smooth, round bottom, about 4 to 5 inch diameter)
  • cookie cutter(s)
  • lollipop sticks – optional

Dalgona candy tools

Tips for making dalgona

The process is simple, but here are a few tips to help you make dalgona successfully.

  • Gather all the ingredients and tools before starting.
  • It’s very important not to burn sugar. Stir constantly, and control the heat. If it starts to smoke, raise the ladle a few inches above the heat, and lower it closer once it cools off a little. Raise it agin when most of the sugar turns syrupy with only a few lumps and finish melting. 
  • Once the baking soda is added, the mixture will immediately begin to foam and can burn quickly. Keep the ladle a few inches above the heat, and stir quickly and vigorously. Don’t let it puff up too long. It will burn at the bottom.
  • The hot dalgona mixture can stick to the base surface and/or the press. Use a non-stick baking sheet or skillet as the base. The key is to let the mixture cool off a little after pouring it out onto the base surface, about 15 seconds. Then, press it gently (as if you’re just tapping it) a couple of times, before pressing it all the way to the desired thickness.
    • Some people sprinkle sugar or baking soda , apply oil or use parchment paper to prevent the frothy mixture from sticking. Experiment and see which works for you the best. 
  • If you’re making more than one, keep a pot of hot water on the stove to rinse off the ladle and the spatula between the batches.

Dalgona candy

Korean sugar candy lollipop

If you tried this dalgona candy recipe, please rate the recipe and let me know how it turned out for you in the comment section below.  Stay in touch by following me on YouTubePinterestTwitterFacebook, and Instagram.

Korean spongy toffee candy
Print

Dalgona (Sugar Candy)

A nostalgic Korean spongy sugar candy which is simply made with sugar and baking soda!
Course Dessert, Snack
Cuisine Asian, Korean
Keyword candy, honeycomb candy, spongy candy, Sugar
Prep Time 2 minutes
Cook Time 5 minutes
Servings 1
Author Hyosun

Equipment

  • stainless steel ladle
  • chopstick to stir the sugar
  • non-stick baking sheet or pan to use as a base (or use parchment paper)
  • rubber spatula
  • hotteok press (or a bowl with a smooth, round bottom, about 4 to 5 inch diameter)
  • cookie cutter(s)
  • lollipop sticks - optional

Ingredients

For each candy

  • 1.5 tablespoons sugar (white or brown)
  • 1/16 teaspoon baking soda (about 3 pinches)

Instructions

  • Have everything ready before you start.
  • Add 1.5 tablespoons of sugar to the ladle. Hold the ladle over low to medium low heat. When the sugar starts to melt around the edges, stir with a chopstick.
    Korean sugar candy
  • Continue to stir constantly, controlling the heat. If it starts to smoke, raise the ladle a few inches above the heat, and lower it closer once it cools off a little. Repeat as necessary until the sugar completely melts without any lumps, but let it cool off a little before adding the baking soda.
    honeycomb candy
  • Holding the ladle away from the heat, stir in the baking soda.
    Spongy cake
  • Stir quickly and vigorously (about 25 times) until the baking soda is completely dissolved and the frothy mixture turns light caramel-color. While stirring, you can bring the ladle closer to the heat for a short second or two to keep it warm, but don’t let it puff up too long. It will burn at the bottom
    Spongy candy
  • Pour the mixture onto a non-stick baking sheet or a skillet, scraping with a rubber spatula. Place the tip of the optional lollipop stick into the mixture.
    Spongy candy
  • Let it cool for 10 to 15 seconds. Then, lightly press it down with the press and lift the press a couple of times, and then press it all the way to the desired thickness. This helps prevent the dalgona from sticking to the press.
    Korean sugar candy
  • Immediately, stamp it with a cookie cutter, firmly but not all the way through. Promptly remove the cutter.
    Dalgona (ppopgi)

The post Dalgona (Spongy Candy) appeared first on Korean Bapsang.

Dalgona Coffee (Whipped Coffee)

$
0
0

Dalgona coffee is whipped coffee made with instant coffee and sugar and served over cold milk. It’s named after a Korean sponge sugar candy.  

Dalgona Whipped Coffee with dalgona candy in the back ground

While we are staying home, this dalgona coffee has taken over the internet. I’m sure you’ve seen it all over your feeds on social media. Intrigued by the name of the coffee, dalgona, which is a nostalgic candy to Koreans, I tried it one day. I drink my coffee black, but this adorable, photogenic frothy coffee over icy cold milk stole my heart. I know I’ll be making this quite often as the weather gets warmer. 

What is dalgona coffee?

Dalgona coffee is whipped coffee made by whipping instant coffee with sugar and hot water and served over cold milk. 

Korean whipped coffee

In January 2020, this whipped coffee appeared on a Korean TV show called Pyunstorang (신상출시 편스토랑) in which actor Jung Il-Woo traveled to Macau and tried the drink at an eatery. He loved it, suggesting it tasted like dalgona, Korean spongy sugar candy.

The show featured the Macau restaurant owner whipping instant coffee, sugar and hot water by hand with a spoon. The actor narrated that the owner whipped 400 times to get it creamy and frothy. Everyone in the show was fascinated by the instant coffee being transformed into something totally unimaginable. They all said it looked just like dalgona candy.

It truly is interesting how the whipped coffee and dalgona candy have similarities in taste and appearance when the only thing common is sugar. Read more about it on my dalgona candy post.

In Korea, there are cafes that serve dalgona coffee, and they often serve it with pieces of dalgona candy

Whipped coffee topped with dalgona candy pieces

How to make whipped coffee

It’s really easy! All you need are instant coffee, sugar and hot water (1:1:1 ratio) as well as your choice of milk. I used two tablespoons each for this recipe, and was able to make two small servings, but if you want strong coffee, it can be one serving.  

To whip it, you can do what the Macau restaurant owner did – mix it by hand with a spoon or a whisk 400 times, but it’ll certainly be an arm exercise! His whipped coffee was not very thick. This trendy thick version was created by Koreans who recreated it at home and shared on social media. 

 I used my hand-held milk frother. It took about 6 minutes, but worked nicely! 

Then, I tried it with my electric hand mixer. The whipped coffee turned out much thicker in less time (3 to 4 minutes) than my hand-held milk frother. This is my pick! 

How to make whipped coffee

The stand mixer works well too, but it takes long because of the small amounts of coffee and sugar, the whisk attachment doesn’t reach the ingredients very well. It will be a good option when you double this recipe or more. 

Once the whipped coffee is nicely frothy, fill a glass 2/3 to 3/4 of the way up with cold milk. Add some ice cubes if desired. Top it with the whipped coffee, and stir it into the milk to drink. Enjoy!

Whipped coffee lasts fluffy for 3 to 4 days  in the refrigerator. Refrigerate in an airtight container if you want to make a big batch for more dalgona coffee later. 

Whipped coffee made with instant coffee and sugar

If you tried this dalgona coffee recipe, please rate the recipe and let me know how it turned out for you in the comment section below.  Stay in touch by following me on YouTubePinterestTwitterFacebook, and Instagram.

Korean whipped coffee
Print

Dalgona Coffee

Dalgona coffee is whipped coffee made by whipping instant coffee with sugar and hot water and served over cold milk. It's named after a nostalgic Korean candy.
Course Drinks
Cuisine Asian, Korean
Prep Time 10 minutes
Servings 1
Author Hyosun

Equipment

  • A whisk or an electric hand mixer

Ingredients

  • 2 tablespoons instant coffee
  • 2 tablespoons sugar
  • 2 tablespoons hot water
  • 1 cup milk

Instructions

  • Add the coffee, sugar and hot water to a large bowl.
    Instant coffee and sugar
  • Whip it with a hand mixer until the mix turns to light caramel color and frothy, about 3 to 4 minutes. Start at a low speed and increase to a higher speed after the coffee and sugar are dissolved. Scrape down the sides with a rubber spatula once or twice during whipping. Or, whisk it vigorously by hand with a whisk (or spoon). This will take much longer, depending on how thick you want your whipped coffee to be.
    Whipping instant coffee with sugar
  • Fill up a cup with about a 2/3 to 3/4 way up with milk along with some ice cubes, if desired, and top it with the whipped coffee. A rubber spatula works great to scrape it off from the bowl. You can use warm milk if you want.
    Whipped coffee over milk

Notes

You can top it off with broken up dalgona candy to serve if desired. See how to make it here.

The post Dalgona Coffee (Whipped Coffee) appeared first on Korean Bapsang.

Kimchijeon (Kimchi Pancake)

$
0
0

This crispy flavor-packed kimchi pancakes are super easy to make with a few basic ingredients as long as you have some kimchi.   

Kimchi pancakes recipe

Kimchijeon, or kimchi jeon (김치전), is a type of Korean savory pancake that’s made with kimchi. It’s also called kimchi buchimgae (김치부침개). Enjoy these deliciously crispy kimchi pancakes as a snack, appetizer, or a light meal!

If you have nicely fermented kimchi and some flour, you can make this popular snack in no time. The flavor-packed sour kimchi does a wonder when it’s fried in a simple batter. Everything else is nice to have, but not absolutely necessary.

Kimchi for pancakes

I’ve said many times on this blog that ripe, well-fermented kimchi is always the best to cook with. No exception for this kimchi pancake recipe! Napa cabbage kimchi is standard for kimchi pancakes, but you can also use radish kimchi (kkakdugi or chonggak kimchi). 

Simply use vegan kimchi for vegan kimchi pancakes. 

Kimchi pancakes (Korean savory pancakes)

Kimchi pancake batter

All-purpose flour is all you need! You can add some sweet rice powder or corn/potato starch, if available, to give it a little bit of crispy, slightly chewy texture. Of course, buchim garu (Korean pancake premix) is always good for any savory pancakes. 

The addition of some juice/liquid from the kimchi is the key. It gives the pancake batter its distinct flavor and a nice orange hue. 

For a slightly spicier kimchi pancake, I like to add a spoonful of gochujang (Korean red chili pepper paste) to the batter. Gochujang is especially good if your kimchi doesn’t have much liquid because it adds extra umami. Gochugaru (Korean red chili pepper flakes) works too if you just want a spicy kick. 

If you use gochujang and/or kimchi liquid, the pancakes will be very well seasoned so you don’t really need a dipping sauce. That will also be the case if you used buchim garu, which is seasoned. But, a dipping sauce recipe is provided here in the recipe below.  

Kimchi pancake cut into small pices

Variations

Minced or thinly sliced pork is commonly added to kimchijeon. No surprise there because kimchi and pork are a winning combo in Korean cooking.

I sometimes add some squid strips. The chewy squid lends a nice textural contrast to the crunchy kimchi. Canned tuna is also a great addition to kimchi pancakes. Squeeze out the liquid from tuna, if using. 

You can make 2 to 3 large pancakes with this kimchi pancake recipe, or 5 to 6 small ones instead. The smaller the pancakes are, the easier it is to flip. 

Tips for making kimchi pancakes: 

  1. Use juice/liquid from kimchi if at all possible. 
  2. Use icy cold water.
  3. The batter should be thin enough to flow easily from a spoon. 
  4. Spread the batter thin when pan frying. 
  5. Use a generous amount of oil.
  6. Increase the heat a little to crisp up the pancakes at the end of pan-frying. 

More Korean savory pancakes recipes

Haemul Pajeon (Scallion seafood pancakes)
Nokdujeon (savory mung bean pancakes)
Gamjajeon (potato pancakes)
Hobak buchim (zucchini pancakes)
Buchujeon (garlic chives pancakes)

Korean kimchi pancake with dipping sauce

If you tried this kimchijeon recipe, please rate the recipe and let me know how it turned out for you in the comment section below.  Stay in touch by following me on YouTubePinterestTwitterFacebook, and Instagram.

Kimchi pancakes recipe
Print

Kimchijeon (kimchi pancakes)

This crispy flavor-packed kimchi pancakes are super easy to make with a few basic ingredients as long as you have some kimchi.
Course Appetizer, Snack
Cuisine Korean
Keyword kimchi, savory pancakes
Prep Time 10 minutes
Cook Time 12 minutes
Servings 3
Author Hyosun

Ingredients

  • 1 cup thinly sliced fully-fermented kimchi
  • 1 to 2 scallions Two if thin and small
  • 1/4 medium onion
  • 3 ounces minced pork, canned tuna (without the liquid), or squid cut into small strips - optional
  • cooking oil with high smoke point for pan frying

Batter

  • 1 1/4 cups all-purpose flour or buchimgaru (Korean pancake premix) or Swap 1/4 cup of all-purpose flour with sweet rice flour or corn/potato starch (See note)
  • 1/4 cup juice/liquid from kimchi Use more water if unavailable
  • 1 tablespoon gochujang (Korean chili pepper paste) - optional Or 1 to 2 teaspoons gochugaru
  • 1 lightly beaten egg - optional
  • 1 cup icy cold water Use more water if juice/liquid from kimchi is unavailable and not using an egg

Optional Dipping Sauce (Combine all the ingredients)

  • 1 tablespoon soy sauce
  • 1 teaspoon vinegar
  • 1 tablespoon water
  • 1/2 teaspoon sugar
  • pinch of black pepper

Instructions

  • Thinly slice the kimchi, about 1/2-inch thick. Cut the scallions into about 2-inch pieces. If the white part is thick, cut in half lengthwise. Thinly slice the onion.
    Kimchi pancake vegetable ingredients
  • In a large bowl, combine the flour (or pancake mix) with the liquid from kimchi, the optional gochujang and egg, and water. Start with dissolving the gochujang with water, and mix everything together. Do not over mix.
    Kimchi pancake batter
  • Add a little more water if the batter is too thick. The batter should flow easily from a spoon.
    Kimchi pancake batter
  • Stir in the kimchi, scallions, onion and the optional protein of your choice.
    Kimchi pancake batter mix
  • Heat one tablespoon of oil in a non-stick pan over medium heat. Ladle the mixture into the pan, and spread it evenly into a thin round shape. Cook until the edges turn light golden brown, about 3 minutes. Turn it over, and add more oil to the sides of the pan. Gently swirl the pan to distribute the oil under the pancakes. Press the pancake down with a spatula. Cook until the other side is nicely browned and crispy, 2 to 3 minutes.
    kimchi pancake recipe
  • Repeat the process until there is no remaining batter. Serve hot with a dipping sauce, if desired.

Notes

You can swap  for a crispier, chewier texture.

This kimchi pancake recipe was originally posted in February 2010. I’ve updated it here with new photos, more information and minor changes to the recipe.  

The post Kimchijeon (Kimchi Pancake) appeared first on Korean Bapsang.


Honghap Miyeok Guk (Seaweed Soup with Mussels)

$
0
0
This recipe is a seafood variation of Korean seaweed soup. It’s made with mussels, but you can substitute them with other seafood such as clams or shrimp. 
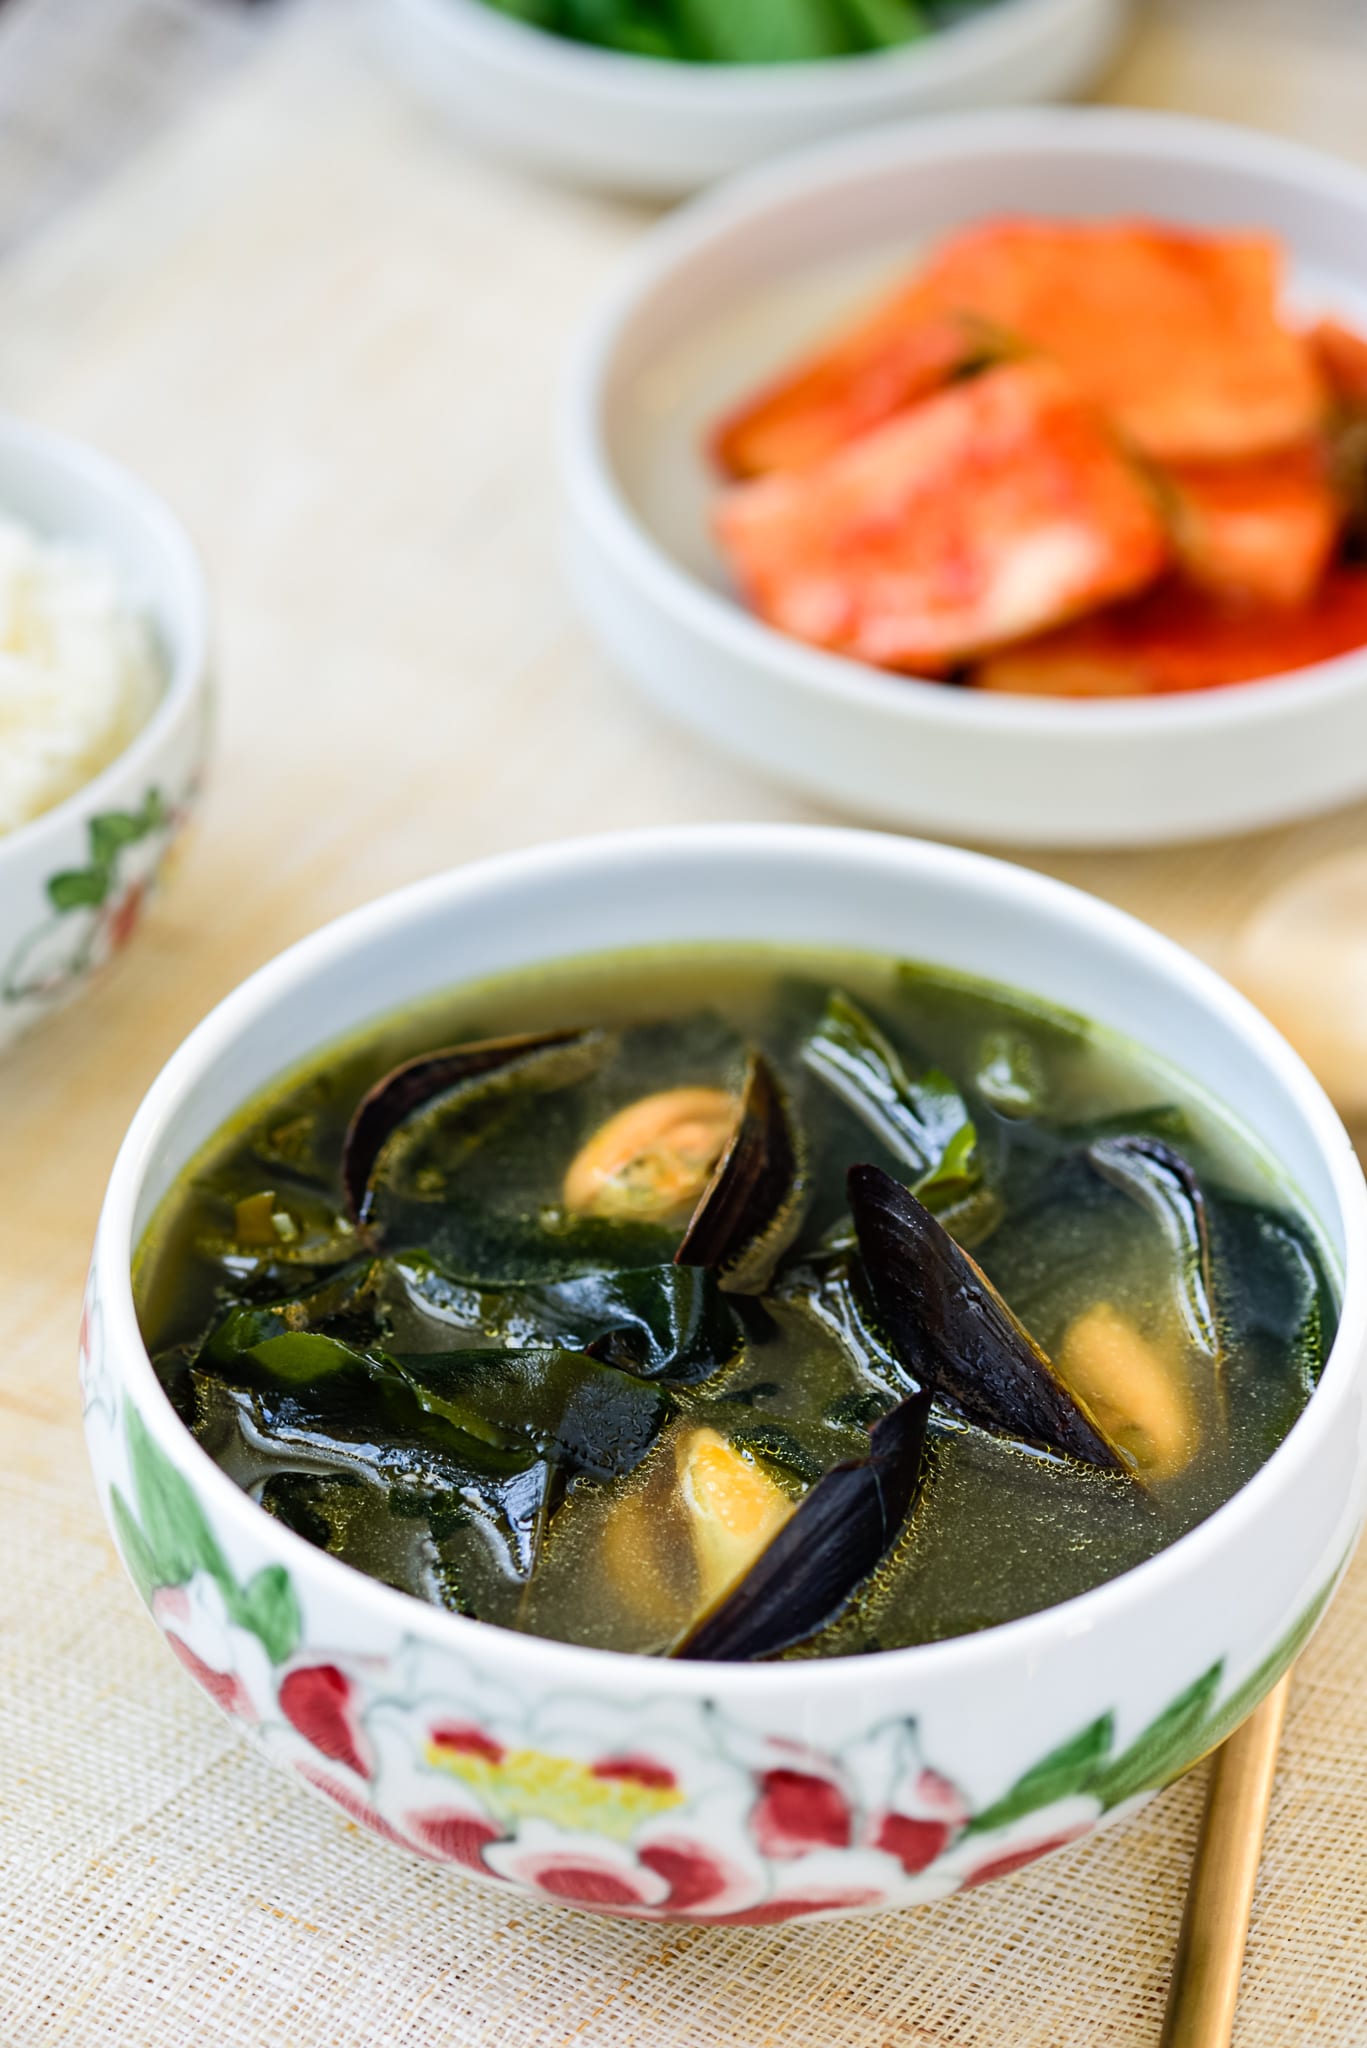
Korean miyeokguk with mussels

What is miyeok guk? 

Miyeok guk (미역국), or miyeokguk, is a soup made with miyeok (also known as wakame) which is a variety of sea vegetable or seaweed. It is a mild and tasty soup typically made with beef or seafood. Here’s miyeokguk with mussels! Mussels are called honghap (홍합), so miyeokguk with mussels is honghap miyeokguk.

More so than other Korean dishes, this soup has a special significance to Koreans. In Korean culture, miyeok guk is traditionally associated with birth. Korean mothers traditionally eat this soup for weeks after giving birth since it has long been believed to contain nutrients that help with a mother’s recovery after giving birth and the production of breast milk.

This sea vegetable is high in fiber and a great source for omega-3 fatty acid, vitamins, calcium, iron and other minerals. 

It is the first meal my mother ate when I was born, and it was the first one I ate upon giving birth to my two children. Due to its symbolic association with birth, miyeok guk is the soup most Koreans eat on their birthdays, hence known as birthday soup. 

Over ten years ago in April 2010, I posted this seaweed soup with mussels recipe when I made it for my mother on her birthday because it was her favorite. She liked her soup mixed in with rice. I have updated it here with new photos, more information and minor changes to the recipe. 

Miyeok (wakame)

Miyeok guk variations

While miyeok guk made with beef is most common, seafood such as mussels and clams are also very popular. In Jeju Island, my parents’ hometown, miyeok guk made with galchi (belt fish) is a regional specialty. We used to have it with fresh caught galchi when we visited our relatives in the island.

I sometimes make it with firm, white fish such as monk fish (agu, 아구), flat fish (gajami, 가자미), and tilapia. Some of you might think it would taste fishy, but it really does not, if you use fresh fish. 

If you want to try other seafood with this recipe, simply add the seafood in the step where the mussels are added. 

For vegan miyeok guk, use vegetable broth and some sliced mushrooms for a meaty texture.

Tips for making miyeok guk

  1. You can find dried miyeok at Korean markets. Look for the ones with a deep, dark green hue.
  2. Dried miyeok comes in different types and sizes. Most of them are pretty clean so it doesn’t require more thorough cleaning we used to do in the past. Some are even ready to use pre-cleaned and pre-cut so you can use it as is simply after soaking for a few minutes. 
  3. Do not soak the seaweed too long. You’ll lose some of the seaweed flavor.
  4. Take the time to boil the soup for the specified time for the depth of flavor. 
  5. Miyeok guk freezes well if you have any leftover soup. 

Korean seaweed soup made with mussels

If you tried this miyeokguk recipe, please rate the recipe and let me know how it turned out for you in the comment section below.  Stay in touch by following me on YouTubePinterestTwitterFacebook, and Instagram.

Korean seaweed soup with mussels
Print

Honghap Miyeokguk (Seaweed Soup with Mussels)

This recipe is a seafood variation of Korean seaweed soup. It's made with mussels, but you can substitute them with other seafood such as clams or shrimp. 
Course Main, Soup
Cuisine Asian, Korean
Keyword miyeok, noodle soup, Seaweed, wakame
Prep Time 20 minutes
Cook Time 35 minutes
Servings 4
Author Hyosun

Ingredients

  • 1 ounce dried miyeok (seaweed), 미역 yields about 2 cups soaked
  • 12 to 16 fresh mussels
  • 1 teaspoon minced garlic
  • 8 cups water
  • 2 tablespoons soup soy sauce (gukganjang) or fish sauce
  • 1 tablespoon sesame oil
  • salt and pepper

Instructions

  • Soak the dried miyeok in cold water for about 20 minutes or just until it turns soft. Rinse a couple of times to remove any hidden sand. Drain well and cut into bite sizes. See note.
    Korean seaweed soup
  • Rinse the mussels in cold water. Rub a few at a time between your hands (or scrub off) to remove any debris on the shells. If you see a beard attached to the mussels, tug it out.
    Mussels
  • In a large pot, sauté the miyeok with the sesame oil, soy sauce and garlic for 4 to 5 minutes over medium high heat. You can add a little bit of water it the seaweed gets too dry.
    Korean seaweed soup
  • Add 8 cups of water. Bring it to a boil over high heat. Lower the heat to medium, cover, and boil for about 25 minutes. 
    Korean seaweed soup
  • Drop the mussels in. Add salt (about 2 teaspoons) and pepper to taste. Boil for an additional 5 minutes.
    Korean seaweed soup with mussels

Notes

  1. You can find dried miyeok at Korean markets. Look for the ones with a deep, dark green hue.
  2. Dried miyeok comes in different types and sizes. Most of them are pretty clean so it doesn't require more thorough cleaning we used to do in the past. Some are even ready to use pre-cleaned and pre-cut so you can use it as is simply after soaking for a few minutes. 
  3. Do not soak the seaweed too long. You'll lose some of the seaweed flavor.
  4. Be sure to take the time to boil the soup for the specified time for the depth of flavor. 
  5. Miyeok guk freezes well if you have any leftover soup. 

The post Honghap Miyeok Guk (Seaweed Soup with Mussels) appeared first on Korean Bapsang.

Salmon Bulgogi

$
0
0

Change up your salmon preparation, and make this bulgogi flavored salmon! The marinade is easy to whip up, and the fish cooks very quickly, making this dish a perfect weeknight meal or a quick addition to you summer grilling!

Korean flavored salmon

I absolutely love salmon! Here’s my favorite way to cook this omega-3 rich fish. I marinate it with a sweet and savory bulgogi marinade, hence the name – salmon bulgogi. The flavorful marinade works wonderfully with the rich, oily fish.

Bulgogi is a marinated meat dish made with thin slices of beef. However, the sweet and savory marinade works well with any meat or seafood. In the past, I posted a variation made with chicken, dak bulgogi. It’s one of the most popular recipes on my blog. 

Buy salmon with skin if you can. The skin helps hold the thin flesh together and helps keep the salmon from drying out while being cooked. Always make sure the fish you buy is fresh.

I cut the salmon thinly for quick marinating and cooking, but you can cut it into any size your want. Simply adjust the marinating and cooking time for larger pieces.

The marinade is easy to whip up, and the fish cooks very quickly, making this dish a perfect weeknight meal! 

I often to serve it with plain rice and sesame broccoli. Also see my 15 Korean Vegetable Side Dishes

Korean flavored salmon

How to cook salmon

You can cook these relatively thinly cut salmon any way you want. My favorite way is quick broiling. The high heat cooks the fish very fast while giving a nice char, but be careful not to overcook. 

If preferred, you can also bake it in the oven at 425°F for 4 to 5 minutes.

It will also be quick to cook the salmon in your skillet, a minute or two on each side. 

Grilled salmon

More bulgogi recipes

Bulgogi
Flank steak bulgogi
Slow cooker bulgogi
Dak bulgogi
Dweji bulgogi

Salmon filets Salmon marinated in bulgogi sauce

Have you tried this salmon bulgogi recipe? Please rate the recipe below and leave a comment! Stay in touch by following me on YouTubePinterestTwitterFacebook, and Instagram.

Grilled salmon
Print

Salmon Bulgogi

A quick and easy salmon recipe made with a bulgogi marinade
Servings 2
Author Hyosun

Ingredients

  • 1 pound salmon fillet preferably with skin

Marinade

  • 3 tablespoons soy sauce
  • 1 tablespoon rice wine (mirin) or white wine
  • 1 teaspoon sesame oil
  • 1 tablespoon lemon juice
  • 1 tablespoon sugar
  • 1 tablespoon honey (or more sugar)
  • 2 teaspoons roughly minced garlic
  • 1 teaspoon grated ginger
  • black pepper to taste

Instructions

  • Pull the bones from the salmon if there are any. Cut the salmon fillet into about 3/4 to 1-inch thick pieces.
    salmon bulgogi
  • In a medium size bowl, mix the marinade ingredients until the sugar and honey have dissolved. Coat the salmon pieces with the marinade. Marinate for 20 to 30 minutes (longer if you have time).
    salmon bulgogi
  • Cook the salmon with one of these methods: (The time will vary depending on the thickness of salmon.)
    Broiling: Set the oven rack 6 inches below the heating element. Preheat the broiler. Place the salmon in a broiling pan lined with parchment paper or aluminum foil. Broil about 3 to 4 minutes until the salmon is cooked and slightly charred. Watch closely as not to overcook. Baking: Preheat the oven to 450°F. Place the salmon in a baking pan lined with parchment paper or aluminum foil. Bake for 4 to 5 minutes.
    Pan-frying: In a preheated, lightly oiled non-stick skillet, cook for a minute or two on each side.
    Salmon Bulgogi

This salmon bulgogi recipe was originally posted in March 2015. I’ve updated it here with new photos, more information and minor changes to the recipe.  

The post Salmon Bulgogi appeared first on Korean Bapsang.

Kongnamul Bap (Soybean Sprout Rice Bowl)

$
0
0

Kongnamul bap is basically rice cooked with kongnamul (soybean sprouts). Simply cook the rice with soybean sprouts and other ingredients such as meat and kimchi for delicious Korean rice bowls!

Korean rice bowl made with soybean sprouts

Unlike bibimbap, a better known rice bowl with various vegetable and meat toppings, kongnamul bap (콩나물밥) is basically rice cooked with kongnamul (soybean sprouts) and other ingredients.  It’s one of my go-to easy meals. It’s a delicious meal you can put together in no time!

Simply add soybean sprouts to your rice, and cook the rice the same way as you normally do. The rice soaks up the nutty flavor of the soybean sprouts as it cooks. The same technique is very common in Korean cooking with various other vegetables, meat and/or seafood to make rice bowl dishes. 

Korean rice bowl with soybean sprouts

Growing up my mother always added lightly seasoned beef or pork, giving the dish another layer of flavor, while making it a more substantial dish. You can certainly use chicken if desired or simply omit the meat for a vegan option. 

Another addition that my family loves is kimchi! Doesn’t kimchi make everything better anyways? So, that’s how I usually make this dish.

In this recipe, I precooked the kimchi and meat to develop more flavors before adding to the rice, but you can skip this step if you want. 

With a delicious soy sauce-based sauce (yangnyeomjang or yangnyumjang, 양념장) mixed in, you and your family will love this tasty one-dish meal!

Tips for making kongnamul bap

  1. It’s important to use less water because soybean sprouts release some water. 
  2. Use a generous amount of soybean sprouts. The sprouts cook down significantly, and the rice bowl is more delicious with lots of them.
  3. The sauce (yangnyeomjang, 양념장) is essential for this dish. Use lots of scallions. You can also add garlic chives (buchu, 부추) if available. 

More Soybean Sprouts Recipes

Kongnamul muchim (seasoned soybean sprouts)
Kongnamul Guk (soybean sprout soup) 
Kimchi kongnamul guk (kimchi soybean sprout soup)
Kongnamul japchae (soybean sprout japchae)

Korean rice bowl with soybean sprouts, meat, and kimchi

Have you tried this kongnamul bap recipe? Please rate the recipe below and leave a comment! Stay in touch by following me on YouTubePinterestTwitterFacebook, and Instagram.

Korean rice bowl with soybean sprouts
Print

Kongnamul Bap (Soybean Rice Bowl)

Kongnamul bap is basically rice cooked with kongnamul (soybean sprouts). Simply cook the rice with soybean sprouts and other ingredients you'd like to add for delicious Korean rice bowls!
Prep Time 15 minutes
Cook Time 20 minutes
Servings 4
Author Hyosun

Ingredients

Rice:

  • 1.5 cups short grain rice
  • 1.5 cups water

Vegetables and meat:

  • 1 pound kongnamul (콩나물), soy bean sprouts
  • 4 - 6 ounces beef or pork (any tender cut) (omit for a vegan option)
  • 1 teaspoon minced garlic
  • 2 teaspoons soy sauce
  • 1 teaspoon rice wine or mirin
  • 1 teaspoon sesame oil
  • 1 cup thinly sliced kimchi (about 1/2 inch thick) preferably fully fermented
  • 2 tablespoons juice from kimchi

Sauce (Yangnyumjang):

  • 4 tablespoons soy sauce
  • 2 teaspoons sesame oil
  • 1 teaspoon gochugaru, Korean red pepper flakes
  • 1 teaspoon sesame seeds
  • 1 teaspoon minced garlic
  • 1 teaspoon sugar
  • 2 - 3 scallions, finely chopped

Instructions

  • Rinse the rice. Drain. (This is to make sure the correct amount of water is added.) Place in a pot or rice cooker and add the exact amount of water (1:1 rice to water ratio). Let sit so the rice is soaked. Wash the soybean sprouts and drain well.
    Kongnamul bap (soybean sprout rice bowl)
  • Cut the meat in small pieces and lightly season with the next 4 ingredients. Cut the kimchi into thin strips (about 1/2 inch). Heat a skillet with a tablespoon of oil over medium high heat. Stir-fry the kimchi for 2 - 3 minutes, adding some juice from kimchi to intensify the flavor, if available. Add the meat and stir-fry for another minute or two. (The meat doesn't need to be cooked through.)
    Kongnamul bap (soybean sprout rice bowl)
  • Spread the soybean sprouts over the rice, followed by the stir-fried kimchi and meat. Start the rice cooker, or cook over the stovetop (see below).
    Kongnamul bap (soybean sprout rice bowl)
  • While the rice is cooking, prepare the sauce by mixing all sauce ingredients.
    Yangnyeomjang (Korean Soy sauce based sauce)
  • When the rice is done, gently fluff up the rice, evenly distributing the sprouts, meat and kimchi. Serve with the sauce on the side.

Stove top method:

  • Cover, and bring the rice to a full boil over high heat. This will take 4 to 5 minutes. Then, reduce the heat to medium. Cook for 7 minutes. Reduce the heat to low and simmer for 5 minutes.

This kongnamul bap recipe was originally posted in December 2011. I’ve updated it here with new photos and minor changes to the recipe.  

The post Kongnamul Bap (Soybean Sprout Rice Bowl) appeared first on Korean Bapsang.

Instant Pot Galbitang (Beef Short Rib Soup)

$
0
0

This Instant Pot galbitang recipe will give you the same delicious result with a nice and clean taste as the traditional stove top recipe. 

Instant Pot Korean beef short rib soup

Galbitang (갈비탕), Korean beef short rib soup, is a clear, delicate soup made by boiling beef short ribs with aromatic vegetables. It’s hearty and nourishing! Previously, I showed you how to make galbitang the traditional way over stove top. This time, I’ll show you how I make this soup in my Instant Pot to achieve the same delicious result.

Traditionally, Korean cooks soak the ribs in cold water to draw out blood. Then, blanch them in boiling water to remove any remaining blood and any impurities and rinse everything clean before actually making the soup. All this is done to give the soup the nicely clean taste it’s known for.

Finally, the ribs are boiled along with Korean radish (mu), onion, garlic, and ginger until fork tender.

Galbitang is fairly simple to make. And it’s quicker with a pressure cooker!

Instant Pot beef short rib soup recipe

Soaking and parboiling the short ribs

See my Instant Pot Braised Short Ribs for purchasing and cleaning short ribs. 

In my Instant Pot adaptation, I skip soaking all together. You can certainly soak them if you want. Instead, I briefly cook the ribs (2 minutes on Manual High Pressure) in water just enough to cover. During the build-up of steam, the short ribs release blood and fat. I then rinse off the brown scums and fat. You can reuse the strained cooking liquid to make the soup if you like your soup to taste more “beefy”.

This method effectively removes excess blood and fat without losing much of the meaty flavor, and it doesn’t involve another pot. 

You can skip this step if you want. But, because the Instant Pot is locked during cooking, you can’t skim off the scums floating at the top, which, if not removed, will turn into fine particles, making the soup not as clean and clear.  

If you skip this step, you can alternatively strain the broth through a fine sieve or cloth after pressure cooking the short ribs.

Instant Pot Korean Beef Short Rib recipe

Pressure cooking the ribs

Once you have cleaned the parboiled ribs and the pot, you’re ready to make the soup in your pressure cooker. Place the ribs in the pot, and add the aromatic vegetables and water. 

What about mu (무, Korean radish)? Basically, there are two options in terms of the timing of adding the radish. The first option is to cut into 2 large blocks and add to the pot along with the aromatic vegetables. However, no matter how big the radish blocks are, they will get quite mushy after 35 to 40 minutes of pressure cooking. I don’t know about you, but I don’t like mushy radish. 

So, I like to add the radish after pressure cooking the short ribs. For this option, you’ll need to cut the radish into smaller bite size pieces, add to the soup after pressure cooking the ribs and cook for about 10 minutes on Sauté until the radish turns translucent. 

A good soup soy sauce (gukganjang, 국간장) makes a huge difference in the taste of the soup. If you don’t have Korean soup soy sauce, you can use light fish sauce or regular soy sauce. However, regular soy sauce can make the soup very dark, so just use a little bit and season with salt.   

Remove the fat:  You can skim off any remaining fat or use a fat separator if you’re serving while still hot. If you have time, you can also let the entire pot sit in the refrigerator for the fat to solidify so it can be removed effortlessly.

More Instant Pot Recipes:

Instant Pot Galbijjim
Instant Pot Spicy Galbijjim
Instant Pot Kkorijjim (Oxtail)
Pressure Cooker Dakbokkeumtang (Spicy Chicken Stew)
Instant Pot Boiled Chicken and Rice
Instant Pot Kimchi Jjigae

Korean beef short rib soup recipe

Have you tried this Instant Pot galbitang recipe? Please rate the recipe below and leave a comment! Stay in touch by following me on YouTube, Pinterest, Twitter, Facebook, and Instagram

Korean beef short rib soup recipe
Print

Instant Pot Galbitang (Beef Short Rib Soup)

This Instant Pot galbitang recipe will give you the same delicious result with a nice and clean taste as the traditional stove top recipe.
Course Main, Soup
Cuisine Korean
Keyword beef short ribs, galbitang, Korean Radish Salad, meat, soup
Cook Time 1 hour 20 minutes
Servings 4
Author Hyosun

Equipment

  • 6 qt pressure cooker

Ingredients

  • 3 to 4 pounds short ribs
  • 1 medium onion cut into halves
  • 2 large scallions white parts
  • 8 plump garlic cloves (or 1 whole bulb) If using bulb, cut into halves crosswise
  • 3 thin ginger slices 1-inch rounds
  • 2 Tablespoons soup soy sauce
  • salt and pepper
  • 1 pound Korean radish cut into bite size pieces (about 1.5-inch square, 1/3-inch thick) see note
  • 3 ounces starch noodles dangmyeon, soaked in warm water for 30 minutes - optional
  • 2 scallions, finely chopped garnish

Instructions

  • Trim off any thick layer of surface fat. In the pot, rinse the ribs with cold water a couple of times to remove surface blood and bone dust. Drain, and fill the pot with enough water to cover the ribs, about 4 cups.
    Beef short ribs in the pressure cooker
  • Close the lid tightly. Press the “Manual” function and High Pressure, and using the “-” button, adjust the time to 2 minutes. Make sure the pressure switch is turned to “sealing”. When finished, carefully release the pressure.
    Instant Pot galbitang recipe
  • Discard the cooking liquid (or save to use it for the soup), and thoroughly rinse the ribs and the pot clean.
    Beef short ribs cooked in the instant pot
  • Return the ribs to the pot, and add the onion, garlic, ginger and soup soy sauce. Add about 10 cups of water, making sure the water level stays below the max line for the pot. Close the lid tightly. Pressure cook the ribs for 35 to 40 minutes, depending on the thickness of the meat. NPR 10 minutes.
    Korean beef short rib soup
  • Then, remove the ribs, and remove the aromatic vegetables with a strainer. Skim off the fat.
    Pressure cooker beef short rib soup
  • Put the ribs back in the pot along with the cut radish. Change the Instant Post setting to “Saute”, and boil until the radish turns translucent, about 10 minutes after coming to a boil. Add the optional noodles a couple of minutes before turning the Instant Pot off.
    Instant Pot galbitang
  • Salt and pepper to taste. Skim off or use a fat separator to remove any remaining fat, if serving while still hot. Or chill the soup and discard solidified fat. Garnish with the chopped scallions to serve.

The post Instant Pot Galbitang (Beef Short Rib Soup) appeared first on Korean Bapsang.

Jajangmyeon (Noodles in Black Bean Sauce)

$
0
0
Jajangmyeon is a popular Korean-Chinese dish. Learn how to make these delicious black bean noodles at home with this easy to follow recipe!

Korean black bean noodles

Whether you grew up on these Korean black bean noodles or learned to love them as an adult, I’m sure you get strong cravings for this beloved dish every so often. Good news is that you can easily make this restaurant favorite at home as long as you have the black bean paste called chunjang (춘장)

What is jajangmyeon?

Jajangmyeon (자장면), also called jjajangmyeon (짜장면), is a noodle dish in a black bean sauce. Along with jjamppong (짬뽕, spicy seafood noodle soup) and tangsuyuk (탕수육, sweet and sour pork or beef), it’s a popular Korean-Chinese dish. Called collectively as Junghwa Yori (중화요리), Korean-Chinese cuisine was developed by early Chinese immigrants in Korea. It’s a huge part of Korean food culture. 

Growing up, jajangmyeon was the dish that our parents treated us with on special occasions, such as graduation, exam days, birthdays, etc. It was every child’s favorite food! Still probably is. The little boy below is my nephew who test tasted it in 2011 when I originally posted this recipe. He’s now going to college! I still remember he said it was so good! 

Child eating black bean noodles

As you might have seen on Korean dramas, it’s also the most popular dish for home delivery in Korea, just like pizza delivery in America. It’s the dish Koreans call to order on a hectic moving day. 

As a more recent phenomena, jajangmyeon has become a symbolic dish that single people eat with their friends on Black Day (April 14) to commiserate with each other over black noodles for lacking a romantic relationship.    

Jjajangmyeon (Korean noodles in a black bean sauce)

Types of Korean black bean noodles

Jjajangmeyon (짜장면): When there’s no other word in front of it, it simply refers to regular jajangmyeon, also known as yetnal jajangmyeon — yetnal meaning from the past or old-fashioned. For this type, water or stock is added to the sauce as well as some starch slurry to thicken it. The resulting sauce is liquidy. 

Ganjjajangmyeon (간짜장면): The dish is made without the addition of any water or stock or thickening for the sauce. As a result, the sauce is dry with more solid ingredients per serving. 

Samseon jjajangmyeon (삼선짜장면): Samseon means fresh delicacies from 3 sources — land, sea and sky, but in Korean-Chinese cuisine, it commonly refers to a dish with various seafoods. There’s usually samseon ganjjajangmyeon (삼선간짜장면) on the menu as well. 

Euni jjajangmyeon (유니짜장면): Jajangmyeon made with ground meat.

Jaengban jjajang (쟁반짜장면): The noodles are stir-fried with the sauce and served in a large platter to be shared. 

This recipe is for regular jajangmyeon, but I didn’t add a lot of liquid. If you want your sauce to be more saucy/liquidy, you can add more stock or water. 

Jjajangmyeon recipe

Jajangmyeon sauce

The sauce is made with chunjang (춘장), which is a Korean-style black bean paste made with fermented wheat flour, soybeans and caramel sauce. Its use is pretty much limited to Korean-Chinese dishes. I know some have asked if a Chinese black bean paste can be a substitute for this dish. The answer is no if you want to make jajangmyeon as Koreans enjoy. 

You can find chunjang at Korean markets, usually next to doenjang (된장, fermented soybean paste). Depending on the brands, some are saltier, sourer, and/or sweeter than others. 

When chunjang is fried in oil along with meat and vegetables, it becomes a jajang sauce. You first need to fry the black bean paste in oil. This process helps remove the bitter and sour taste of the bean paste. Some are sold pre-fried, so check the directions on the package. But, it would never hurt to fry it again. 

In the past, and probably still the case at many restaurants, chunjang was fried in pork fat as a flavoring, so there’s your option if you want to try!

A little bit of sugar also helps balance out the bitterness, sourness, and saltiness of the black bean paste. 

Korean black bean paste

Meat and vegetables

Pork is the classic option for the meat, but you can substitute it with any chicken, beef, and/or seafood. You can, of course, use lean meat, but some pork fat will add lots of flavor to the sauce. 

For vegan jajangmyeon recipe, omit the meat, and use some mushrooms and/or fried tofu.

Typically, jajangmyeon includes lots of vegetables such as onion, green cabbage, zucchini, and potato. Onion and cabbage, especially, give the jajang sauce a delicious sweetness. I didn’t use potatoes in this recipe, but you can if you want. Carrots and green peas are also good options.

In this jajangmyeon recipe, I used good quality chicken stock to give the sauce extra flavor. I think it makes a big difference, but water is okay too.

Jajangmyeon noodles

Nothing is better than restaurants’ hand-pulled noodles, which are nicely thick and chewy. For home cooking, you can find ready-made fresh noodles in the refrigerator section of Korean markets, which are preferred. There are also frozen and dried noodles. These noodles are generally labeled for udon and jajangmyeon (우동 짜장면) or jungwhamyeon (중화면). 

Jajangmyeon noodles

Variations

  • Add some seafood such as shrimp and squid. You can throw them into the pan when the vegetables are almost cooked. 
  • If you like a spicy kick, add a little bit of gochujang (Korean red chili pepper paste) or gochugaru (red chili pepper flakes).
  • Serve the jajang sauce over cooked rice, a welcome change from the usual dish with noodles. In this case, the dish is called jajangbap (짜장밥). 

This recipe yields 3 to 4 servings, depending on your serving size. 

Korean black bean paste over rice

More warm noodle recipes

Jjapaguri with steak
Jjamppong (spicy seafood noodle soup)
Dak kalguksu (chicken noodle soup)
Janchiguksu (warm noodle soup) 

Have you tried this jajangmyeon recipe? Please rate the recipe below and leave a comment! Stay in touch by following me on YouTube, Pinterest, Twitter, Facebook, and Instagram.

Korean black bean noodles
Print

Jajangmyeon (noodles in a black bean sauce)

Jajangmyeon (noodles in a black bean sauce) is a popular Korean-Chinese dish. Learn how to make this restaurant favorite at home with this easy to follow recipe!
Course Main Course
Cuisine Korean
Keyword black bean noodles, black bean sauce, chunjang, jjajangmyeon, noodles, pork
Prep Time 20 minutes
Cook Time 20 minutes
Total Time 40 minutes
Servings 4
Author Hyosun

Ingredients

  • 3 to 4 servings fresh jajangmyeon/udon noodles (about 6 ounces per serving)

For the sauce

  • 5 tablespoons Chunjang (춘장), Korean black bean paste some may be labeled as jjajang (짜장)
  • 2 tablespoons cooking oil
  • 1 tablespoon sugar
  • 1 tablespoon oyster sauce - optional
  • 1 cup chicken stock or water You can add 1/2 cup more for more liquidy/watery sauce. See note.
  • 1 tablespoon potato or corn starch dissolved in 1/4 cup of chicken stock or water

Meat

  • 8 to 10 ounces pork (preferably with some visible fat, pork shoulder cut, Boston butt, etc.) or lean cut if preferred
  • 2 tablespoons cooking oil
  • 1 teaspoon grated ginger
  • 1 tablespoon soy sauce

Vegetables

  • 1 extra large onion (or 2 medium, 12 to 14 ounces) See note if adding potatoes
  • 8 ounces green cabbage
  • 8 ounces zucchini
  • 1 small cucumber for garnish - optional

Instructions

  • Have a pot of water ready to cook the noodles. Turn the heat on when you start cooking the meat. This way you will have the boiling water ready, for cooking the noodles, by the time the sauce is done.
  • Prepare the pork and vegetables by cutting them into 1/2 - 3/4 inch cubes. Marinate the pork with a tablespoon of rice wine (or mirin), ginger, salt and pepper while preparing the vegetables.
    jajangmyeon2
  • Add the black bean paste to a small saucepan with the oil, sugar, and the optional oyster sauce. Fry it over medium heat for 2 - 3 minutes, stirring constantly.
    Stir frying black bean paste
  • Heat a large pan with 2 tablespoons of cooking oil over medium high heat. Add the pork and ginger and stir fry until no longer pink, adding a tablespoon of soy sauce half way through. 
    Stir frying pork for jajangmyeon
  • Add the onion and cook until soft, stirring occasionally. 
    Stir-frying pork and onion for Korean black bean noodles
  • Add the cabbage and zucchini and continue to stir fry until vegetables are softened. 
    Stir-frying pork and vegetables for Korean black bean noodles
  • Stir in the black bean paste and mix everything together until all the meat and vegetables are coated well with the paste.
    Black bean sauce for jajangmyeon
  • Mix everything together until all the meat and vegetables are coated well with the paste. If you like ganjjajang, you can stop here and skip the next two steps. See note.
    Korean black bean noodle sauce
  • Pour in the stock (or water) and bring it to a boil. Cook for 3 to 4 minutes.
    Black bean sauce for jajangmyeon
  • Stir in the starch slurry and cook briefly until the sauce is thickened. Add more sugar to taste.
    Korean black bean noodle recipe
  • Add the noodles in the boiling water. Cook according to the package instructions and drain. Do not overcook. The noodles should have a firm bite to them (al dente). Place a serving size of noodles in each bowl. Spoon the sauce over the noodles and garnish with the optional cucumber matchsticks. Alternatively, you can serve over cooked rice. 
    Jajangmyeon noodles

Notes

1.If you're adding some potatoes, dice smaller than other vegetables, and add to the pan when the onions are added. Or you can briefly cook diced potatoes in the microwave because it takes longer to cook potatoes than the other vegetables. 
2. Ganjajang is a drier sauce made without the addition of any water or stock. Some people prefer it this way, but this will yield less servings. (See the body of this post for types of jajangmyeon.)
3. If you want your sauce to be more liquidy/watery, add an addition 1/2 cup of stock or water with a little more starch when you make starch slurry (about 1 teaspoon more). 

This jajangmyeon recipe was originally posted in May 2011. I’ve updated it here with new photos, more information, and some changes to the recipe. 

The post Jajangmyeon (Noodles in Black Bean Sauce) appeared first on Korean Bapsang.

Ssamjang (Sauce for Korean Lettuce Wraps)

$
0
0

Ssamjang is a Korean sauce for lettuce wraps. Learn how to make a basic ssam sauce and a variation made with canned tuna.

Sauce for Korean lettuce wraps

What is ssamjang?

Ssamjang (쌈장) is best known as a dipping sauce that accompanies lettuce wraps for Korean BBQ. In food terms, ssam (쌈) means wraps or wrapped food, and jang (장) is a collective term for Korean fermented condiments, such as doenjang, gochujang and ganjang.

Technically, ssamjang is any sauce that’s used for ssam. While there are many different types, it’s typically made with doenjang and/or gochujang as well as some other ingredients. The mixture is primarily used at the table as a sauce for vegetable wraps or as a dipping sauce for fresh vegetables such as cucumbers, carrots, and chili peppers.

Ssamjang (Korean dipping sauce)

What is ssam?

As mentioned above, ssam refers to wraps or wrapped food. It’s a huge part of Korean food culture. We eat ssam all the time with or without BBQ meat. Historically, Koreans associated wrapped food with good fortune, and there are many different types of wrapped food. This type of sauce is typically used for vegetable wraps, which encompass all kinds of fresh and steamed/blanched vegetables.

Although lettuce varieties (sangchu, 상추) are most common, there an infinite number of vegetables Koreans use for ssam, sometimes depending on the regions. Perilla leaves, bean leaves, zucchini leaves, cabbages, and fresh sea vegetables (such as miyeok or dashima) are some of the common ones.

Growing up, steamed zucchini leaves (hobaknnip, 호박잎) were my summer favorite. My mother used to throw some in to the pot she was cooking rice in with the last couple of minutes remaining. My family also loves steamed/blanched green cabbages as wraps.

Wrapping rice and sauce in a cabbage leaf

Often, we simply enjoy ssam with a spoonful of rice in it with a dollop of ssamjang. However, there’s no limit to what goes into a wrap. In addition to all the meat options, ssam is also delicious with braised fish, grilled fish, raw fish, canned fish, tofu, and so on.

Usually each person makes his/her own wraps at the table. You can also serve pre-wrapped ssambap by making ssam rolls with some rice and ssamjang in them.

Ssambap recipe

Types of ssamjang

You can purchase pre-made ssamjang at Korean markets, usually stocked side by side with doenjang and gochujang. However, I’d recommend you spend your money on doenjang and guchujang, with which you can easily make fresh ssamjang any time and make many other Korean dishes.

As with most Korean dishes, there are probably as many ssamjang recipes as the number of Korean cooks. However, there are largely two types. The first type is made simply by mixing the ingredients, while the other type involves cooking the ingredients together.

Ssamjang recipe

How to make ssamjang 

The most basic ssamjang is doenjang or gochujang itself. Commonly, ssamjang is a mixture of doenjang and gochujang. The ratio of the two is totally a matter of preference, but it’s usually more doenjang than gochujang. For a good balance of umami and heat, I generally use the ratio of 2:1.

What’s added to the mixture is wide open to the cooks as well.

For a quick version, I simply add sesame oil, sesame seeds, and some minced garlic, and mix with a bit of water or rice wine (or mirin) to thin it. Sometimes, I use a soft drink instead, if available.

If you want to go one step further, add finely chopped scallions, onion and/or chilli peppers. A little bit of sugar, oligodang, or honey is also nice to balance out the saltiness of doenjang and gochujang.

Sometimes, I also mix in finely chopped nuts, such as almonds, walnuts, peanuts, and/or pine nuts. The addition of nuts gives ssamjang a nice nutty flavor while adding a crunchy texture. 

Korean sauce recipe for lettuce wraps

How to make cooked ssamjang

Cooked ssamjang is also very popular in Korea. It’s a great way to put in protein and/or other vegetables to make the sauce more substantial and delicious. Plus, the resulting sauce tastes less salty, so you can use more for each wrap or dip. 

To make it, you basically cook aromatic vegetables such as garlic, onion, and scallions as well as your choice of protein and/or other vegetables such as mushrooms, zucchini, etc. Then, stir in doenjang and gochujang. Canned tuna (chamchi 참치) and ground meat are popular protein choices. For vegan options, try tofu and/or mushrooms. 

I’m showing both no-cook and cooked ssamjang recipes here and how you can vary each type. 

Tuna ssamjang recipe

Have you tried this ssamjang recipe? Please rate the recipe below and leave a comment! Stay in touch by following me on YouTubePinterestTwitterFacebook, and Instagram.

Ssamjang recipe
Print

Ssamjang (Sauce for Korean Lettuce Wraps)

Ssamjang is a Korean sauce for lettuce wraps. Learn how to make a basic ssam sauce and a variation made with canned tuna.
Course sauce, Side Dish
Cuisine Korean
Keyword Korean dipping sauce, Ssam, Ssamjang
Prep Time 10 minutes
Cook Time 10 minutes
Servings 4
Author Hyosun

Ingredients

For basic ssamjang (no-cook)

  • 2 tablespoons doenjang 된장 (Korean fermented soy bean paste)
  • 1 tablespoon gochujang 고추장 (Korean red chili pepper paste)
  • 1 teaspoon minced garlic
  • 1/2 tablespoon sugar (or honey or oligodang) or to taste
  • 2 teaspoons sesame oil
  • 1 teaspoon sesame seeds
  • 1 tablespoon water or rice wine to thin the sauce or use more for a desired thickness

Optional ingredients for no-cook ssamjang (use any or all of the listed ingredients)

  • 1 tablespoon finely chopped onion
  • 1 tablespoon finely chopped scallion
  • 1/2 tablespoon finely chopped green chili pepper
  • 1/2 tablespoon finely chopped red chili pepper
  • 2 tablespoons chopped nuts (almonds, walnuts, peanuts, etc.)

For Tuna Ssamjang

  • 1 can tuna (about 5 ounces) See note for other options
  • 2 tablespoons finely chopped onion
  • 2 tablespoons finely chopped scallion
  • 2 teaspoons minced garlic
  • 2 tablespoons doenjang 된장 (Korean fermented soy bean paste)
  • 1 tablespoon gochujang 고추장 (Korean red chili pepper paste)
  • 1 tablespoon sugar (or honey or oligodang)
  • 1 tablespoon sesame oil
  • 2 teaspoons sesame seeds
  • 1 tablespoon cooking oil

Instructions

For basic ssamjang

  • Combine all the ingredients and mix well until everything is well incorporated.
    easy Korean ssam sauce recipe
  • If using optional ingredients, prepare the ingredients, combine and mix everything well.
    Korean ssamjang recipe

For tuna ssamjang

  • Preheat a small pan with a tablespoon of oil. Add the onion, scallion and garlic and stir fry until the onion is cooked.
    tuna ssamjang recipe
  • Add the tuna, doenjang, gochujang and the remaining ingredients. Stir well for a few minutes until everything is well incorporated. You can stir in some water or rice wine (or mirin) if the sauce seems dry (2 to 3 tablespoons).
    tuna ssamgjang recipe

Notes

You can add other canned fish. Also, substitute tuna with ground meat or crushed tofu. 

The post Ssamjang (Sauce for Korean Lettuce Wraps) appeared first on Korean Bapsang.

Patbingsu (Shaved ice with Sweet Red Beans)

$
0
0

Bingsu is a Korean shaved ice treat. You can easily make a quick version with canned red beans, but the sweet red beans are easy to make at home. Either way, it will certainly cool you body down on hot summer days. 

Korean shaved ice dessert with sweetened red beans

Nothing says summer more than bingsu (빙수) in Korea! It’s a shaved ice dessert with various sweet toppings. While there are infinite variations, one topping that’s in most  of the variations is sweetened red beans, called pat (팥). Whether you choose store-bought sweetened red beans or homemade from scratch, patbingsu (팥빙수) is a delicious summer treat!

In Korea, many popular patbingsu places make their bingsu simply with pat (red beans) and tteok (떡, rice cake). That’s exactly how I like it, but feel free to load it up! Try it with your favorite fruits, ice cream, cookies, and/or anything else you want. Green tea powder, roasted grain powder (misugaru, 미수가루), and nuts are also popular. 

Hope you make some bingsu at home this summer. Indulge in it and feel your whole body cool down on a hot summer day!  

Shaved ice with green tea ice cream

How to make patbingsu

Making patbingsu at home is pretty easy if you have an electric ice shaver. It’s relatively inexpensive. Imagine having bingsu anytime you want on hot summer days without traveling to Korea or not having to pay $12 for it if you have a place near you.

As an alternative, use a blender or a food processor if it has an ice shaving or crunching blade.

Regular ice is typical, but in Korea, shaved ice milk has become popular in recent years. Simply, freeze some milk and shave it. 

For a quick and easy version, you can use pre-made, canned sweetened red beans. However, nothing beats homemade red beans that are made with good quality beans and sweetened to your taste. 

Patbingsu recipe

Sweetened red beans (pat) 

The most important ingredient in patbingsu is obviously the pat, the red bean topping. These red beans, aka adzuki beans, are tiny and have a white ridge on one side. You can find dried red beans at Korean/Asian markets.

Cooking the red beans is easy, but it takes time as they need to be slow cooked. Soaking the beans is not necessary. The cooked beans should be soft, mostly intact, and moderately sweet.

I usually cook one pound (about 2 cups) at a time. It may seem like a lot, but when you spend time cooking them. you might as well make enough to have bingsu a few times.  Or, puree the leftover (or pass it through a sieve) and make danpatjuk (단팥죽), sweet red bean porridge – another popular sweet treat in Korea.

How to cook adzuki beans in the Instant Pot

If you have an Instant Pot or any other pressure cooker, it’s much faster. To cook the red beans in the Instant Pot, bring the beans to a boil with 4 cups of water on the Sauté  function and continue to boil 5 minutes. Drain off the water, and add 6 cups of fresh water. Cook on Manual High Pressure for 20 minutes. Release after 10 min. Add the salt, sugar, and honey and cook on Sauté for 3 to 4 minutes, gently stirring. Cool before using. 

Sweet rice cake (injeolmi) 

Patbingsu is usually topped with injeolmi (인절미), a type of rice cake (tteok) made with sweet rice powder. Fresh injeolmi from your Korean market will be great for bingsu. Some Korean markets also carry frozen rice cake pieces made for bingsu.

However, you can try making a simple version with sweet rice powder (chapssalgaru, 찹쌀가루) in the microwave as I’m showing here. 

You can dust the rice cake pieces with corn starch or roasted soybean powder (konggaru, 콩가루) Koreans make injeolmi with. Sweet rice cake is sticky, so the powder makes it easier to handle, but not necessary. Just wet everything — your hand, rice cake, knife, cutting board, etc — with water to deal with the stickiness. 

Other ingredients

Typically, bingsu is drizzled with sweet condensed milk as a flavoring, but you can leave it out if you want, or use regular milk instead. You can make homemade condensed milk by simmering the milk (2 cups) with some sugar (1/4 cup or to taste) over medium low heat for 20 to 30 minutes or until it’s reduced by half. Stir frequently while simmering.

Green tea powder, roasted grain powder (misugaru, 미수가루), chopped or sliced nuts, and cookies are all very popular toppings. You can find misugaru at Korean markets. It’s a healthy, multi-grain powder that we dissolve in water or milk to drink.

Have you tried this patbingsu recipe? Please rate the recipe below and leave a comment! Stay in touch by following me on YouTubePinterestTwitterFacebook, and Instagram.

Patbingsu recipe
Print

Patbingsu (Shaved Ice with Sweet Red Beans)

Bingsu is a Korean shaved ice treat. You can easily make a quick version with canned red beans, but the sweet red beans are easy to make at home. Either way, it will certainly cool you body down on hot summer days. 
Author Hyosun

Ingredients

For patbingsu (per serving)

  • 1 bowl shaved ice or milk ice
  • 2 or 3 tablespoons sweetened red beans (pat, 팥), aka adzuki beans canned or from scratch
  • 2 tablespoons condensed milk
  • a few sweet rice cake pieces (injeolmi, 인절미), aka mochi store-bought or from scratch

Optional toppings

  • Fruits, nuts, green tea ice cream, cookies, misugaru, green tea poweer, etc.

For the red beans

  • 1 pound dried pat (팥, aka adzuki beans) about 2 cups
  • 1/2 teaspoon salt
  • 1/3 cup of sugar adjust to taste
  • 1/3 cup of honey

For the rice cake

  • 1 cup sweet rice powder (chapssal garu, 찹쌀가루)
  • 2 tablespoons sugar
  • 1/4 teaspoon salt
  • 3/4 cup water
  • 2 tablespoons corn starch or roasted soybean powder for dusting - optional You can wet everything with water so rice cake won't stick instead.

Instructions

Assembling bingsu:

  • Before shaving the ice, make sure all the ingredients are cold. It also helps if you keep the serving bowls in the freezer for 10 minutes. Shave the ice in an ice shaver or in a blender or food processor.
    shaved ice dessert
  • Add 2 to 3 tablespoons of the red beans. Drizzle with a tablespoon or two of condensed milk. Top it with a few rice cake pieces and your favorite fruit pieces, ice cream, and/or any other desired toppings.
    Shaved ice dessert with sweetened red beans

For the red beans:

  • Discard broken or rotten beans and rinse the beans. In a large pot, add the beans with 4 cups of water. Bring it to a boil, uncovered, over medium high heat. Reduce the heat to medium and boil for 5 minutes.
    Azuki beans
  • Drain the beans.
    adzuki beans
  • Return the beans to the pot with 8 cups of fresh water. Bring it to a boil. Cover, and simmer over medium low heat for about 1 hour, until the beans are nicely soft. Gently stir occasionally to make sure the beans are not sticking at the bottom. Add more water if needed.
    cooking azuki beans
  • Gently stir in the salt, sugar and honey. Continue to simmer, uncovered this time, for about 10 minutes, gently stirring occasionally. Add more water if necessary. The beans should be liquidy. Most of the liquid will be soaked up by the beans even after being cooked.
    sweetened azuki beans
  • Transfer to a container and cool. Keep it in the fridge up to a week, or in the freezer for a few weeks. Thin it with cold water, if you want, when ready to use it again.

For the rice cake:

  • Combine the sweet rice powder, sugar and salt. Mix well with a whisk.
    sweet rice cake
  • Add water and mix well again.
    Microwave sweet rice cake
  • Cover with ceramic wrap. Microwave for 2 minutes. Carefully open and flip the rice cake upside down and mix a couple of times. Microwave for another minute and check if the rice powder is entirely translucent. Microwave a little more (30 seconds) if needed.
    Sweet rice cake made in microwave
  • Remove from the microwave and let it sit for 5 minutes. Knead well with a wooden spoon for 2 to 3 minutes for a chewier rice cake.
    Sweet rice cake
  • You can wet your hand and the cutting board, and turn the rice cake out on a wet cutting board. OR: Dust the cutting board with a tablespoon of cornstarch or roasted soybean powder. Flatten it with your hands into a rectangle.
    microwave sweet rice cake
  • Cut into 1/2 to 3/4- inch strips. Wet the knife with water. Cut each strip into 3/4 inch cubes. Lightly dust the cut parts of the rice cake pieces with the cornstarch to prevent from sticking, if desired. You can freeze leftover rice cakes.
    cutting sweet rice cake

Notes

To cook azuki beans in the Instant Pot, boil the beans with 4 cups of water on the Saute function for 5 min after coming to a boil. Drain off the water, and add 6 cups of fresh water. Cook on Manual High for 20 minutes. Release after 10 min. Add the salt, sugar, and honey and cook on Saute for 3 to 4 minutes, gently stirring. 

This recipe was originally posted in July 2011. Here, I have updated it with new photos, more information and improvements to the recipe. 

The post Patbingsu (Shaved ice with Sweet Red Beans) appeared first on Korean Bapsang.


Jangajji (Vegetable Pickles)

$
0
0

Vegetable pickles made with a simple brine with 3 ingredients — soy sauce, vinegar and sugar! These Korean pickles are quick, delicious and crunchy!

Korean soy sauce pickles

Salty, sweet, tangy and crunchy Korean pickles, anyone? Pickling is a food preservation process, and different cultures have different techniques and flavorings. In Korea, vegetables pickled in soy sauce are highly popular. You can use this simple brine with 3 ingredients — soy sauce, vinegar and sugar — for quick pickling of any vegetables! 

These pickles go very well with any Korean meal, especially with grilled meat dishes. They will wake up your appetite and brighten your meal. 

Collectively called jangajji (장아찌), Korea has a wide variety of pickles. Some are pickled in soy sauce, and some are pickled in doenjang (Korean fermented soybean paste) or gochujang (Korean red chili pepper paste). 

In the old days, the salt content for pickling was very high for a long shelf life. With the invention of refrigeration and availability of vegetables all year round, that’s no longer necessary. We now simply enjoy pickles for their appetizing savory taste.

This mild soy sauce pickling is similar to “quick pickling” or “refrigerator pickling” in America. No canning required! And it’s meant to be kept in the fridge. You can start eating them the next day or so, but they will get better with a few days in the brine.

In case you wonder, these pickles are not fermented because of the vinegar in the solution. For fermented Korean traditional cucumber pickles, see my oiji recipe. 

Korean pickles

How to make a brine for Korean pickles

Easy peasy! 

  1. Clean and cut vegetables into bite size pieces any way you want. Pack them in jars.
  2. Add water, soy sauce, and sugar to a pot, and bring it to a boil.
  3. Add vinegar.
  4. Pour the hot brine over the vegetables.
  5. Cool, close the lid, leave it out a day or two, and refrigerate. 

No, the hot brine will not cook the vegetables, but shocking them with hot water will help create crunch on the outside.

Soy sauce brine for pickling

The ratio of water, soy sauce, sugar and vinegar is a matter of preference. I’ve used the same ratio I’m sharing here for many years, and it’s exactly how I like it. Not that salty, not too sweet, and not too vinegary! So, here’s my golden ratio:

Water Soy Sauce Sugar Vinegar
2 cups 1 cup 1/2 cup 1/2 cup

If you want saltier, sweeter or more vinegary pickles, simply adjust any of the three ingredients to taste, keeping the water amount the same. The additional liquids will also yield more brine so you’ll need more veggies. 

This recipe yields enough brine to pickle vegetables packed in two 32-oz jars and maybe a little more depending on how packed your vegetables are in the jars. Don’t worry about finding 32-oz jars. You can use smaller jars or even Pyrex containers. Remember we’re not canning for these quick pickles. 

Korean pickle recipe

If you want to add more flavor, add a small piece of dashima (dried kelp) to the brine before boiling. Or, use vegetable broth instead of water. 

I know some of you wonder which sugar and/or vinegar to use. Any sugar and any clear vinegar are fine. However, remember the acidity level of vinegar varies widely depending on the type. 

Which vegetables to pickle

As you can see from the photos, I pickle quite a few different vegetables using the same brine. The only thing I’d do differently is pickled garlic for which I use a 2-step process. 

This recipe calls for cucumbers, onions and jalapenos, but those are simply guidelines. You can pickle only one of these vegetables if you want, or use entirely different vegetables.

Depending on the season, my other favorites are Korean radish, Chayote, maneuljjon (garlic scapes), kkaennip (perilla leaves), and ramps. 

Chayote, which is not a common vegetable in Korea, is a brilliant find by some Koreans in America for pickling. I first tried chayote jangajji at a Korean restaurant many years ago. Its taste, as well as the texture, is somewhere between cucumber and white radish, which is great for incredibly crispy pickles. 

Korean pickled perilla leaves

How long will these Korean pickles keep?

Again, these pickles are made to be kept in the fridge. Don’t worry even if you forgot to put in the fridge right away. They are fine at room temperature for 2 to 3 days. The salt level, vinegar and even sugar keep them from any harmful bacteria to grow during that time. 

These pickles will keep well for up to 4 weeks in the fridge. 

To keep it longer, you can pour out the brine into a pot and boil it for a few minutes. You can do this after 3 or 4 days of pickling at which time the vegetables have released their water content and diluted the brine. This time, cool it, pour back over the pickles, and return to the fridge.

Cucumber pickles

What to do with leftover soy sauce brine

The vegetable infused soy brine is delicious. You can use it as a dipping sauce or use it in cooking or marinating. Just remember it’s been diluted and contains vinegar. Better yet, you can add more soy sauce, sugar and vinegar, boil, and make more pickles. 

More Pickle Recipes

Oiji (Cucumber pickles)
Maneul jangajji (picked garlic)

Cucumber pickles in soy sauce

Have you tried this Korean pickles recipe? Please rate the recipe below and leave a comment! Stay in touch by following me on YouTubePinterestTwitterFacebook, and Instagram.

Cucumber pickles in soy sauce
Print

Jangajji (Vegetable Pickles)

You can pickle just about any vegetables with this simple brine with 3 ingredients -- soy sauce, vinegar and sugar! Quick, delicious and crunchy!
Course Side Dish
Cuisine Asian, Korean
Keyword cucumbers, green onion, jangajji, Pickles, Pickling, soy sauce, vinegar
Prep Time 10 minutes
Cook Time 10 minutes
Author Hyosun

Ingredients

For 2 32-oz jars

  • 2 pounds cucumbers (Kirby pickling cucumbers, Korean cucumbers) or any other vegetables of choice
  • 1 medium onion
  • 4 to 5 green chili peppers or jalapenos

For the brine

  • 1 cup soy sauce
  • 1/2 cup sugar
  • 1/2 cup vinegar (any clear type such as rice vinegar, white vinegar, etc.)

Instructions

  • Clean and cut the vegetables into bite size pieces, any way you want.
    vegetables for pickling
  • Pack the vegetables in jars or glass containers.
    Cucumber pickles in soy sauce
  • Add 2 cups of water to a small pot along with 1 cup of soy sauce and 1/2 cup of sugar. Bring it to a boil, and gently boil for 2 to 3 minutes over medium heat, until the sugar is dissolved. Turn the heat off, and pour in 1/2 cup of vinegar. Adjust to taste if necessary.
    Pickling brine
  • Pour the hot brine over the vegetables. If the vegetables are tightly packed in the jar, you don't need to weigh it down. However, make sure all the vegetables are submerged in the brine.
    Quick pickling in soy sauce
  • Close tightly with a lid, and leave it out at room temperature for a day or 2. Then refrigerate. The pickles can be eaten the next day or so of pickling, but they will taste better as they mature.
  • Optional: To keep the pickles longer, you can pour out the brine into a pot and boil it for a few minutes. You can do this after 3 or 4 days of pickling at which time the vegetables have released their water content and diluted the brine. This time, cool it and pour back over the pickles before refrigerating.

The post Jangajji (Vegetable Pickles) appeared first on Korean Bapsang.

Gochujang Jjigae (Gochujang Stew with Zucchini)

$
0
0
Gochujang adds lots of spicy, robust flavors to this simple stew made with summer zucchini and potatoes. You’ll love it is you like Korean stews.
 
Korean stew made with zucchini and gochujang
This gochujang jjigae (고추장 찌개) with zucchini is especially popular in summer when zucchinis are abundant and tasty. It’s a family favorite! If you like rich and flavor packed Korean stews (jjigae), such as soondubu jjigae, kimchi jjigae and doenjang jjigae, you should add this gochujang stew to your repertoire.

Gochujang (fermented red chili pepper paste) is a condiment that’s spicy, savory, slightly sweet, and salty. It adds lots of spicy, robust flavors to this simple stew which is made with a few ingredients such as zucchini and potatoes. 
 
You can totally make this stew simply with gochujang, but I like to add a bit of doenjang to add another layer of savory taste. 
 
Korean gochujang stew
 

Variations for gochujang jjigae

For vegetables, zucchini and potatoes are typical for this stew. I also like to add chilli peppers and scallions. Other vegetables such as onions, mushrooms, or Korean radishes (mu) are all great additions to this stew. 

In terms of protein, I use clams when I want a clean, refreshing taste of the stew. Other times, we also love pork for a rich, meaty stew. Both very delicious different ways! Canned tuna works well too for this stew. 

If using pork (or beef), preheat the pot with a little bit of oil. Sauté the meat, gochujang and doenjang over medium heat for 3 to 4 minutes until the meat is almost cooked. You can add a little bit of water to prevent gochujang and doenjang from burning.

To make it vegan, simply omit the seafood/meat option. The addition of tofu and mushrooms will be great for a vegan stew. You can use vegetable broth instead of water for extra flavor. 

Korean gochujang stew with zucchini and potato
 
As with doenjang jjigae, I use the water used to rinse rice (ssalddeumul, 쌀뜨물) as the stew base. The rice water adds starch to the stew and works as a binding agent between the gochujang and the broth while enhancing the flavor. 
 
Of course, you can use vegetable broth or anchovy broth if you like. 
 
Korean stew made with gochujang and zucchini
 
Have you tried this gochujang jjigae recipe? Please rate the recipe below and leave a comment! Stay in touch by following me on YouTubePinterestTwitterFacebook, and Instagram. 
Korean gochujang stew
Print

Hobak Gochujang Jjigae (Korean Spicy Zucchini Stew)

Korean spicy stew made with gochujang and summer zucchini!
Course Main
Cuisine Korean
Keyword gochujang jjigae, gochujang stew, Korean stew, potatoes, zucchini
Prep Time 15 minutes
Cook Time 10 minutes
Servings 2
Author Hyosun

Ingredients

  • 1 medium zucchini - about 10 ounces
  • 1 medium potato (2 small) - about 8 ounces
  • 1 or 2 scallions
  • 1 - 2 green or red chili peppers
  • 1 teaspoon minced garlic
  • 3 ounces clam meat (fresh or canned) or pork (see note 1 if using meat)
  • 1.5 tablespoons gochujang (Korean red chili pepper paste)
  • 1/2 tablespoon Doenjang (Korean soybean paste) or more gochujang
  • 2 cups water or water used to rinse rice (ssalddeummul), water - see note 2. vegetable broth or anchovy broth is good too

Instructions

  • Cut the zucchini and potatoes into about 1/2-inch thick bite size pieces. Roughly chop the scallion. Thinly slice the peppers.
  • If using meat, see note 1 below. Otherwise, add 2 cups of water to a pot along with the red chili pepper paste and soybean paste. Stir well to dissolve. Bring it to a boil.
  • Drop the potatoes in and bring it to a boil again. Continue to boil for a minute or two. Then add the zucchini, clam meat (unless using meat), garlic, chili peppers and scallions.
  • Cook until the potatoes and zucchini turn soft. Serve hot with a bowl of rice.

Notes

  1. If using pork (or beef), preheat the pot with a little bit of oil. Sauté the meat, gochujang and doenjang over medium heat for 3 to 4 minutes until the meat is almost cooked. You can add a little bit of water to prevent gochujang and doenjang from burning. Then, add water (or broth) and follow the rest of the recipe.
  2. The water used to rinse rice is commonly used in Korean stews and soups. If using, save the water from the second round of rinsing.
This recipe was originally posted in October 2012. Here, I have updated it with new photos, more information and improvements to the recipe. 

The post Gochujang Jjigae (Gochujang Stew with Zucchini) appeared first on Korean Bapsang.

Hobak Bokkeum (Stir-fried Zucchini)

$
0
0
A simple Korean side dish you can make with abundant summer zucchinis!  It’s also great in bibimbpap.
Stir-fried zucchini side dish
 
This stir-fried zucchini is one of my favorite summer side dishes (banchan, 반찬)! It’s delicious with summer zucchinis and goes well with any Korean meal, especially meat dishes such as bulgogi, galbi, or jeyuk bokkeum or in bibimbap.

My preference is to make this dish with Korean zucchinis called aehobak (애호박), meaning young squash, if available. Aehobak has the shape of regular zucchini, but with a lighter green color, thinner skin, and more delicate yellowish flesh. There are also round shaped varieties of aehobak. These are available in summer months around here. 
 
However, you can make this dish with any zucchini varieties, such as grey zucchini, black beauty, etc.
 
Korean zucchini
 
This dish can be vegan if you use salt or soup soy sauce (gukganjang) to season. However, the classic seasoning for this Korean side dish is saeujeot (or saewujeot, 새우젓), which is salted and fermented tiny shrimp. It adds a delicious savory flavor to the zucchini. Fish sauce works as well. 
 
Stir-fried zucchini side dish
 
Saeujeot is a staple ingredient most commonly used in kimchi but its distinct savory flavor works wonderfully as a seasoning for various other dishes such as gyeran jjim (steamed egg), sundubu jjigae (soft tofu jjigae), kongnamul guk (soybean sprout soup) and bossam (boiled pork). If you have leftover saeujeot from making kimchi, keep it in the freezer in a freezer bag. It won’t freeze because of the high level of salt content, but will keep well for a long time.  
 
You can keep this zucchini side dish in the fridge up to 4 days.

More zucchini recipes

Hobak buchim
Gochujang stew with zucchini
Hobak madu (zucchini dumplings)

Korean zucchini side dish
 
Have you tried this stir-fried zucchini recipe? Please rate the recipe below and leave a comment! Stay in touch by following me on YouTubePinterestTwitterFacebook, and Instagram. 
DSC2558 2 150x150 - Hobak Bokkeum (Stir-fried Zucchini)
Print

Hobak bokkeum

A simple stir-fried zucchini side dish
Course Side Dish
Cuisine Korean
Keyword banchan, stir-fried, stir-fry, zucchini
Servings 2
Author Hyosun

Ingredients

  • 1 medium zucchini (about 10 - 12 ounces)
  • 2 teaspoons saeujeot (salted shrimp) or salt to taste or fish sauce
  • 1 teaspoon minced garlic cloves
  • 1 scallion finely chopped
  • 1 teaspoon sesame oil
  • 1 teaspoon sesame seeds (preferably crushed)

Instructions

  • Cut the zucchini in half lengthwise (I cut mine into quarters because mine was round). Then cut crosswise into 1/4-inch thick slices.
    stir-frying zucchini
  • You can use saeujeot as is or finely chopped. This is very salty, so use 2 teaspoons first and add more if needed.
    Salted shrimp
  • Heat a pan with the oil over medium high heat. Add the zucchini, garlic and saeujeot (or salt or fish sauce) to the pan. Cook for 2 to 3 minutes, stirring well. Add 2 tablespoons of water to the pan while stir frying. You can add another spoon or two of water if the pan is dry.
    stir-fried zucchini
  • Add the scallion, sesame oil and sesame seeds. Continue to cook until the zucchini is softened and turns translucent, about 2 to 3 minutes. Do not overcook. Taste and add more salted shrimp or salt if necessary.
    stir-fried zucchini

This recipe was originally posted in July 2011. Here, I have updated it with new photos, more information and improvements to the recipe.

The post Hobak Bokkeum (Stir-fried Zucchini) appeared first on Korean Bapsang.

Gamja Jorim (Korean Braised Potatoes)

$
0
0

Gamja jorim is an easy Korean side dish made with potatoes and a few basic ingredients!
Korean braised potato side dish

What is gamja jorim?

Gamja jorim (감자조림) is a braised potato dish. It’s a popular side dish at home and restaurants and for home-packed lunch boxes. Jorim refers to dishes made by simmering the main ingredient in a sauce until the sauce is reduced. This dish involves short braising in a slightly sweet, soy sauce-based sauce. It’s a filling, inexpensive dish we all grew up on.

I originally posted this recipe in 2009 after spending a couple of weeks on vacation in Berlin visiting my son who was taking a summer program there. After several days eating German food, we felt it would be a nice change to have a home-cooked Korean meal. I had made a quick version of green cabbage kimchi a couple of days before. We cooked some rice and needed some other banchan (side dish), so I made this braised potatoes.

It was delicious even without all the conventional ingredients. After this memorable meal thousands of miles away from home, my daughter asked me to write my recipe for gamja jorim. 

Korean soy braised potatoes

Which potatoes to use 

Any variety of potatoes works for this dish. However, less starch ones such as white or Yukon gold hold up their shape better. Red, fingerling, and new potatoes are all good for this dish. You can leave the skins on if you want. If using starchy potatoes such as Russet potatoes, rinse and soak them in water for a few minutes after cutting them into cubes. This process removes some starch. 

I also find the cooking time varies quite a bit depending on the potatoes. So, watch it not to overcook the potatoes. 

Variations

Gamja jorim can be made simply with just potatoes. I typically use a carrot, onion, and some green pepper or chili peppers for colors. You can use other vegetables of your choice such as red/orange bell pepper, scallions, and mushrooms. I sometimes, also throw in a few whole garlic cloves. 

For the seasonings, you can also add some gochujang (Korean red chili pepper paste) and/or gochugaru (Korean red chili pepper flakes) if you like to add a little heat to the dish. Simply swap out 1 tablespoon of soy sauce with 1 tablespoon of gochujang. You can add gochugaru to your taste without altering the recipe. 

Korean braised potato side dish

More potato recipes

Gamjajeon (potato pancakes)
Gamjaguk (potato soup)
Gamjatang (spicy pork bone stew)

Gamja jorim (Soy braised potatoes)

Have you tried this gamja jorim? Please rate the recipe below and leave a comment! Stay in touch by following me on YouTubePinterestTwitterFacebook, and Instagram. 

Korean soy braised potatoes
Print

Gamja Jorim (Braised Potatoes)

Easy Korean side dish made with potatoes and a few basic ingredients! 
Course Side Dish
Cuisine Korean
Keyword banchan, braised, gamja, potatoes, side dish, soy sauce
Prep Time 10 minutes
Cook Time 15 minutes
Total Time 30 minutes
Servings 4
Author Hyosun

Ingredients

  • 1.5 pounds potatoes (about 3 medium size)
  • 1 carrot (about 3 ounces) See note 1
  • 2 to 3 green chili peppers (or 1/2 green bell pepper)
  • 1/4 medium onion
  • 1 tablespoon cooking oil

Braising liquid:

  • 3 tablespoons soy sauce (or 2 T soy sauce and 1 T gochujang) See note 2
  • 1 tablespoon sugar
  • 1 tablespoon rice wine (or mirin) You can omit it if unavailable
  • 1 tablespoon corn syrup (or oilgodang) Or use 1 tablespoon more sugar
  • 1 teaspoon  minced garlic
  • pinch black pepper
  • 3/4 cup water
  • 1 teaspoon sesame oil
  • 1/2 teaspoon roasted sesame seeds

Instructions

  • Peel and cut potatoes into about 1-inch cubes. Cut the carrot, peppers, and onion into big chunks.
    Korean braised potato side dish
  • In a small bowl, combine all the braising liquid ingredients except the sesame oil and seeds. Stir well.
    Sauce for Korean braised potato
  • In a non-stick pan (or a small pot), sauté the potatoes in cooking oil over medium heat for 4 - 5 minutes, stirring occasionally so the potatoes don't stick to the pan.
    Korean braised potatoes
  • Add the sauce mix and bring it to a boil over high heat. Drop the carrot pieces in. Cover, and reduce the heat to medium and cook until the potatoes are almost cooked through (about 5 to 6 minutes, depending on the type or size of potatoes). The potatoes should be firm and not mushy.
    Korean braised potatoes
  • Stir in the green peppers and onion, and continue to boil (uncover this time) until the sauce is reduced and slightly thickened, about 3 minutes. The potatoes will continue to soak up the sauce even after being cooked. Stir in the sesame oil and sprinkle with sesame seeds.
    Korean soy braised potato

Notes

1. This dish can be made simply with just potatoes. The other vegetables in this recipe are only guidelines. You can use other vegetables of your choice such as red/orange bell pepper, scallions, garlic cloves, and mushrooms. 
2. If using gochugaru (Korean chili pepper flakes) to add a spicy kick, you don't need to change anything in the recipe. Try 1 to 3 teaspoons to your taste.

This recipe was originally posted in November 2009. Here, I have updated it with new photos, more information and improvements to the recipe.

The post Gamja Jorim (Korean Braised Potatoes) appeared first on Korean Bapsang.

Korean BBQ Pork Ribs

$
0
0

Tender, moist and flavorful Korean BBQ pork ribs! Choose from two different marinades –sweet and savory or spicy. 

Korean BBQ pork ribs

These Korean marinated baby back ribs are tender, moist, and flavorful! You can choose from two different marinades –  sweet and savory or spicy.

The ribs are first slow cooked in the oven and finished off under the broiler or on the grill until lightly caramelized and charred. If you love tender, delicious pork ribs, you’ll love this recipe! It’ll certainly be a nice change from the usual fare — with a dry rub and BBQ sauce. 

In Korea, grilled pork ribs are very popular at restaurants where the ribs are partially grilled in the kitchen and finished off at the table on a wood charcoal (sootbul) grill. At home, I like this easy oven method and then either broil or grill to give them a nice char and delicious smoky flavor. 

Korean style back ribs

How to prepare baby back ribs

I love to cook with back baby back ribs (aka pork loin ribs or back ribs). They are tender, lean, and meaty. I usually buy mine at Costco. Their ribs are well trimmed with the membrane (thin tough white/silver skin on the bone side) already removed. So not much prep work on my part.

If the ribs still have the membranes, you will need to remove them for the marinade to penetrate better. Insert a paring knife under the membrane to carefully loosen it, then slowly pull it by hand away from the bones.

Korean marinades

Each marinade is for 2 whole slabs (about 5 to 7 pounds total), which can easily be halved or doubled. 

Sweet and savory: This marinade is similar to the beef galbi marinade. However, for pork ribs, I use much more ginger than that of the galbi marinade. 

Spicy: The spicy version is the classic spicy pork marinade similar to that used in jeyuk bokkeum. It is slightly sweet with a lot of kick. You can increase the heat level by adding more gochugaru without altering the other ingredients. 

In either case, the secret to tasty Korean pork ribs is to use lots of fresh garlic and ginger. 

For best results, marinate the ribs overnight or longer (24 to 48 hours if you have time).

Korean spicy pork ribs

How to cook the baby back ribs

Slow cook the ribs in the oven, covered, at a low temperature with some marinade in the baking sheet/dish. This method gives the ribs a steaming effect, keeping the ribs moist while being cooked.

1. Preheat the oven to 325.
2. Line a baking sheet/dish with aluminum foil. Arrange the ribs, meat side down, on a baking sheet/dish. 
3. Cover the baking sheet/dish tightly with aluminum foil. Bake them for 1.5 hours (2 hours if you want to fall off the bones tenderness). Remove the foil cover.
4. For the mild version, you will end up with a lot of liquid after slow cooking the ribs. You can pour it out into a sauce pan, reduce it to a thicker sauce on the stove top, and use it to baste the ribs. 
5. Finish off under the broiler or on the grill until they are slightly charred and caramelized. 

If you have a favorite way to cook the baby back ribs, feel free to use it with these marinated ribs. 

You can bake the ribs up to a day before and keep them refrigerated. Bring refrigerated ribs to room temperature about 1 hour before you either broil or grill them.

Grilled spicy Korean back ribs

What to serve with the Korean ribs

For an easy side dish, I like to throw in some sliced zucchini and/or eggplants and some chili peppers to the baking sheet/dish during the final step of broiling or on the grill. You can also serve any Korean vegetable side dishes with these ribs, such as spicy cucumber salad and baby bok choy kimchi salad. Some fresh vegetables with ssamjang will be great as well.

See my 15 Korean vegetable side dishes for more. 

Korean BBQ pork ribs
 
Have you tried this Korean BBQ pork ribs recipe? Please rate the recipe below and leave a comment! Stay in touch by following me on YouTubePinterestTwitterFacebook, and Instagram. 
Korean BBQ pork ribs
Print

Korean BBQ Pork Ribs

Tender, moist, and flavorful Korean baby back ribs!
Course Main
Cuisine Asian, Korean
Keyword baby back ribs, bbq, Korean ribs, pork, pork ribs, spicy
Prep Time 20 minutes
Cook Time 2 hours
8 hours
Servings 4
Author Hyosun

Ingredients

For each marinade:

  • 2 slabs baby back ribs (5 to 7 pounds)

Sweet and Savory Marinade:

  • 1/2 cup soy sauce
  • 1/2 cup water
  • 1/4 cup rice wine (or mirin or white wine)
  • 2 tablespoons sesame oil
  • 4 tablespoons honey
  • 2 tablespoons brown sugar use regular sugar if unavailable
  • 3 tablespoons minced garlic (8 or 9 plump cloves) See note 1
  • 2 tablespoons finely grated ginger See note 1
  • 1/2 medium onion, grated See note 1
  • 1/2 medium sweet apple, grated See note 1
  • 1/2 teaspoon black pepper

Spicy Marinade:

  • 2/3 cup Korean red pepper paste (gochujang, 고추장)
  • 1 to 3 teaspoons Korean red chili pepper flakes (gochugaru, 고추가루)
  • 1/4 cup soy sauce
  • 1/4 cup rice wine (or mirin or white wine)
  • 2 tablespoons sesame oil
  • 4 tablespoons honey
  • 2 tablespoons brown sugar Use regular sugar if unavailable
  • 3 tablespoons minced garlic See note 1
  • 2 tablespoons grated ginger See note 1
  • 1/2 medium onion, grated See note 1
  • 1/2 medium sweet apple, grated See note 1
  • 1/2 teaspoon black pepper

Instructions

For the marinade

  • Prepare the ingredients for the marinade of your choice. Mix all of the ingredients well.
    Korean marinade for pork ribs

Preparing the ribs

  • Pull off the membrane if it's not been removed (see note 2). Cut each slab of the ribs into two pieces for easier handling. Rinse the ribs and drain. Coat the ribs well with the marinade, and marinate them for a minimum of eight hours (preferably 24 hours to 48 hours). Turn them over once after half of the marinating time has passed. (You can use large zip lock bags for easier handling.)
    Marinating back ribs in Korean marinade

Cooking the ribs

  • Preheat the oven to 325°F (300°F if using a convection oven). Line a baking sheet with aluminum foil. I used 2 baking dishes. Arrange the ribs, meat side down. If using the mild marinade, pour some marinade into the baking sheet or dish. Cover the baking sheet/dish tightly with aluminum foil. Bake them for 1.5 hour (2 hours if you want fall off the bones tenderness). Remove the foil cover.
    Korean pork ribs BBQ
  • If used the mild marinade, you will have a lot of liquid in the baking sheet/dish. Pour it out into a sauce pan along with any reserved marinade, and bring the liquid to a boil and reduce by about half or until it turns into a thick consistency. You don't need to do this with the spicy marinade as it doesn't have as much liquid. Brush the sauce onto the ribs.

Finishing the ribs

  • Option 1: Change the oven setting to broil (500°F) and preheat for a few minutes. Then broil the ribs until the ribs are lightly caramelized and charred, about 5 minutes on each side. Baste the ribs with the sauce a couple of times while broiling.
    Korean BBQ pork ribs
  • Option 2: Preheat the grill and grill the ribs over medium heat until the ribs are lightly caramelized and charred, about 5 minutes on each side. Baste the ribs with the sauce while grilling.
    Korean spicy BBQ pork ribs

Notes

1. For convenience, you can blend garlic, ginger, apple and onion in a blender. 
2. To remove the membrane, insert a paring knife under the membrane to carefully loosen it, then slowly pull it by hand away from the bones.

This recipe was originally posted in July 2011. Here, I have updated it with new photos, more information and improvements to the recipe.

The post Korean BBQ Pork Ribs appeared first on Korean Bapsang.

Viewing all 1019 articles
Browse latest View live


Latest Images